
Mobile App Center
The Mobile App Center is a hub for building, configuring, and managing mobile apps in ThingsBoard. Whether you are starting from scratch or publishing the ThingsBoard Mobile Application to Google Play or the App Store, this tool guides you through every step.
The Mobile App Center is divided into tabs:
- Bundle — manage settings for mobile applications included in the bundle: authentication methods, layout.
- Applications — add, edit, or remove mobile applications.
- QR code widget — set up a QR code widget on the Home page for easy mobile app access.
Bundle
Section titled “Bundle”A Bundle groups OAuth 2.0 settings, layout design for one or more mobile apps — letting you manage Android and iOS versions in one place.
The bundle wizard includes the following steps:
- Basic settings — define the bundle name and link your apps. You can also create a new app directly.
- OAuth 2.0 — enable Single Sign-On (SSO) via third-party identity providers that support OAuth 2.0.
- Layout — customize the app’s navigation menu to match your use cases.
Adding a New Bundle
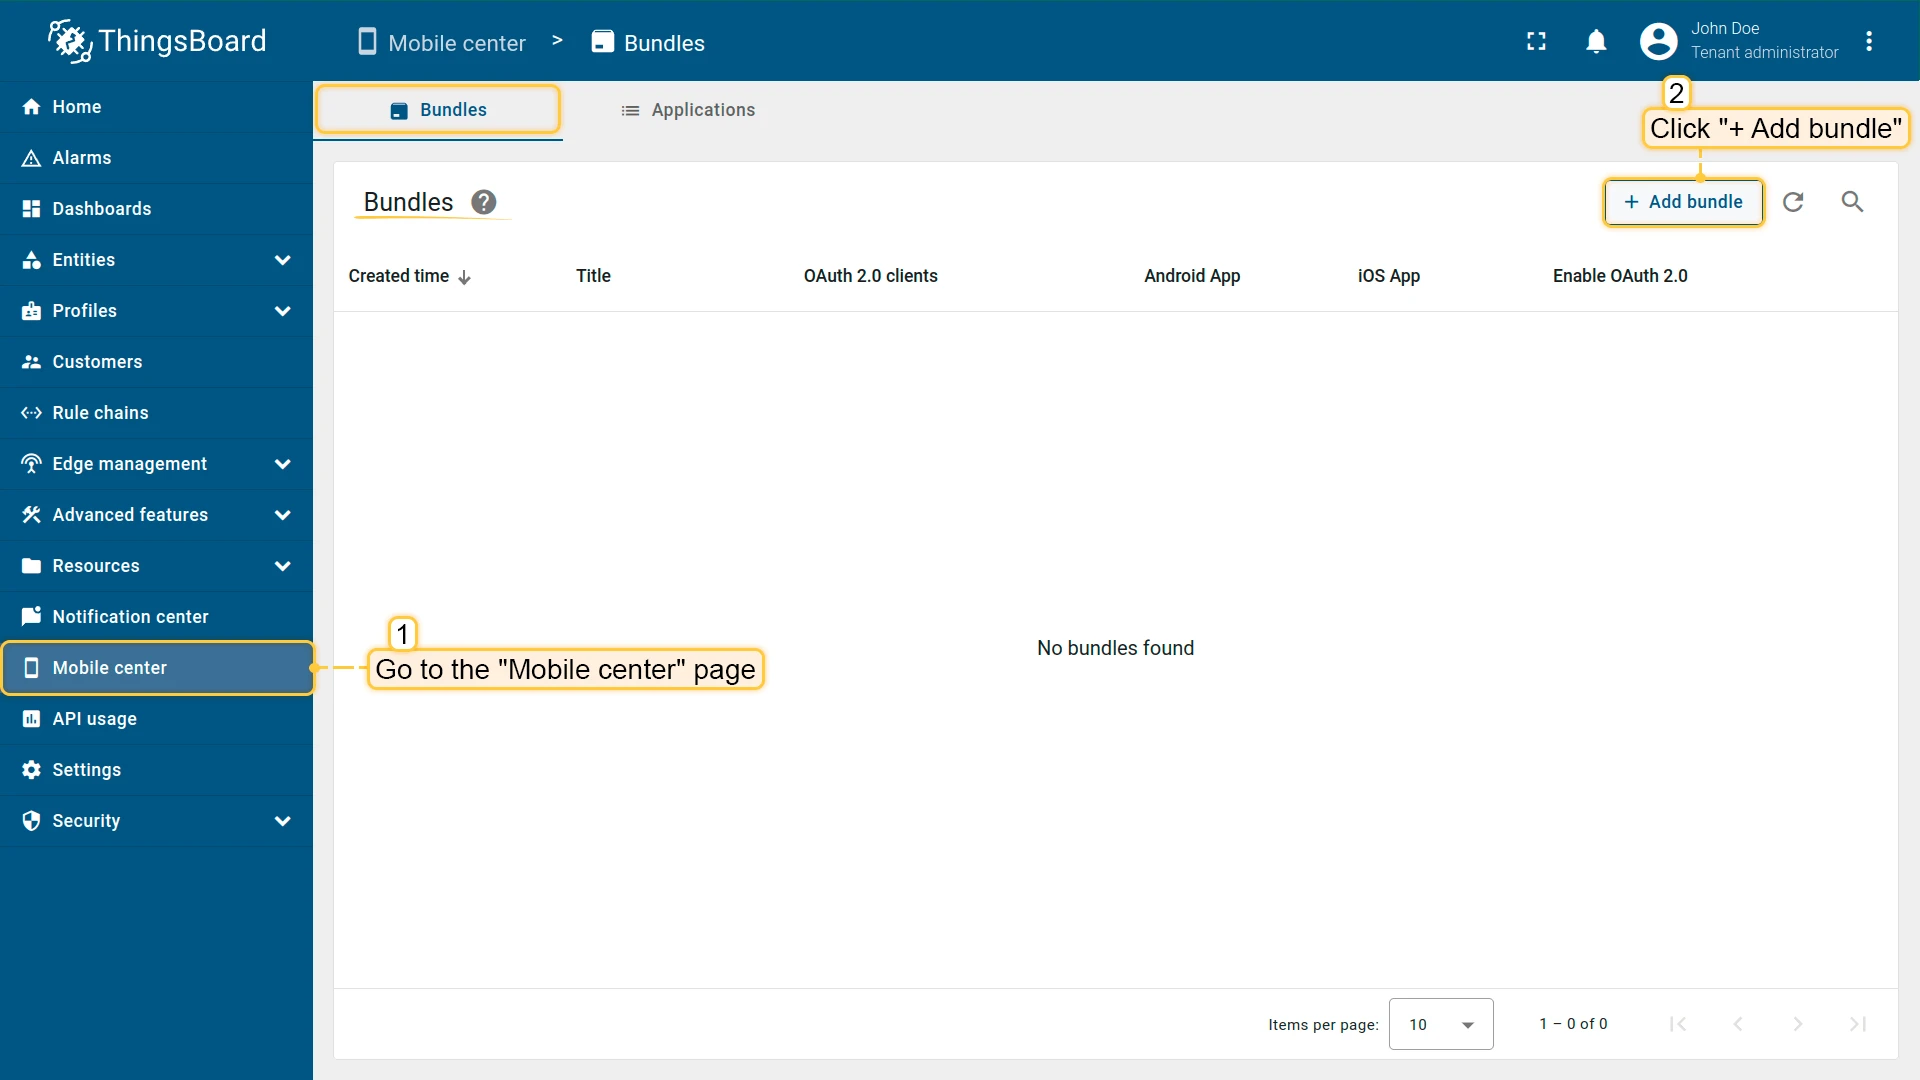
Section titled “Adding a New Bundle”- Go to the Mobile center page.
- On the Bundle tab, click + Add bundle in the upper-right corner.
The bundle configuration wizard opens.
Basic Settings
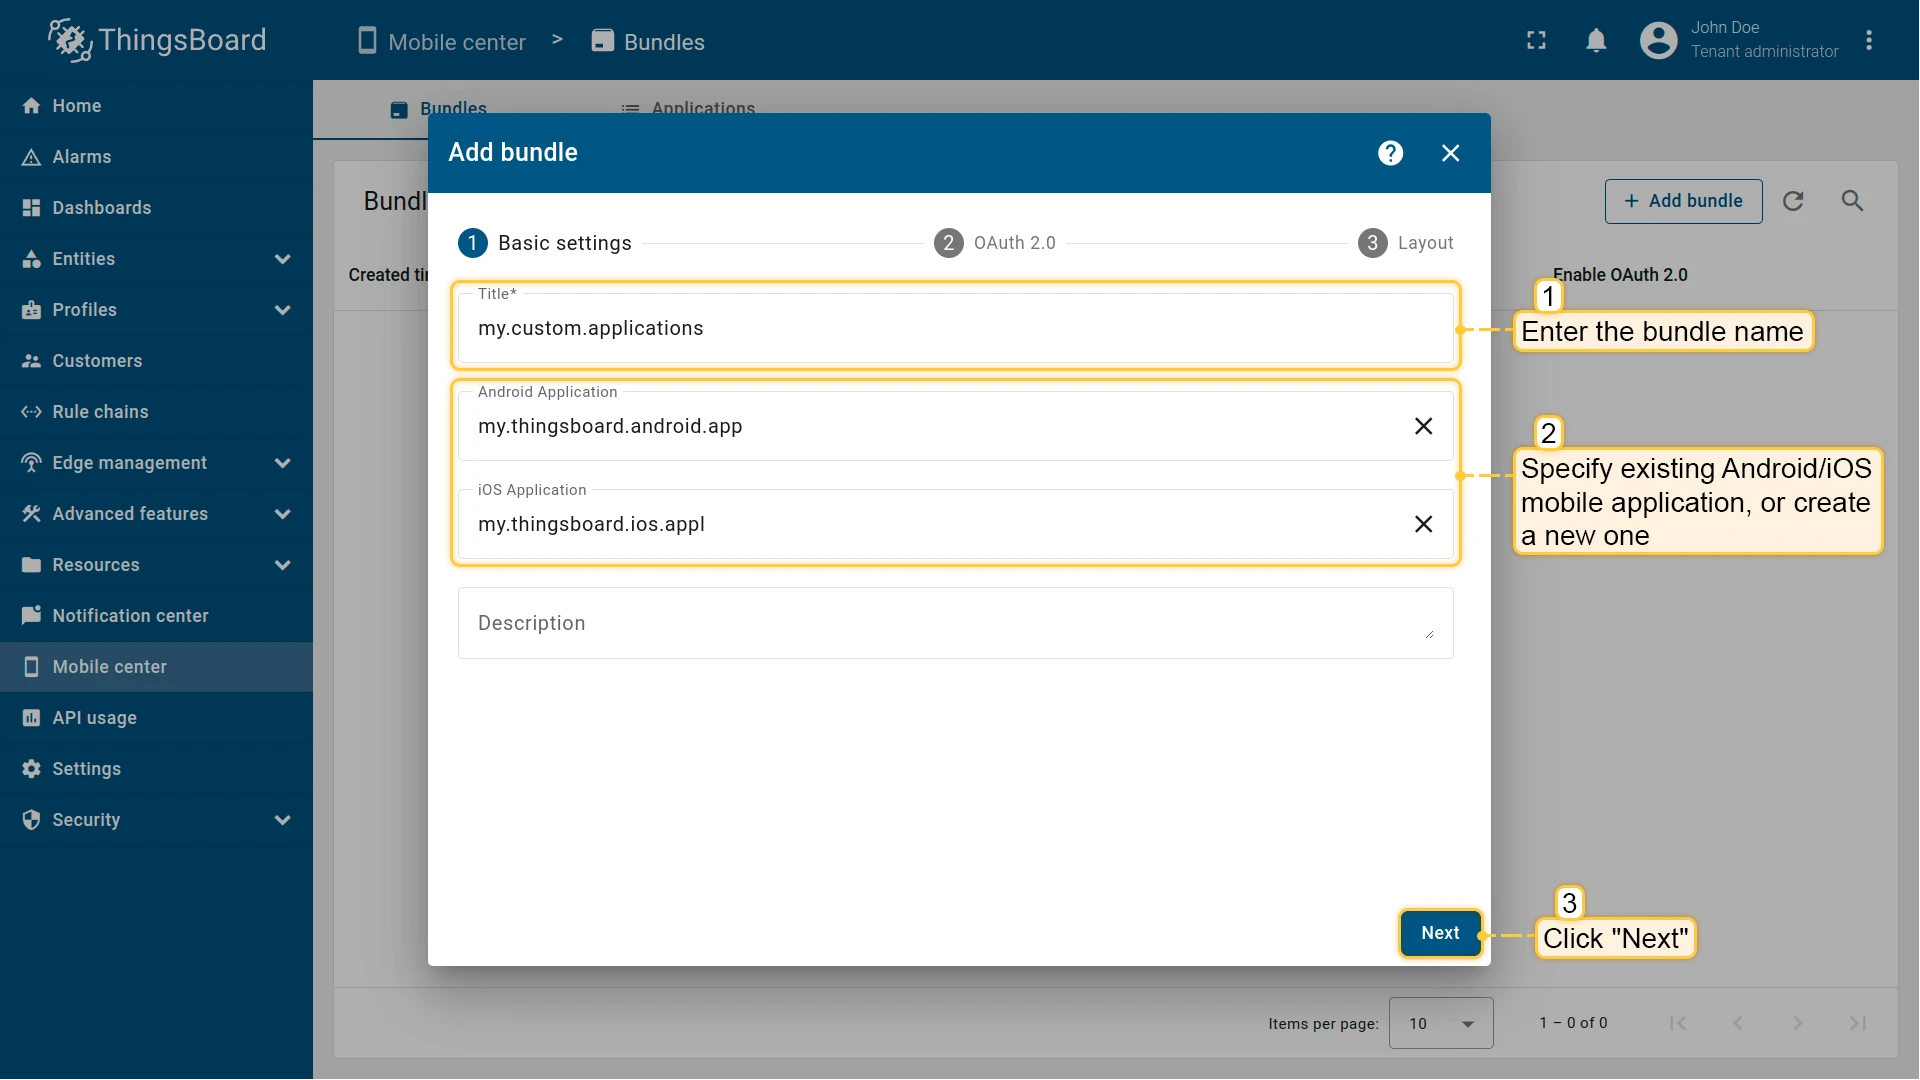
Section titled “Basic Settings”Enter a name for the bundle and select existing Android or iOS apps, or create new ones directly from this window.
Creating an Application
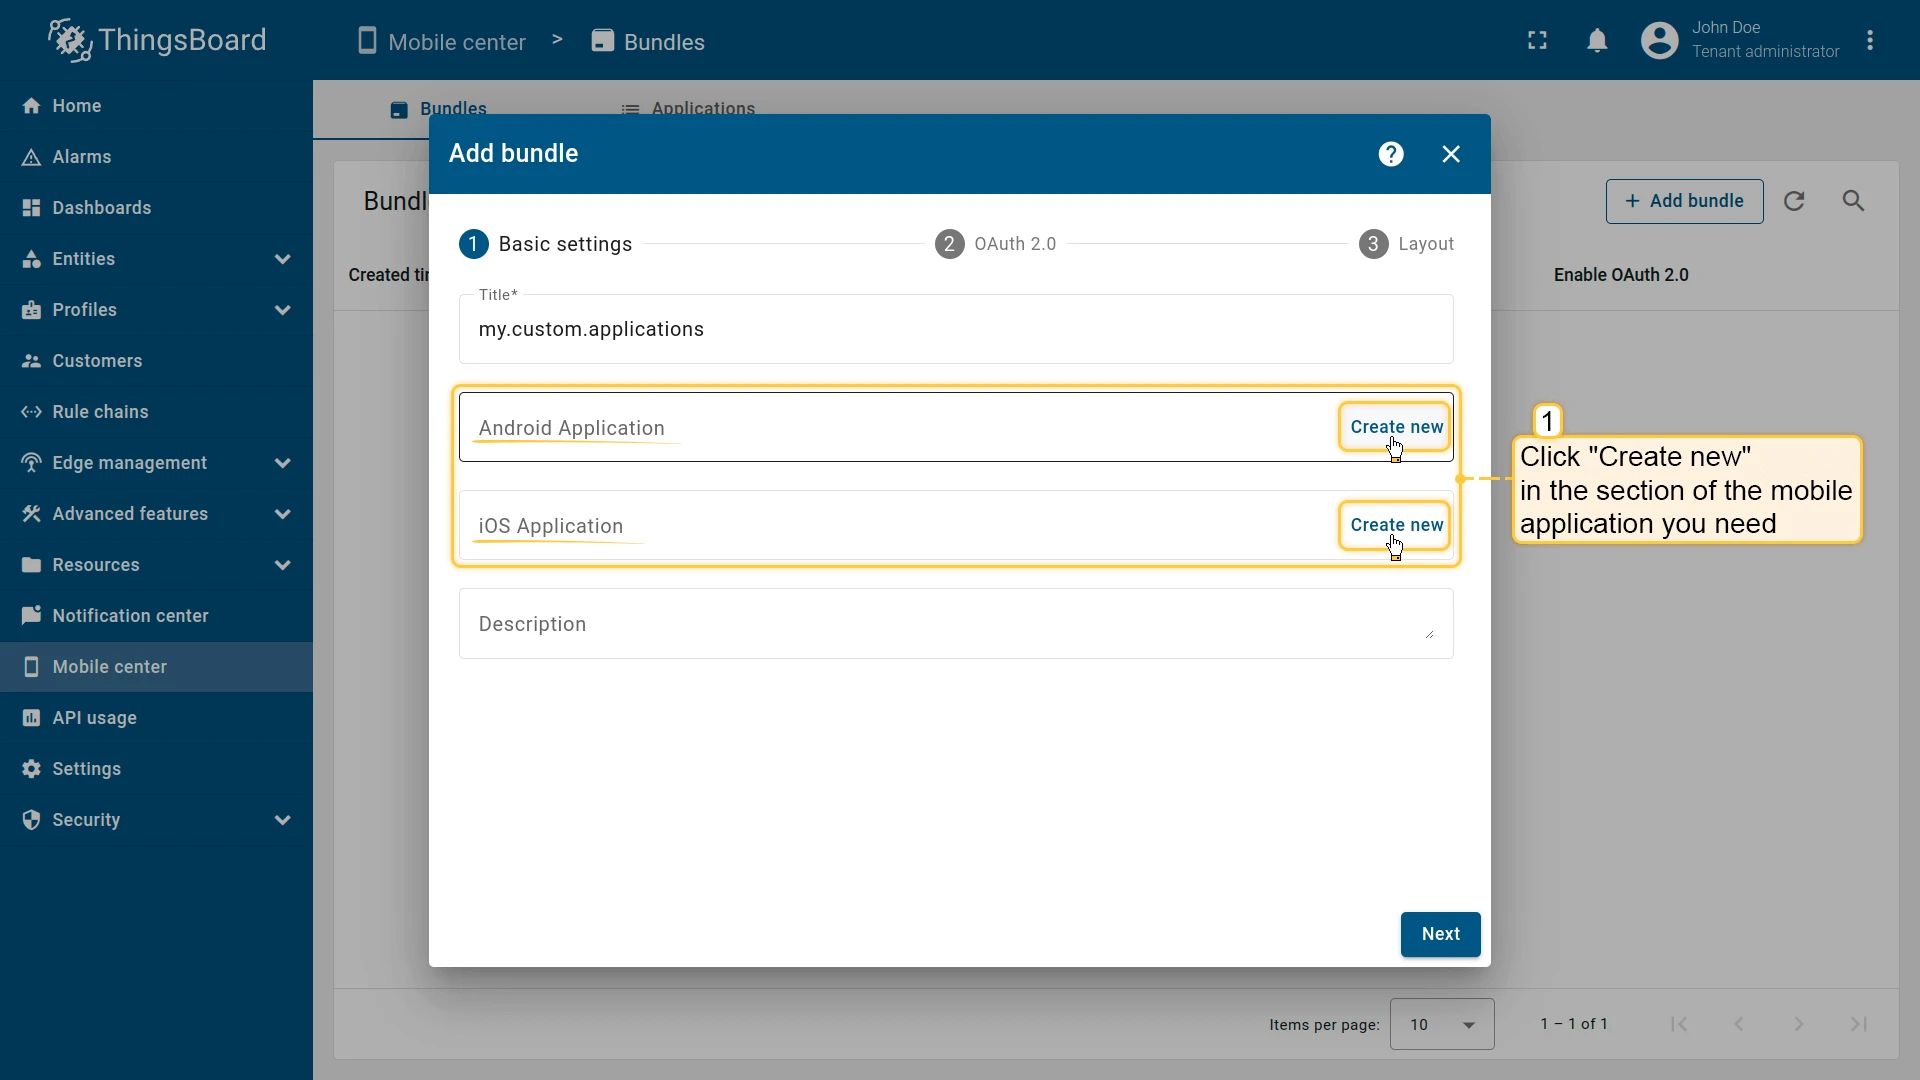
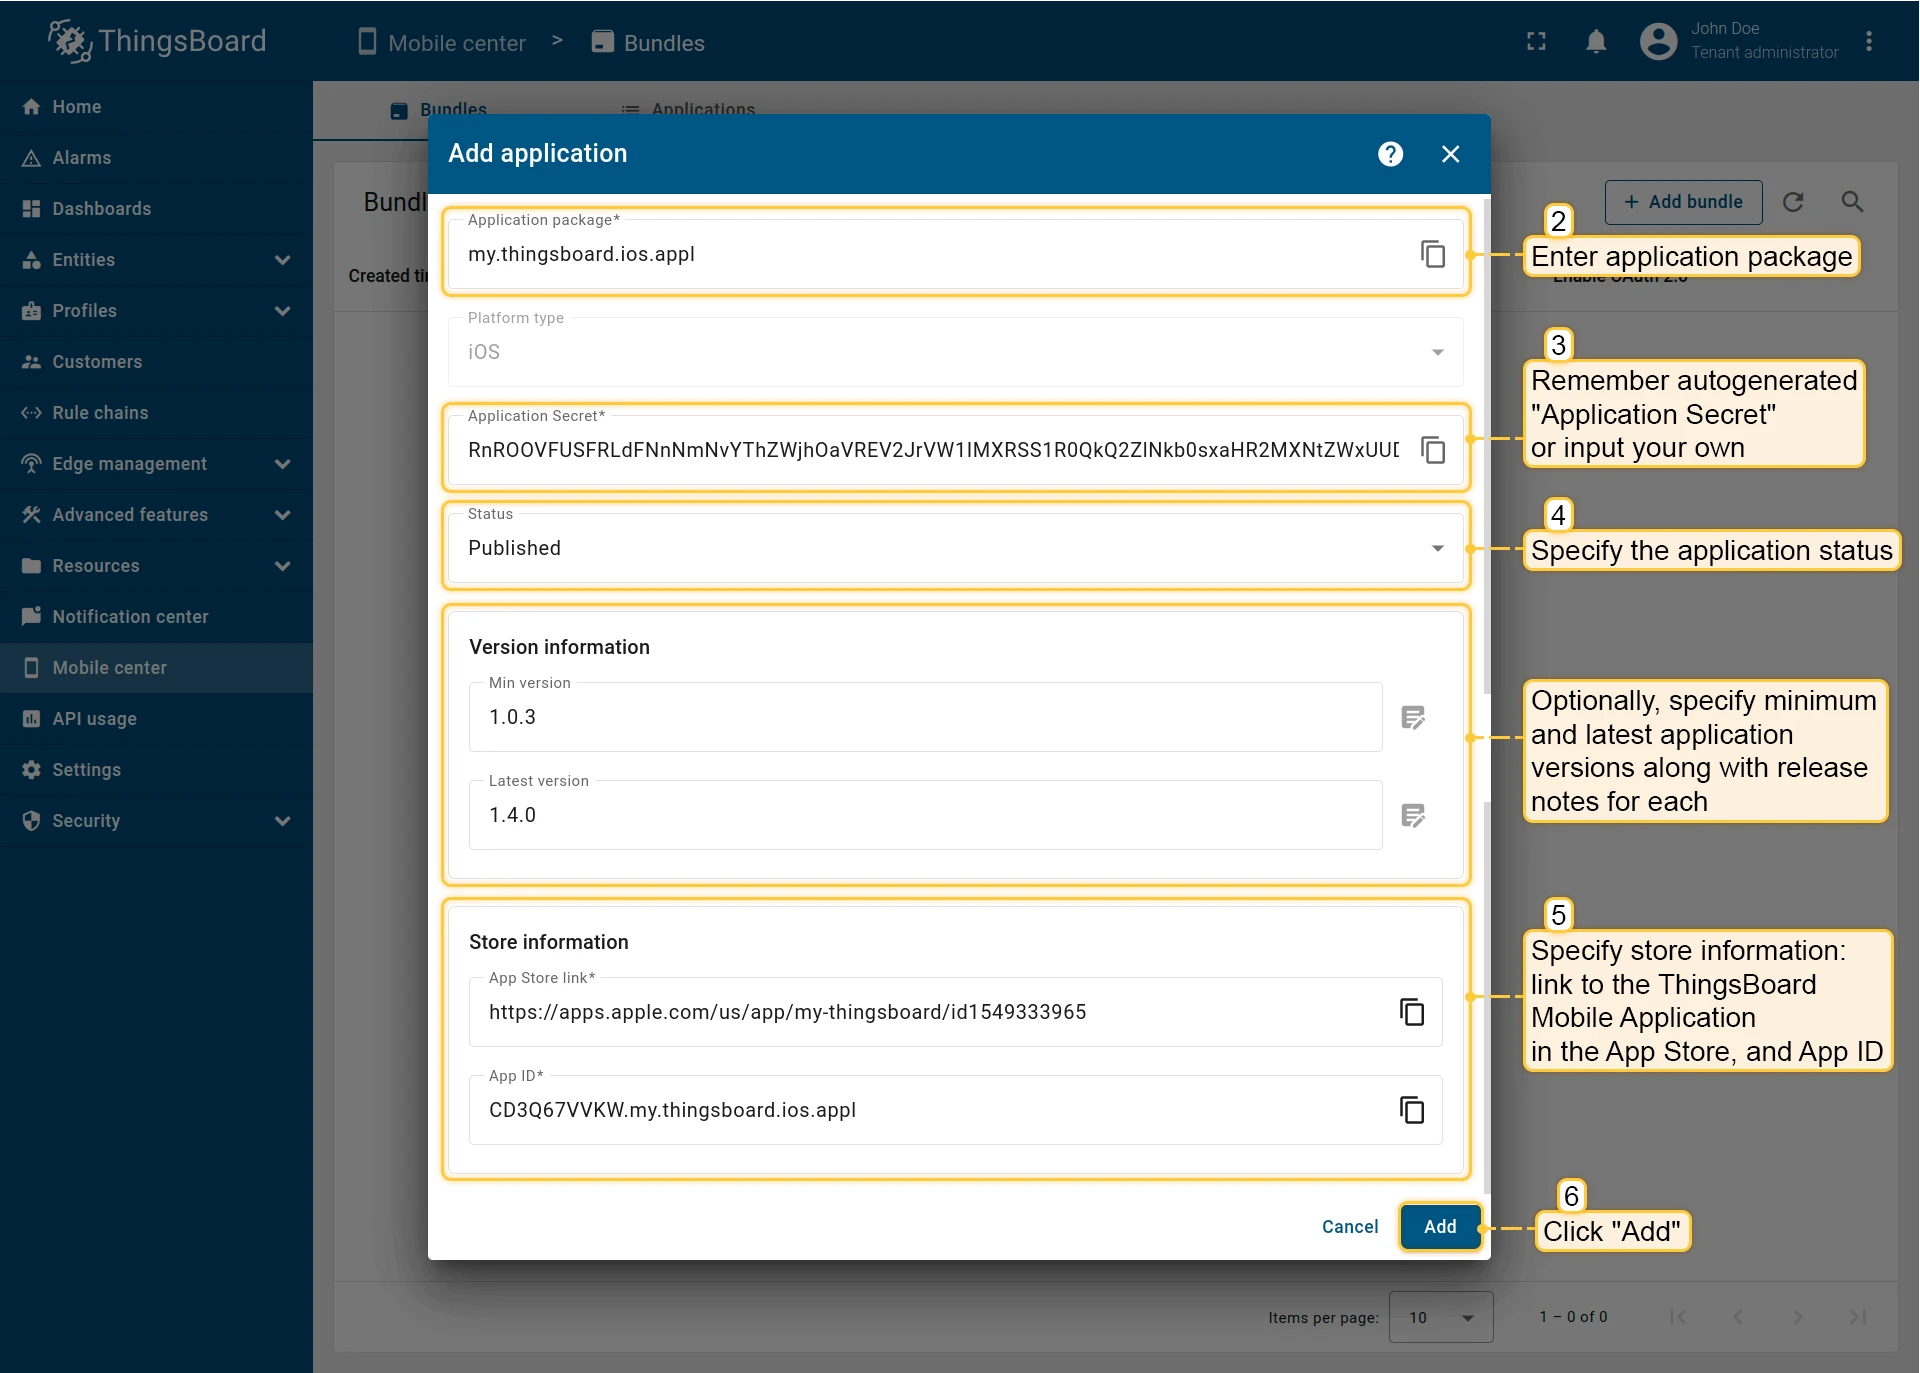
Section titled “Creating an Application”- Click Create new in the corresponding section (Android Application or iOS Application).
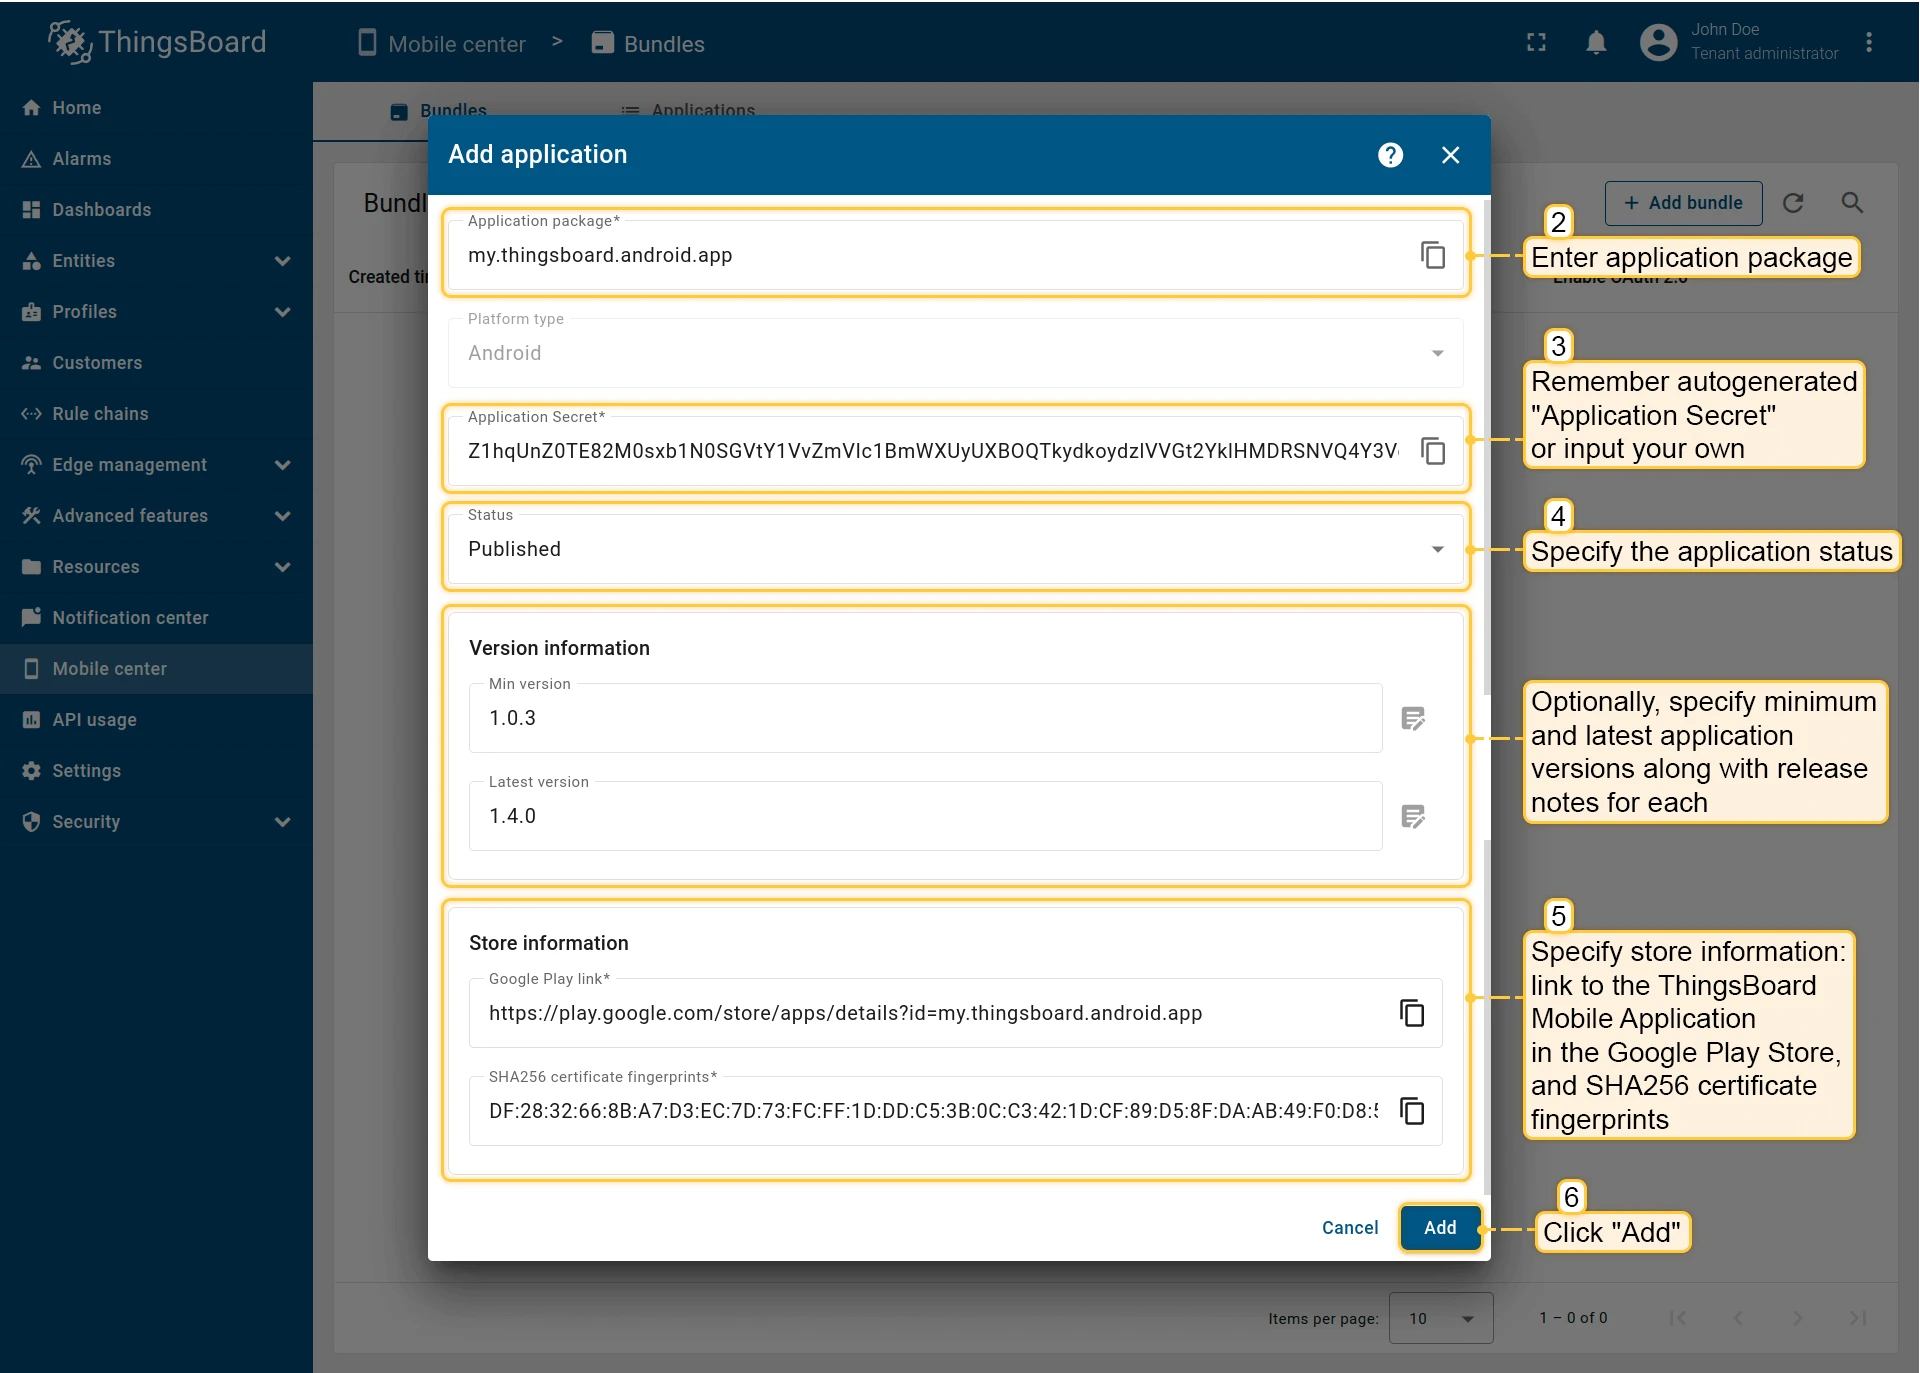
- Enter the application package name.
- An Application Secret is generated automatically — copy and store it, or replace it with your own value.
- Set the application status:
- Draft — for applications still in development. Store information can be added later.
- Published — for applications ready to be launched and used by end users.
- Deprecated — for older applications that are no longer actively supported but still available.
- Suspended — for applications that are temporarily disabled or restricted.
- (Optional) Specify minimum/latest app versions and release notes.
- Add store information:
- Android: Google Play Store link and SHA256 certificate fingerprints.
- iOS: App Store link and App ID.
- Click Add to save the application.
Click Next.
OAuth 2.0
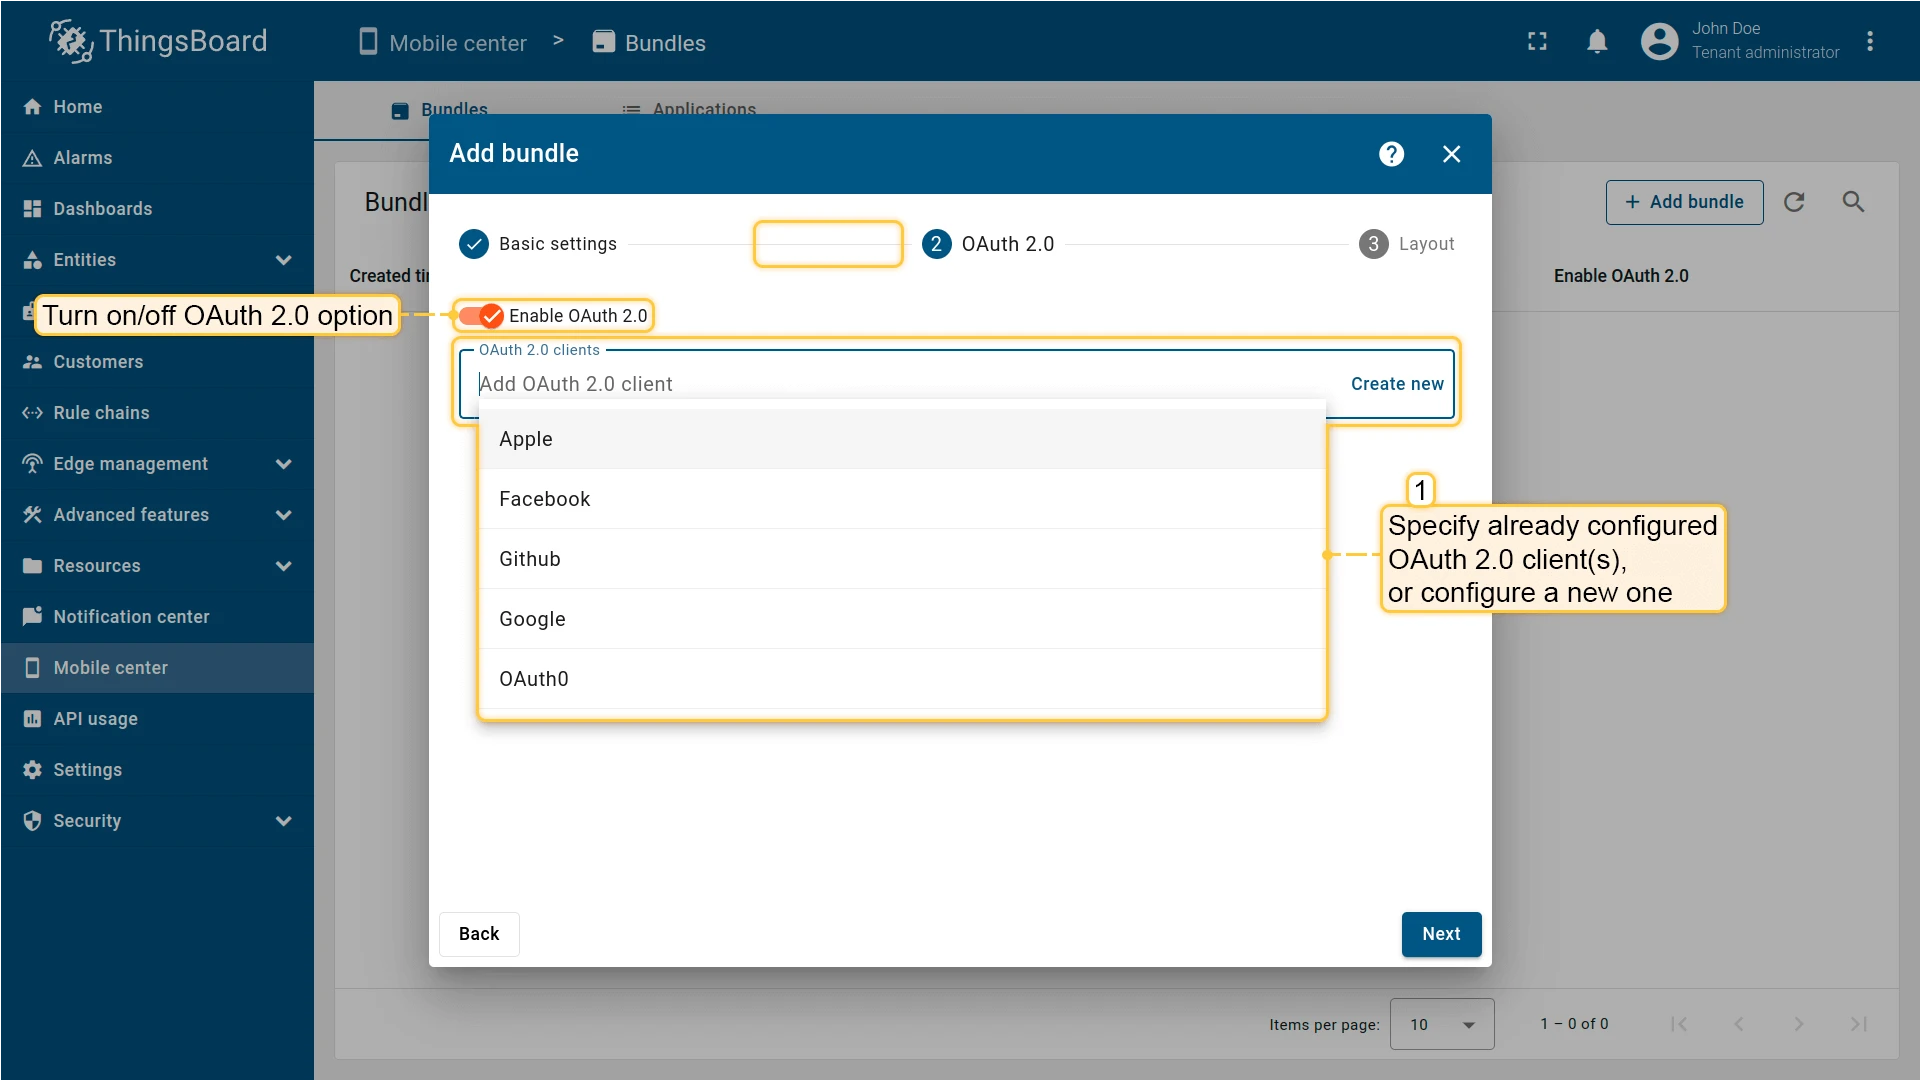
Section titled “OAuth 2.0”Enable authentication through an external provider that supports the OAuth 2.0 protocol. Select an existing OAuth 2.0 client or configure a new one.
You can also disable OAuth 2.0 for mobile devices.
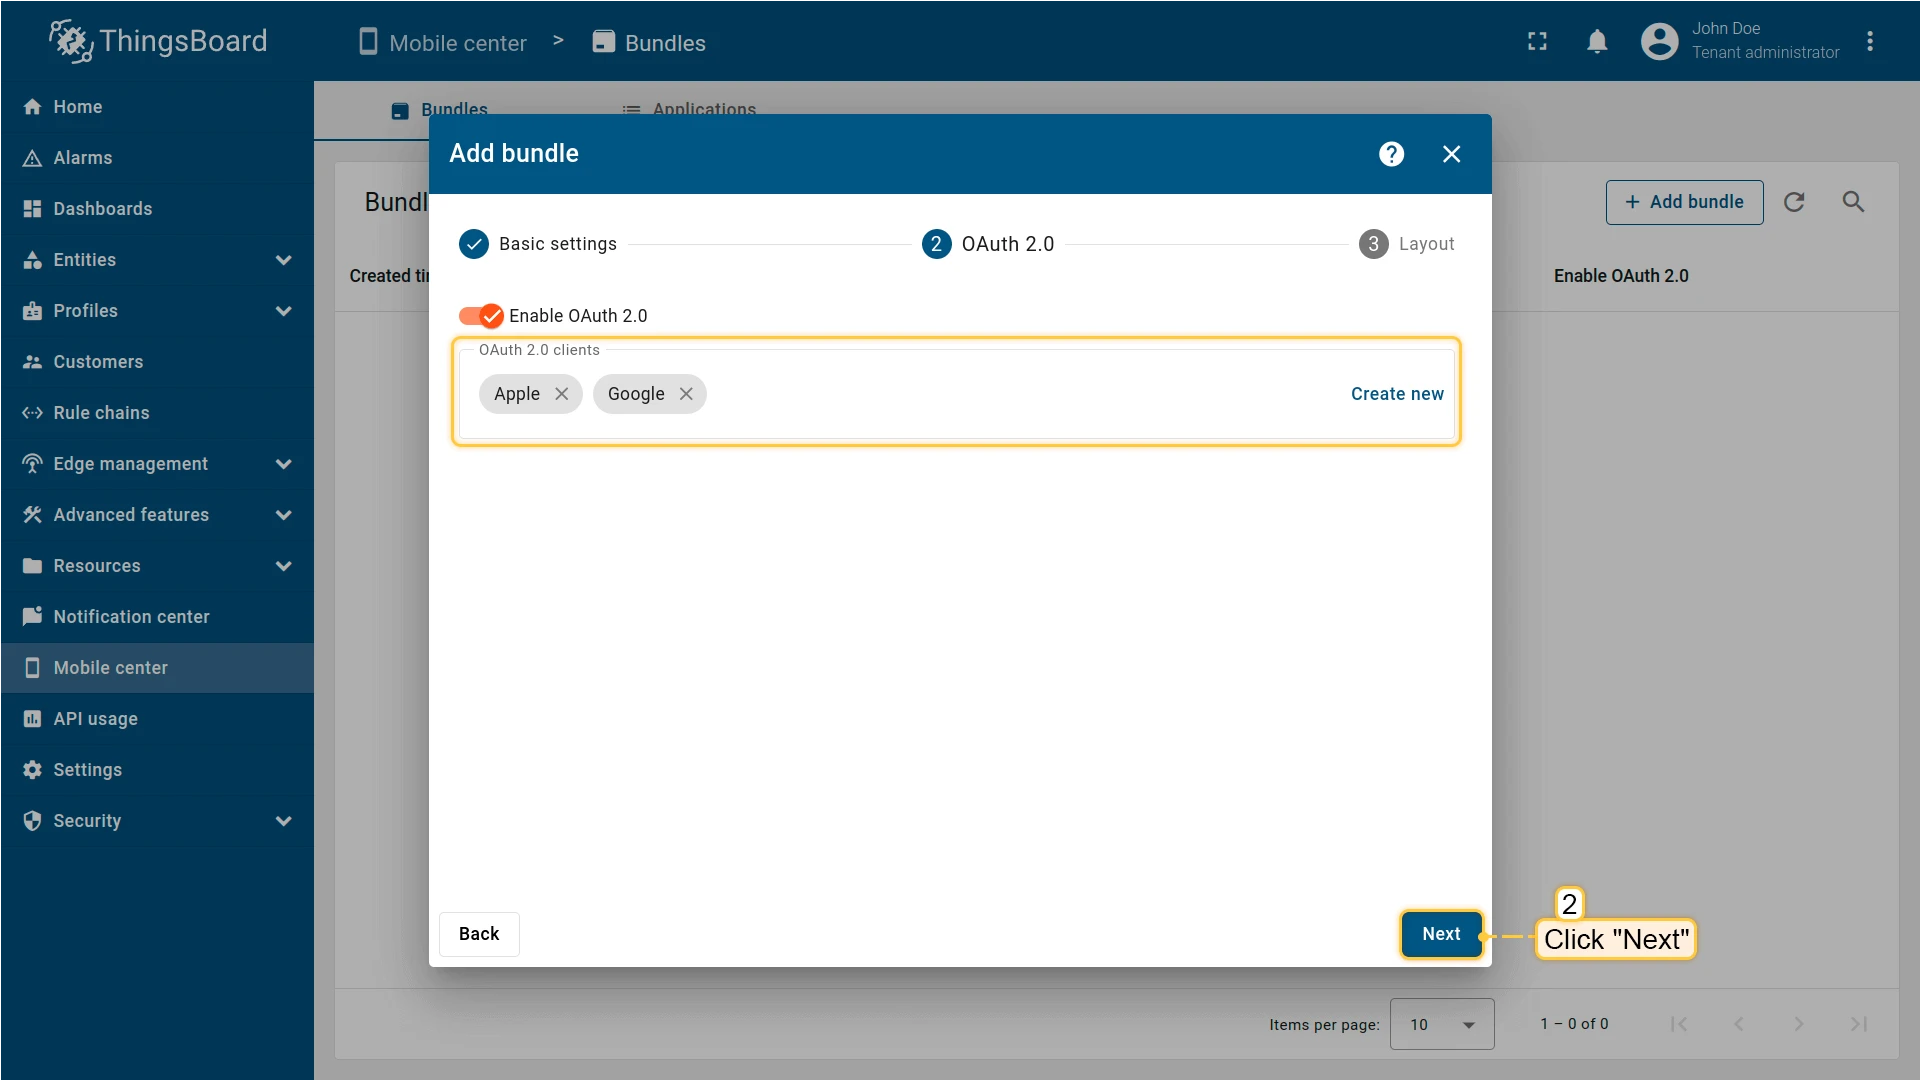
After completing the OAuth 2.0 configuration, click Next.
Layout
Section titled “Layout”Set up quick access to the dashboards and features you use most. Add menu items, change icons and names, and reorder the navigation menu.
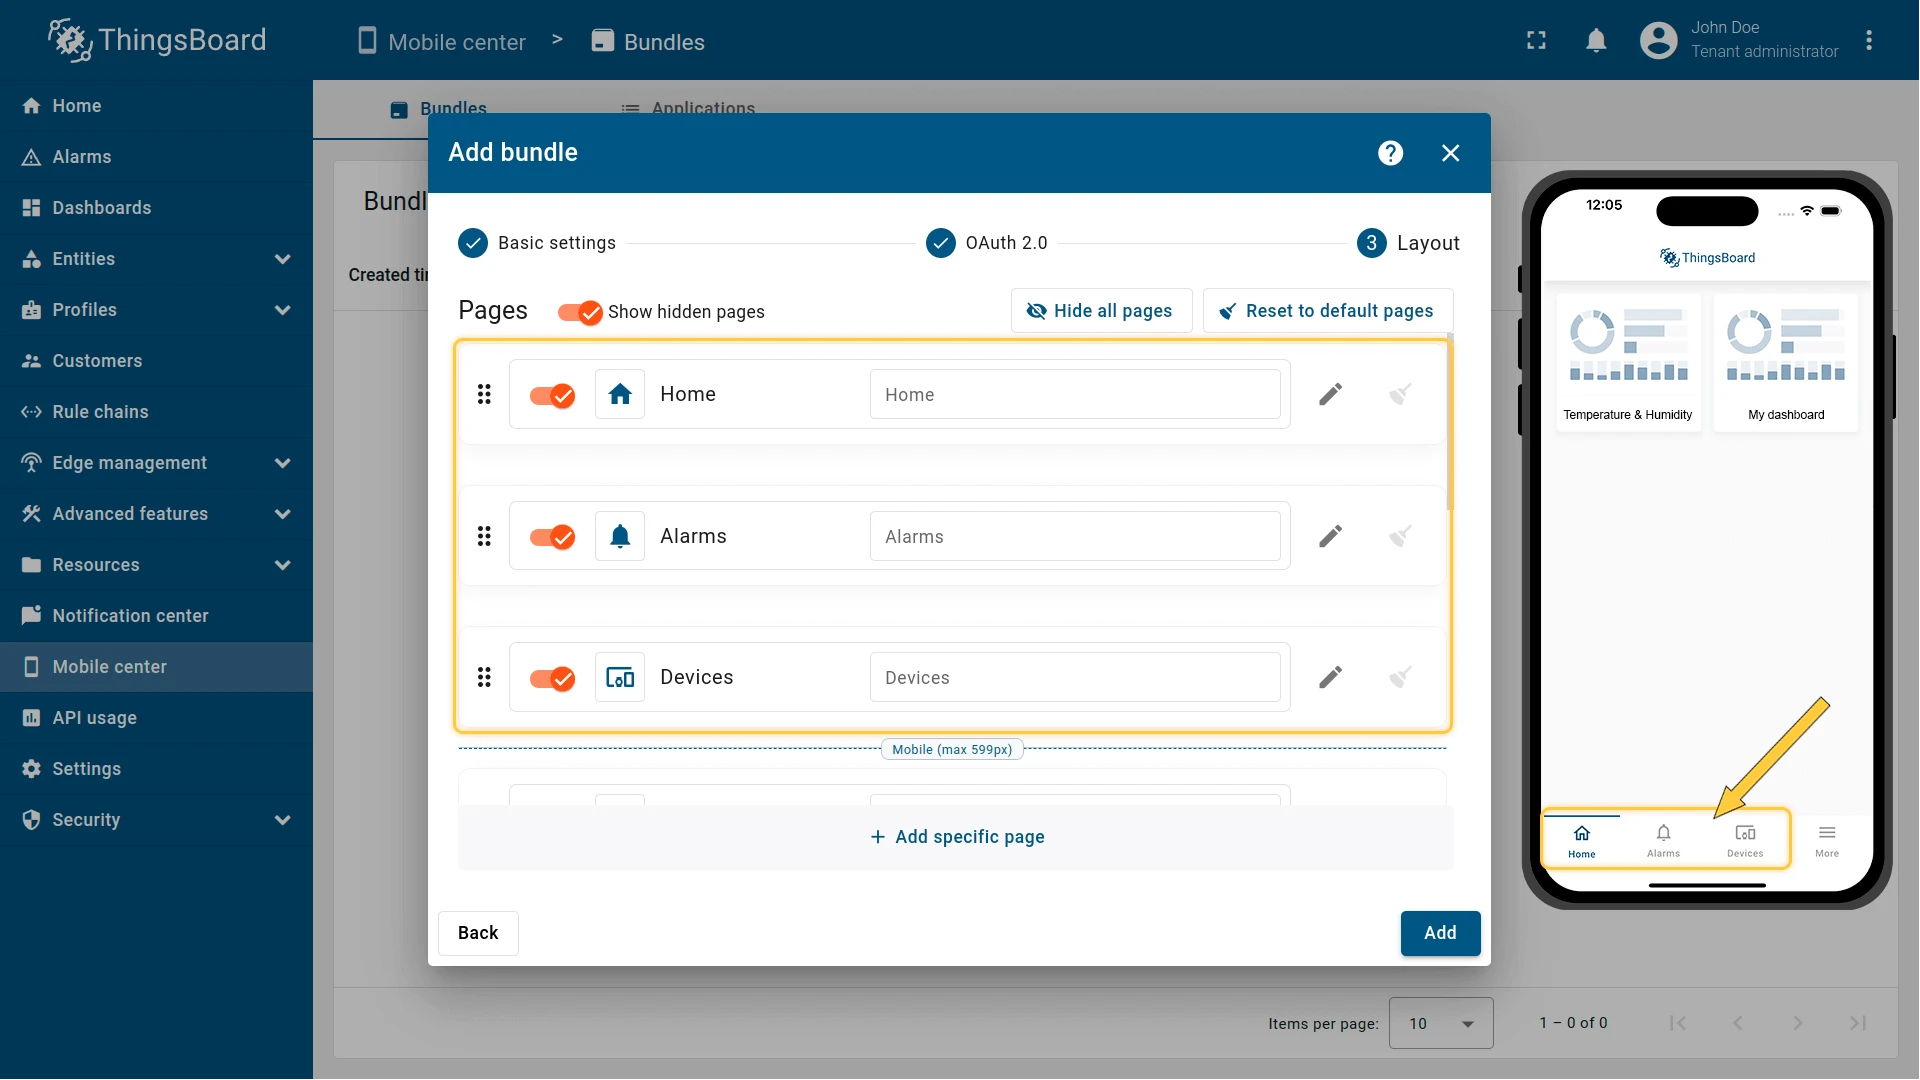
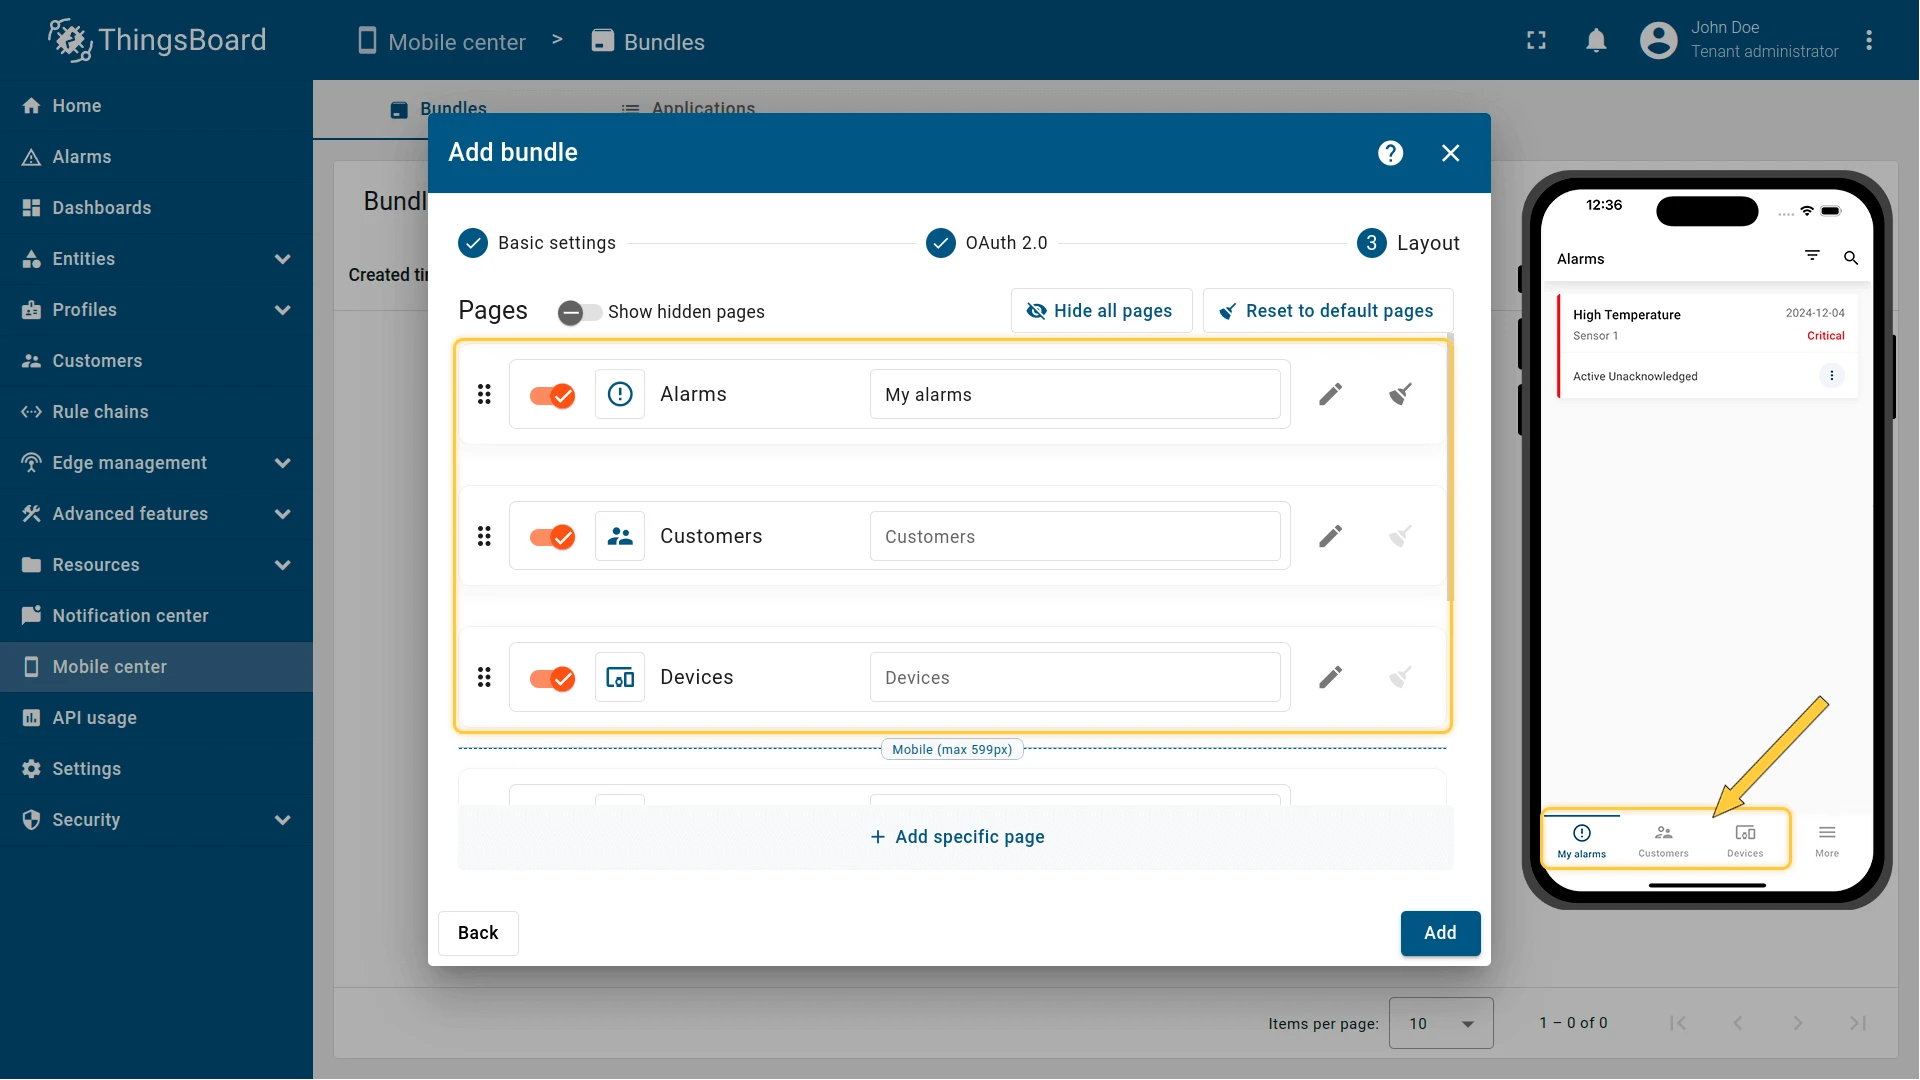
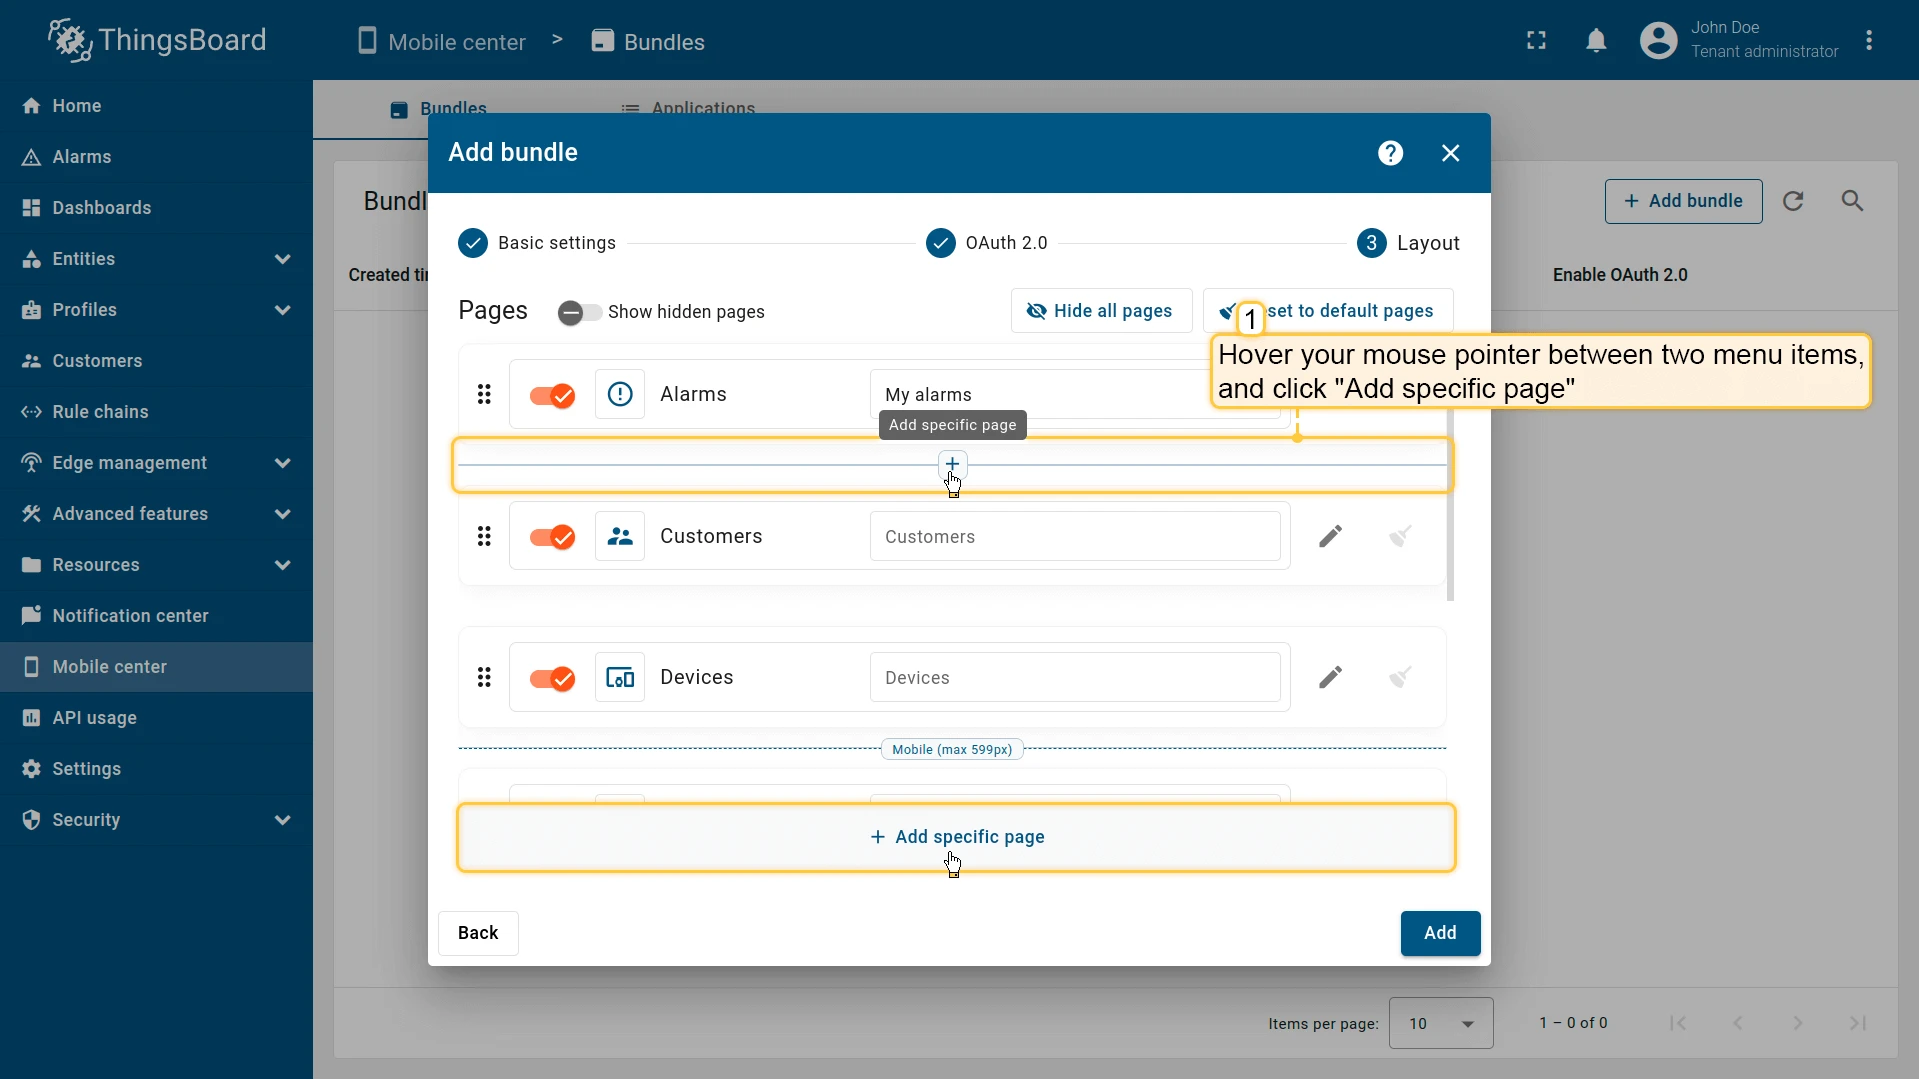
To add a new menu item:
- Click + Add specific page at the bottom of the page or between existing menu items.
- Enter the name for the new menu page.
- Select the page type:
- Dashboard — link to a ThingsBoard dashboard.
- Webview — link to an external webpage.
- Custom — link to built-in ThingsBoard pages.
- Depending on the selected page type, specify a dashboard, external URL, or ThingsBoard menu item.
- Click Add.
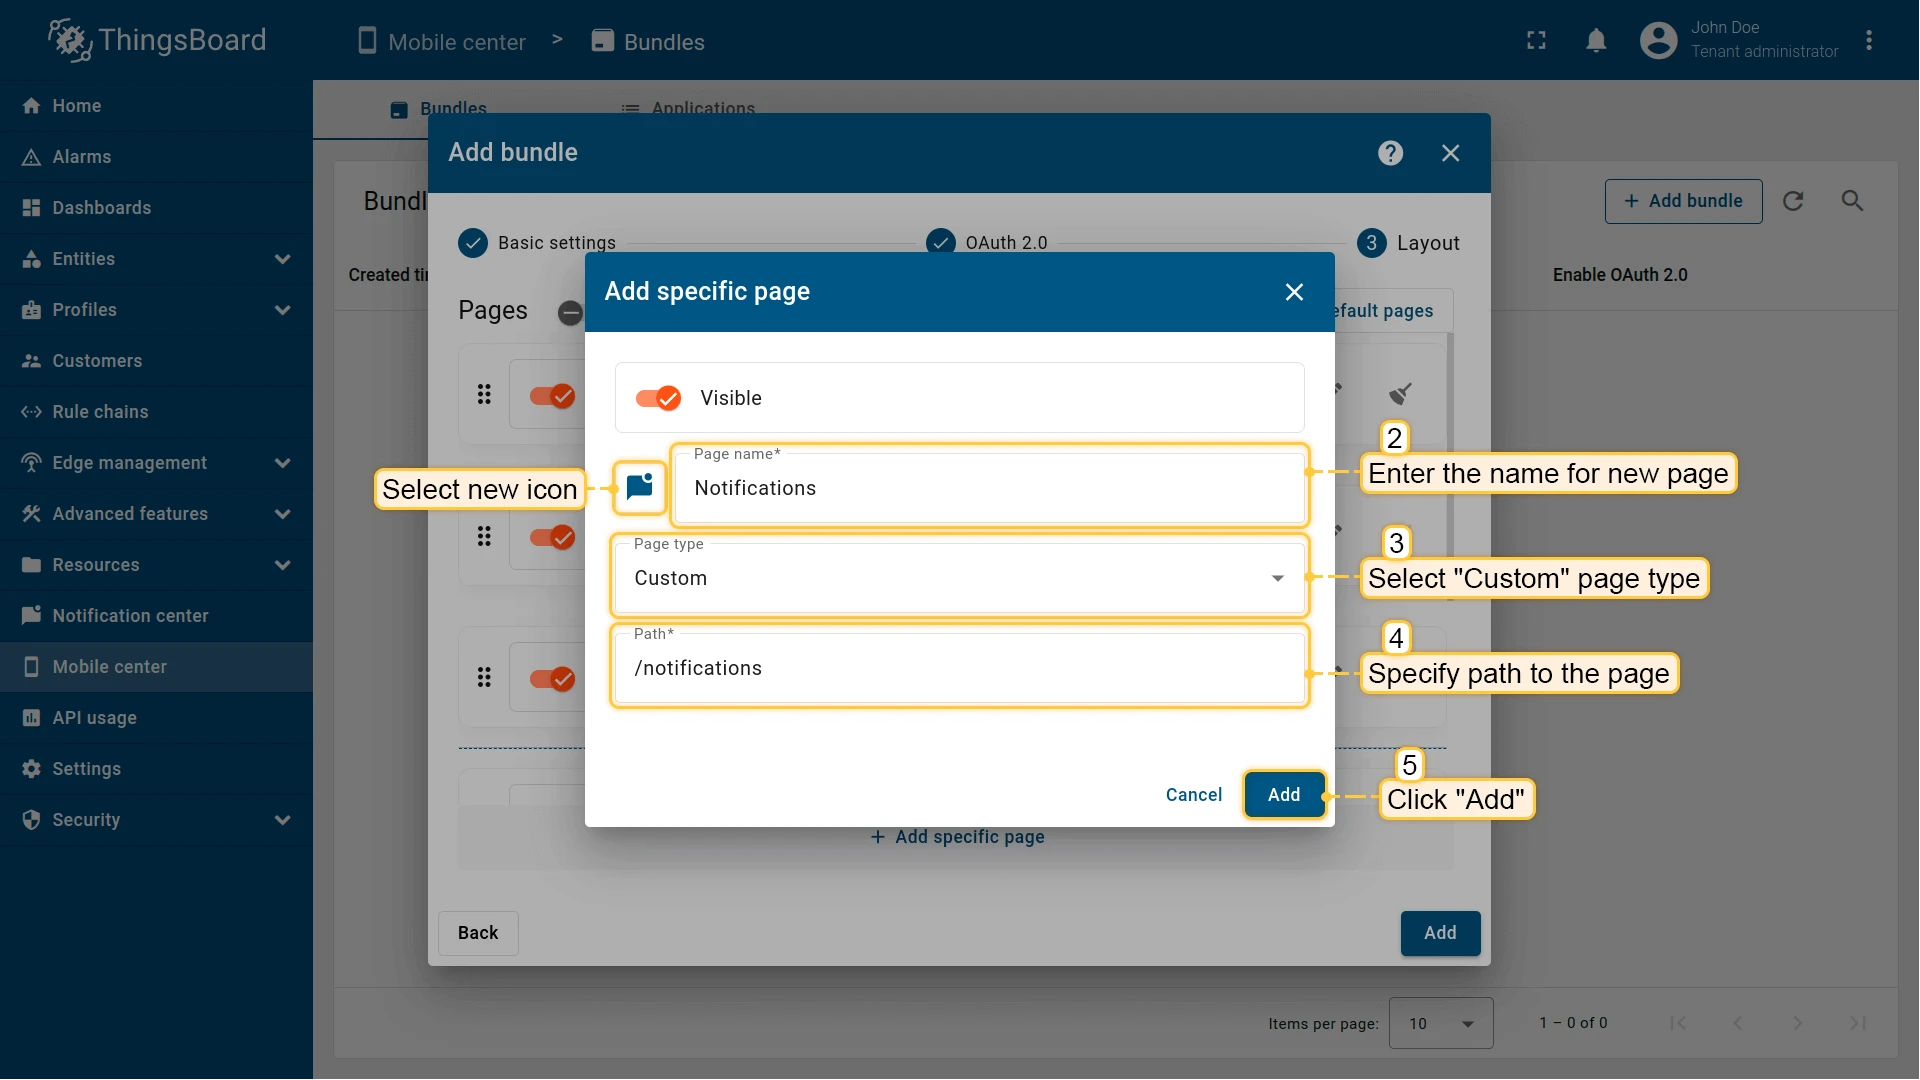
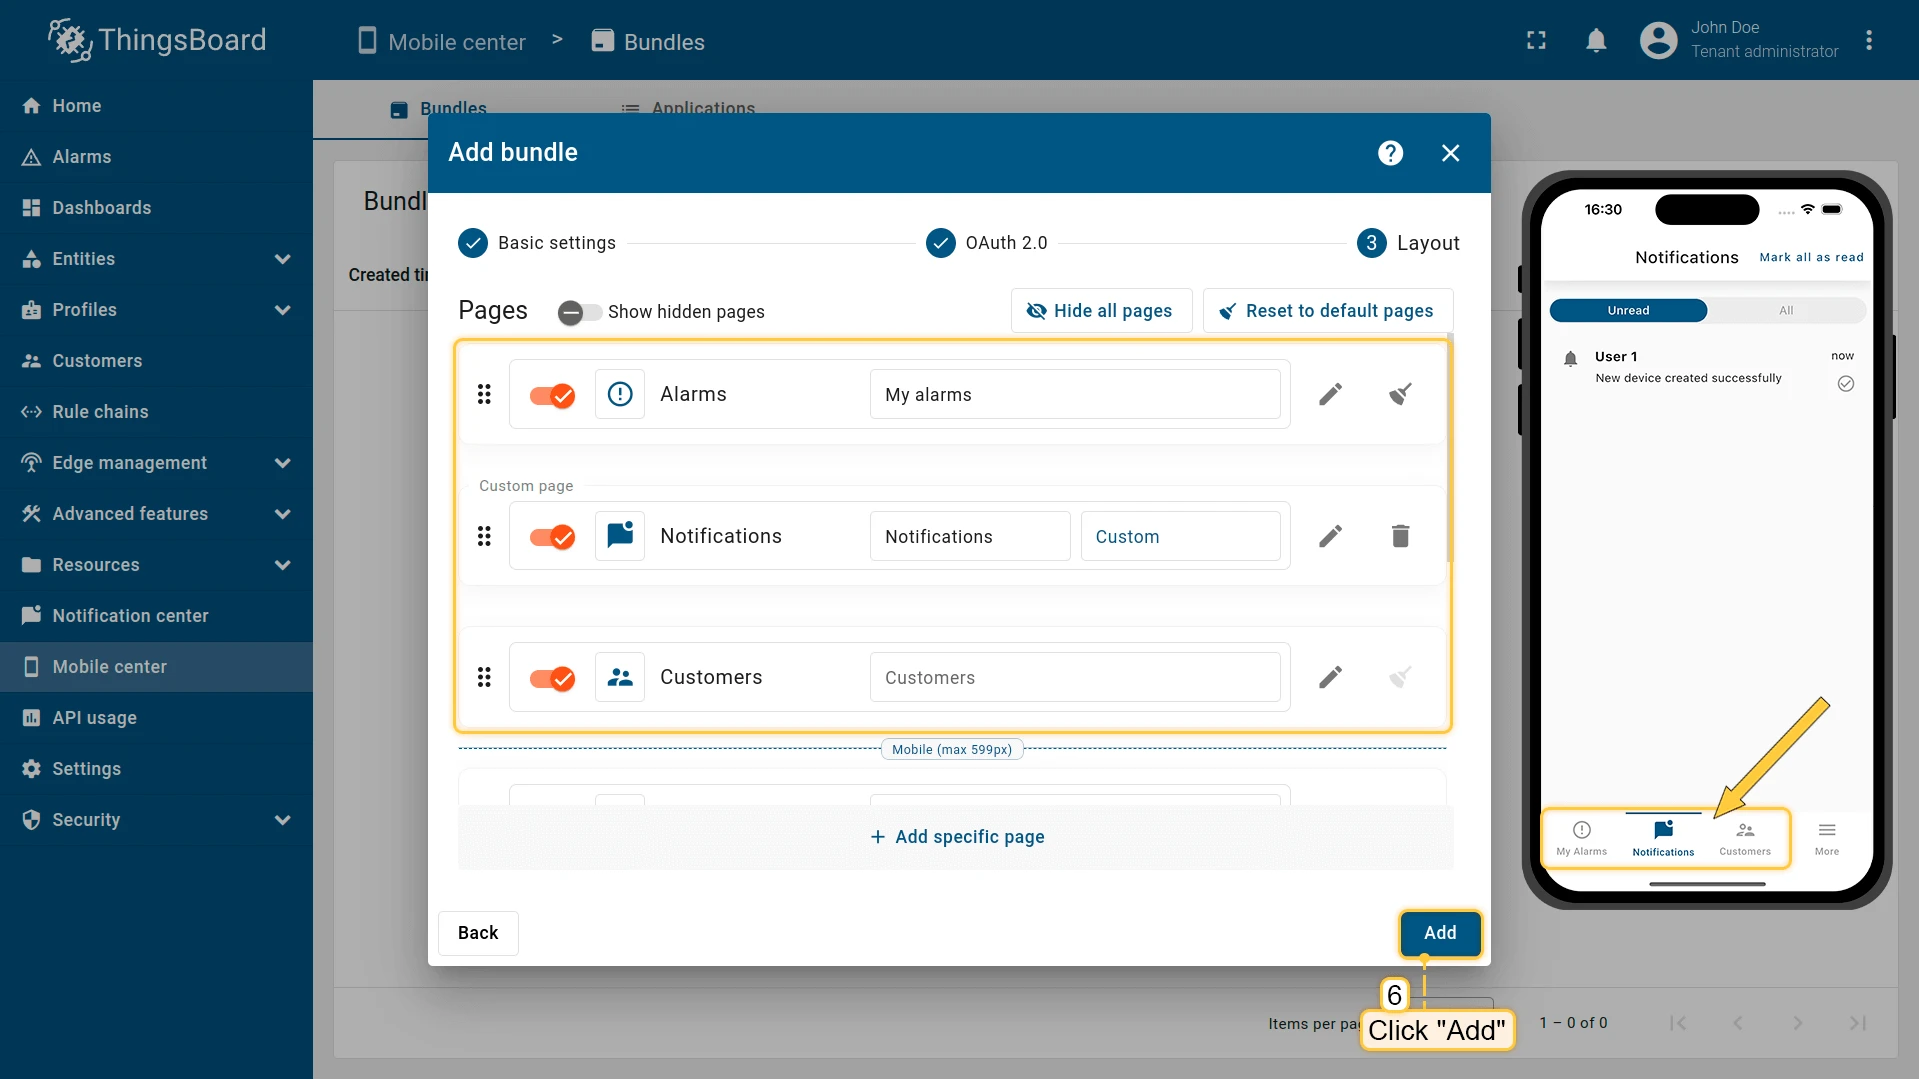
The following routes are available for the Custom page type:
| Page name | Route | Description |
|---|---|---|
| Home | /home | Displays the Home page |
| Assets | /assets | Displays the Assets page |
| Device profiles | /devices | Displays the Device profiles page |
| All devices | /deviceList | Displays the list of all devices |
| Alarms | /alarms | Displays the list of alarms |
| Dashboards | /dashboards | Displays the list of dashboards |
| Specific dashboard | /dashboard/:id | Displays the specified dashboard |
| Audit logs | /auditLogs | Displays the Audit logs page |
| Customers | /customers | Displays the list of customers |
| Specific customer | /customer/:id | Displays the specified customer |
| Notifications | /notifications | Displays the list of notifications |
| Custom URL link | /url/:link | Displays an external URL |
The “More” Page
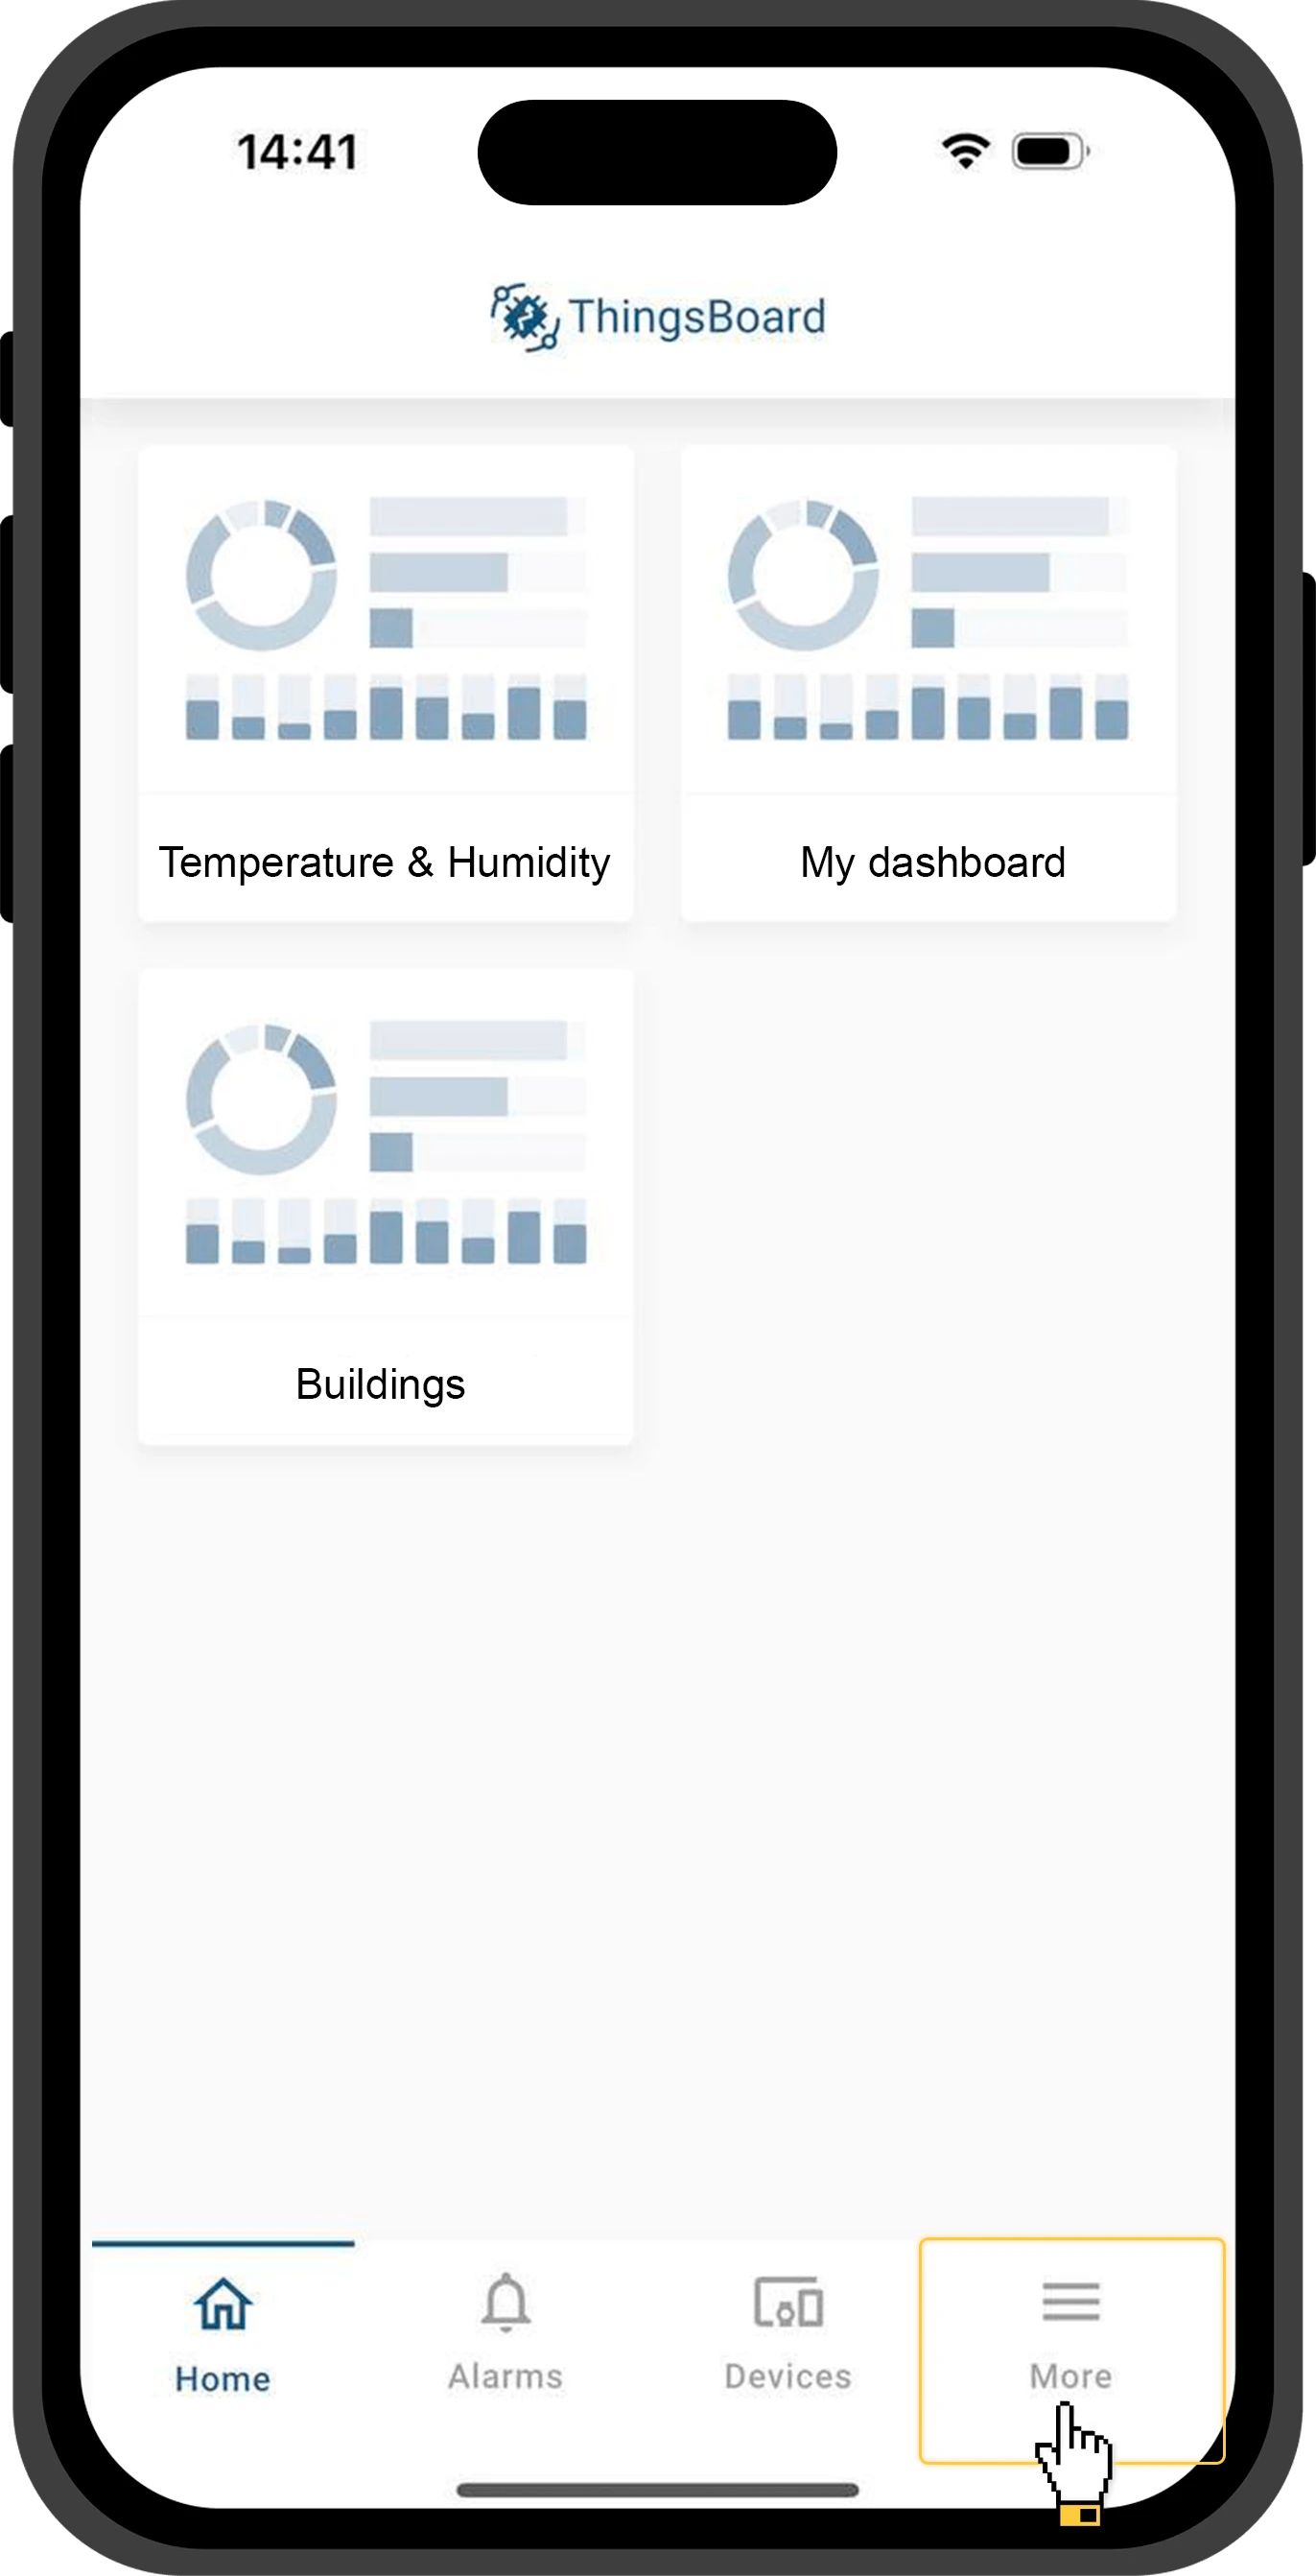
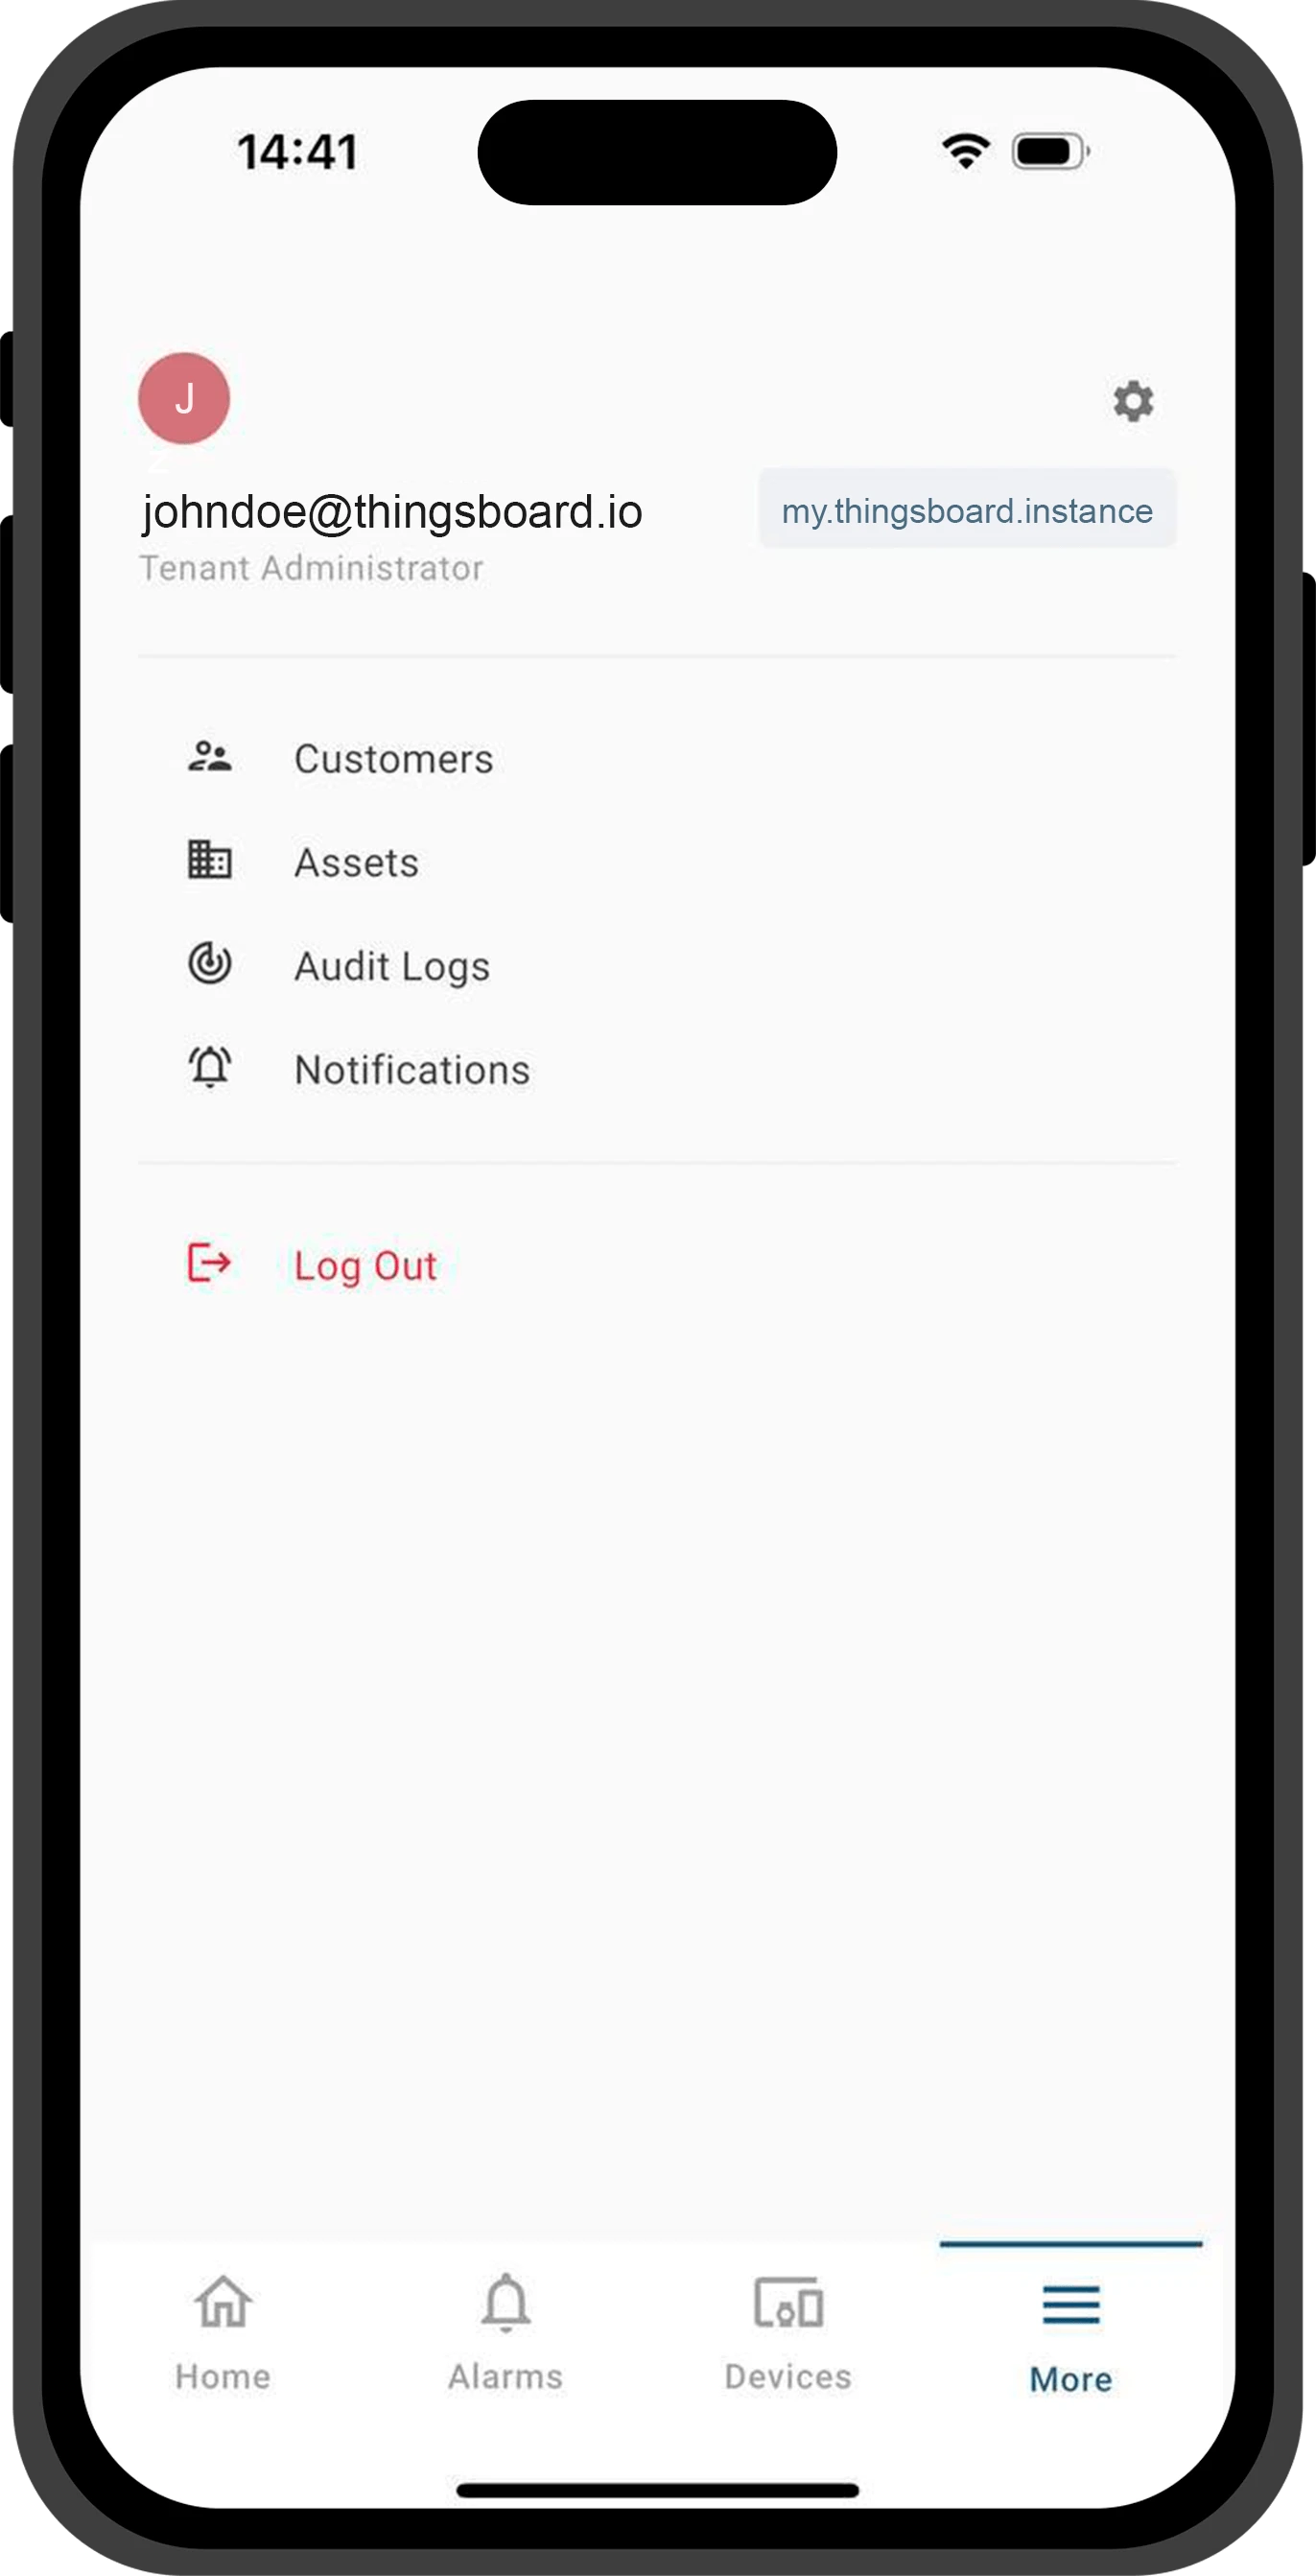
Section titled “The “More” Page”The number of menu items displayed in the bottom navigation menu depends on the screen size of the mobile device. Items that do not fit are grouped under the More page.
Configuration Dialog
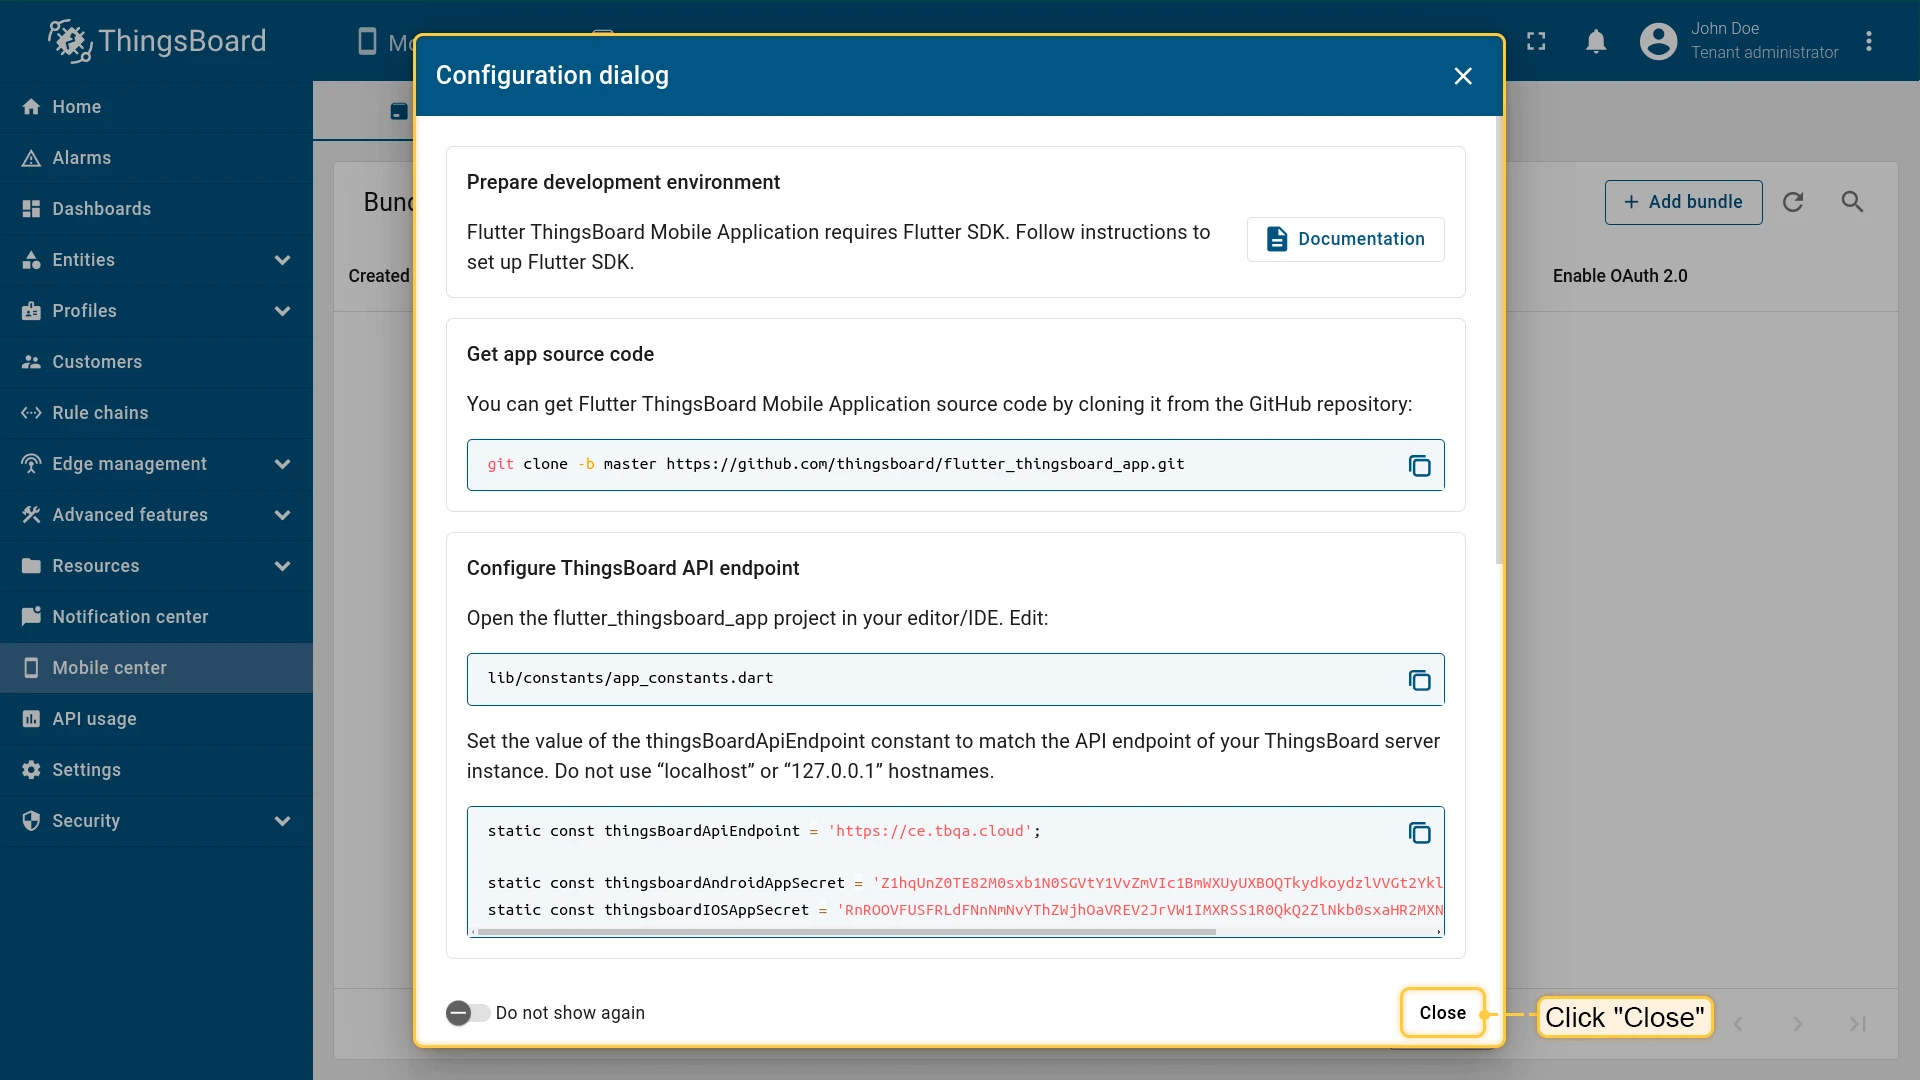
Section titled “Configuration Dialog”After the bundle is created, a dialog opens with SDK setup instructions for the ThingsBoard Mobile Application. Follow the instructions to set up your app, or click Close if you already have one configured.
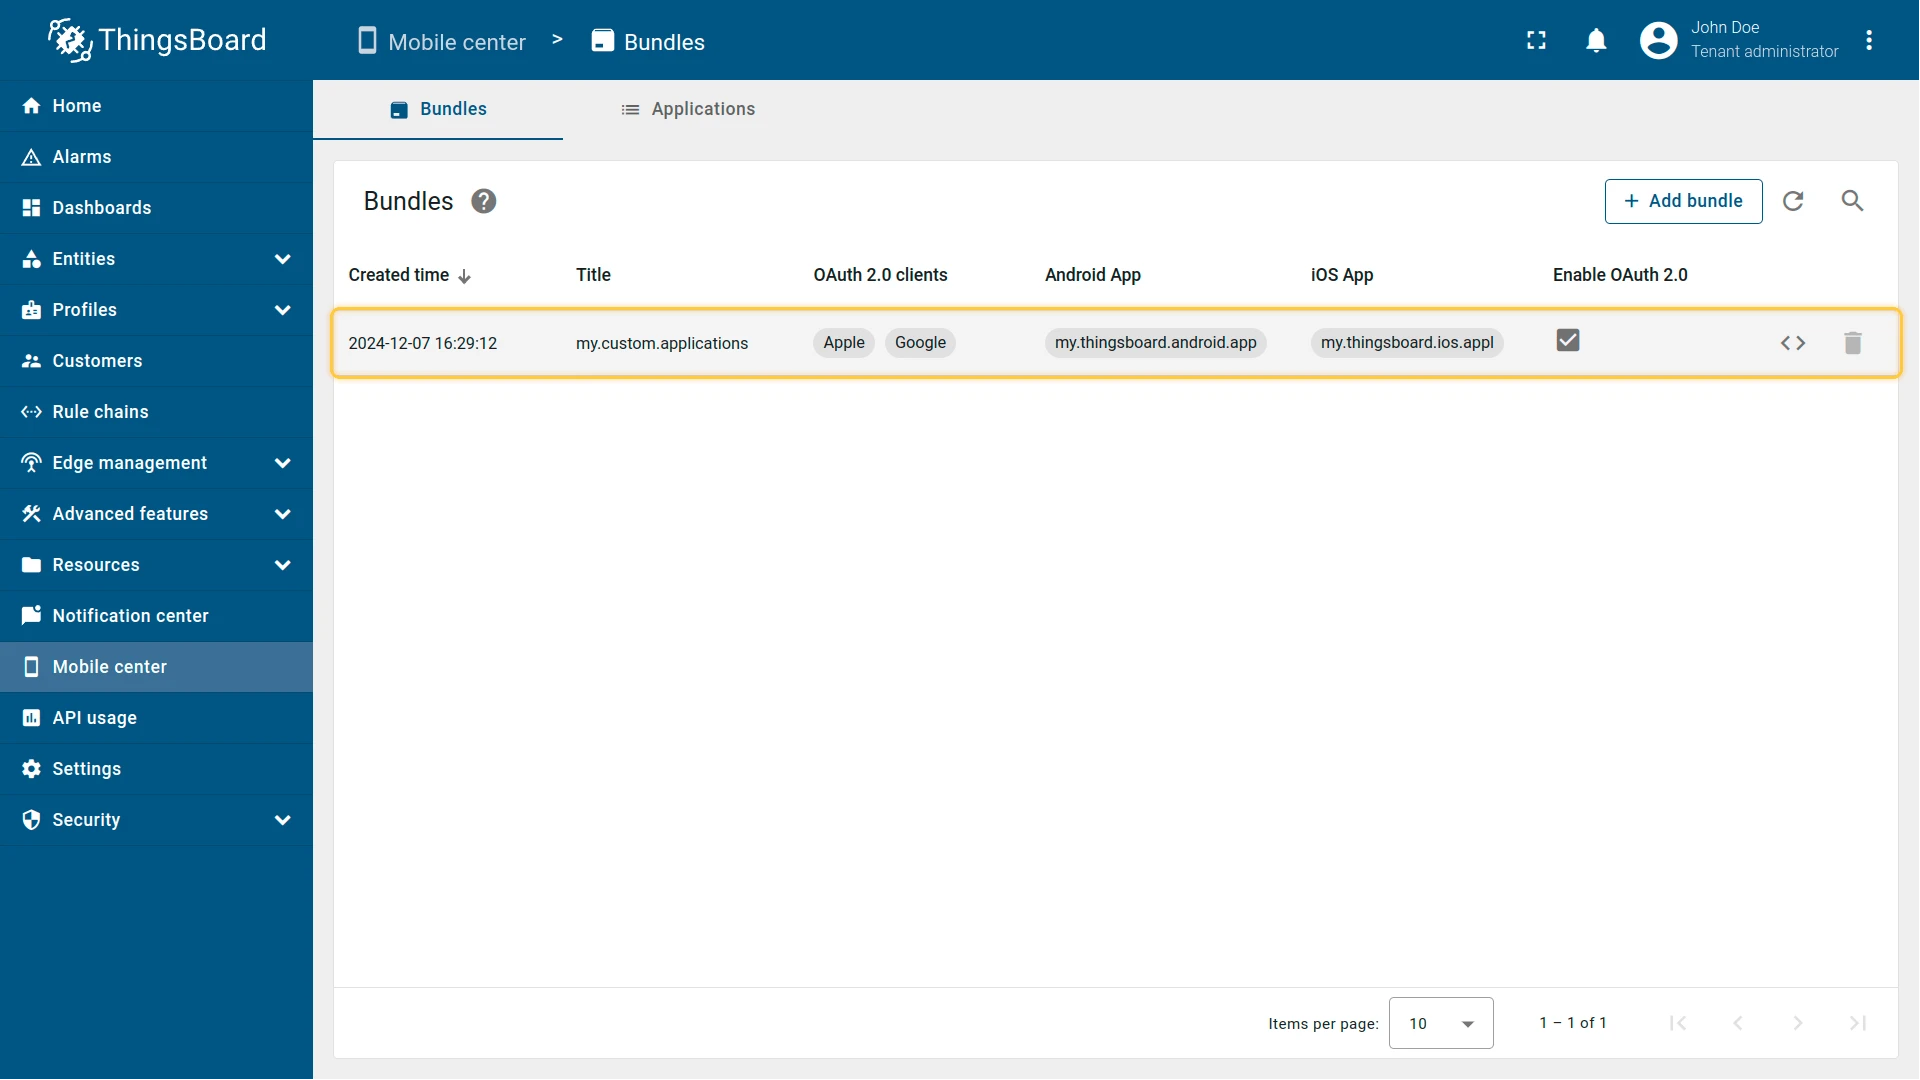
The bundle is created. Applications included in the bundle now use the configured settings.
Was this helpful?