
Step 3. Add a connector
By choosing the type of connector, you determine the specific method of connection you will use to ensure the interaction of your gateway with other systems or devices.
To see how the connector works, you can choose one of the following connectors:
Let’s add an MQTT connector, which will subscribe to some data topics using the demo broker with a built-in data generator and send data to the gateway.
Setup demo MQTT broker
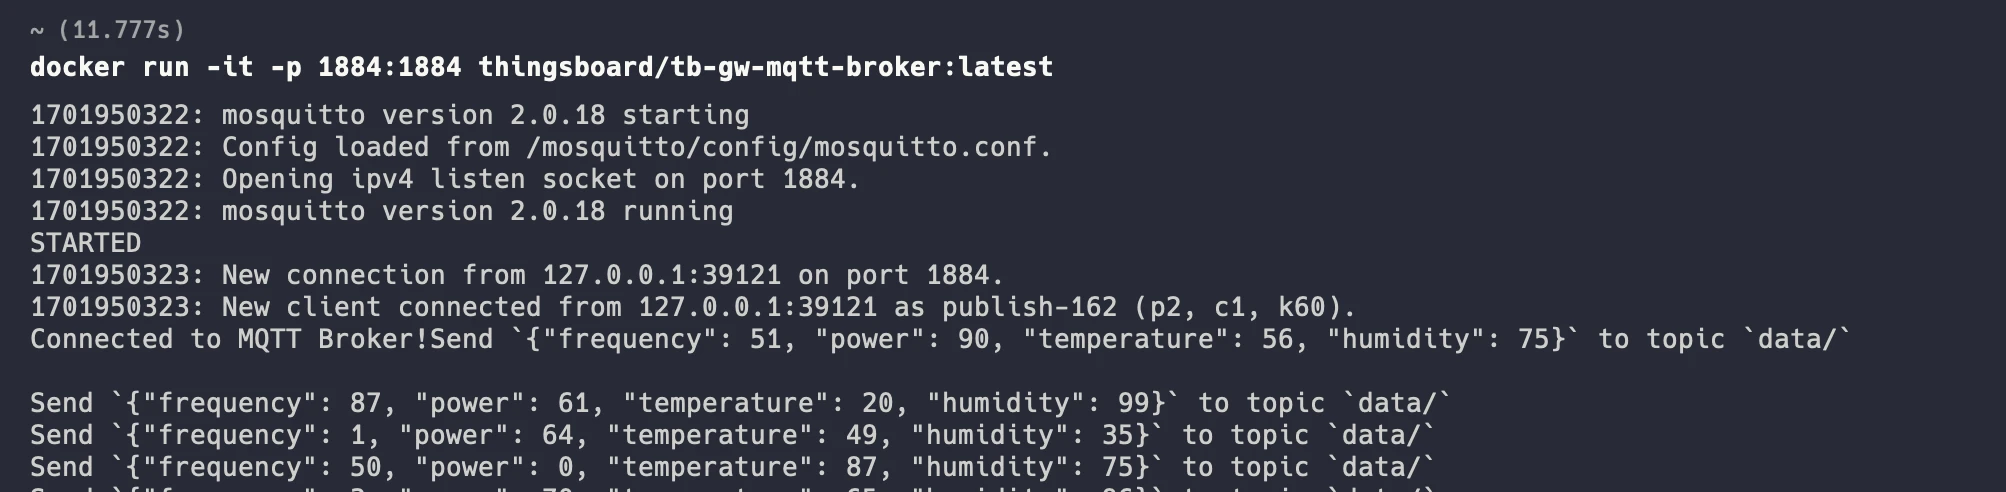
Section titled “Setup demo MQTT broker”As a demo MQTT broker, we will use a Docker image, that can be installed and run using the following command:
docker run -it -p 1884:1884 thingsboard/tb-gw-mqtt-broker:latestAfter running docker image, you can see the following logs in your terminal:
Setup connector
Section titled “Setup connector”To create a connector with the default configuration, follow these steps:
-
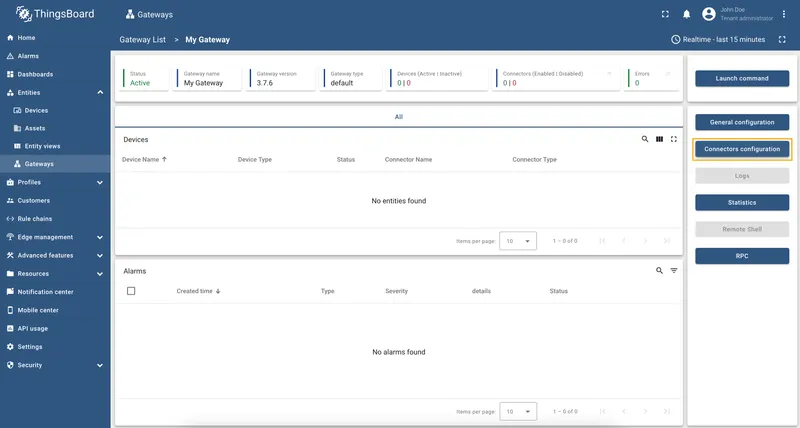
Click on Connectors configuration button on the right panel.
-
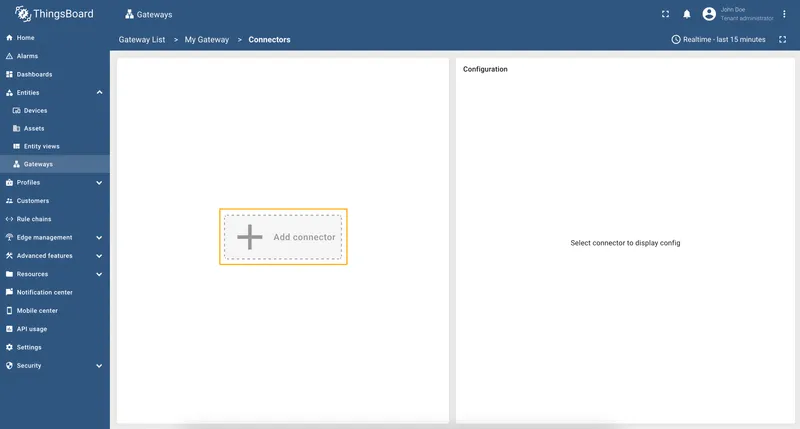
Click the + Add connector button.
-
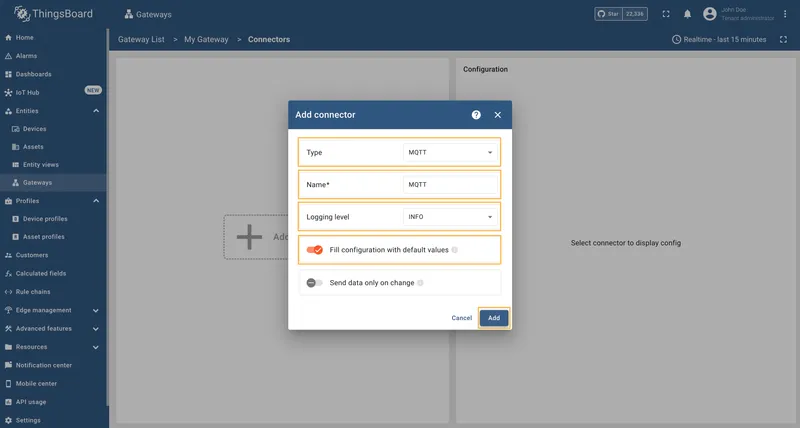
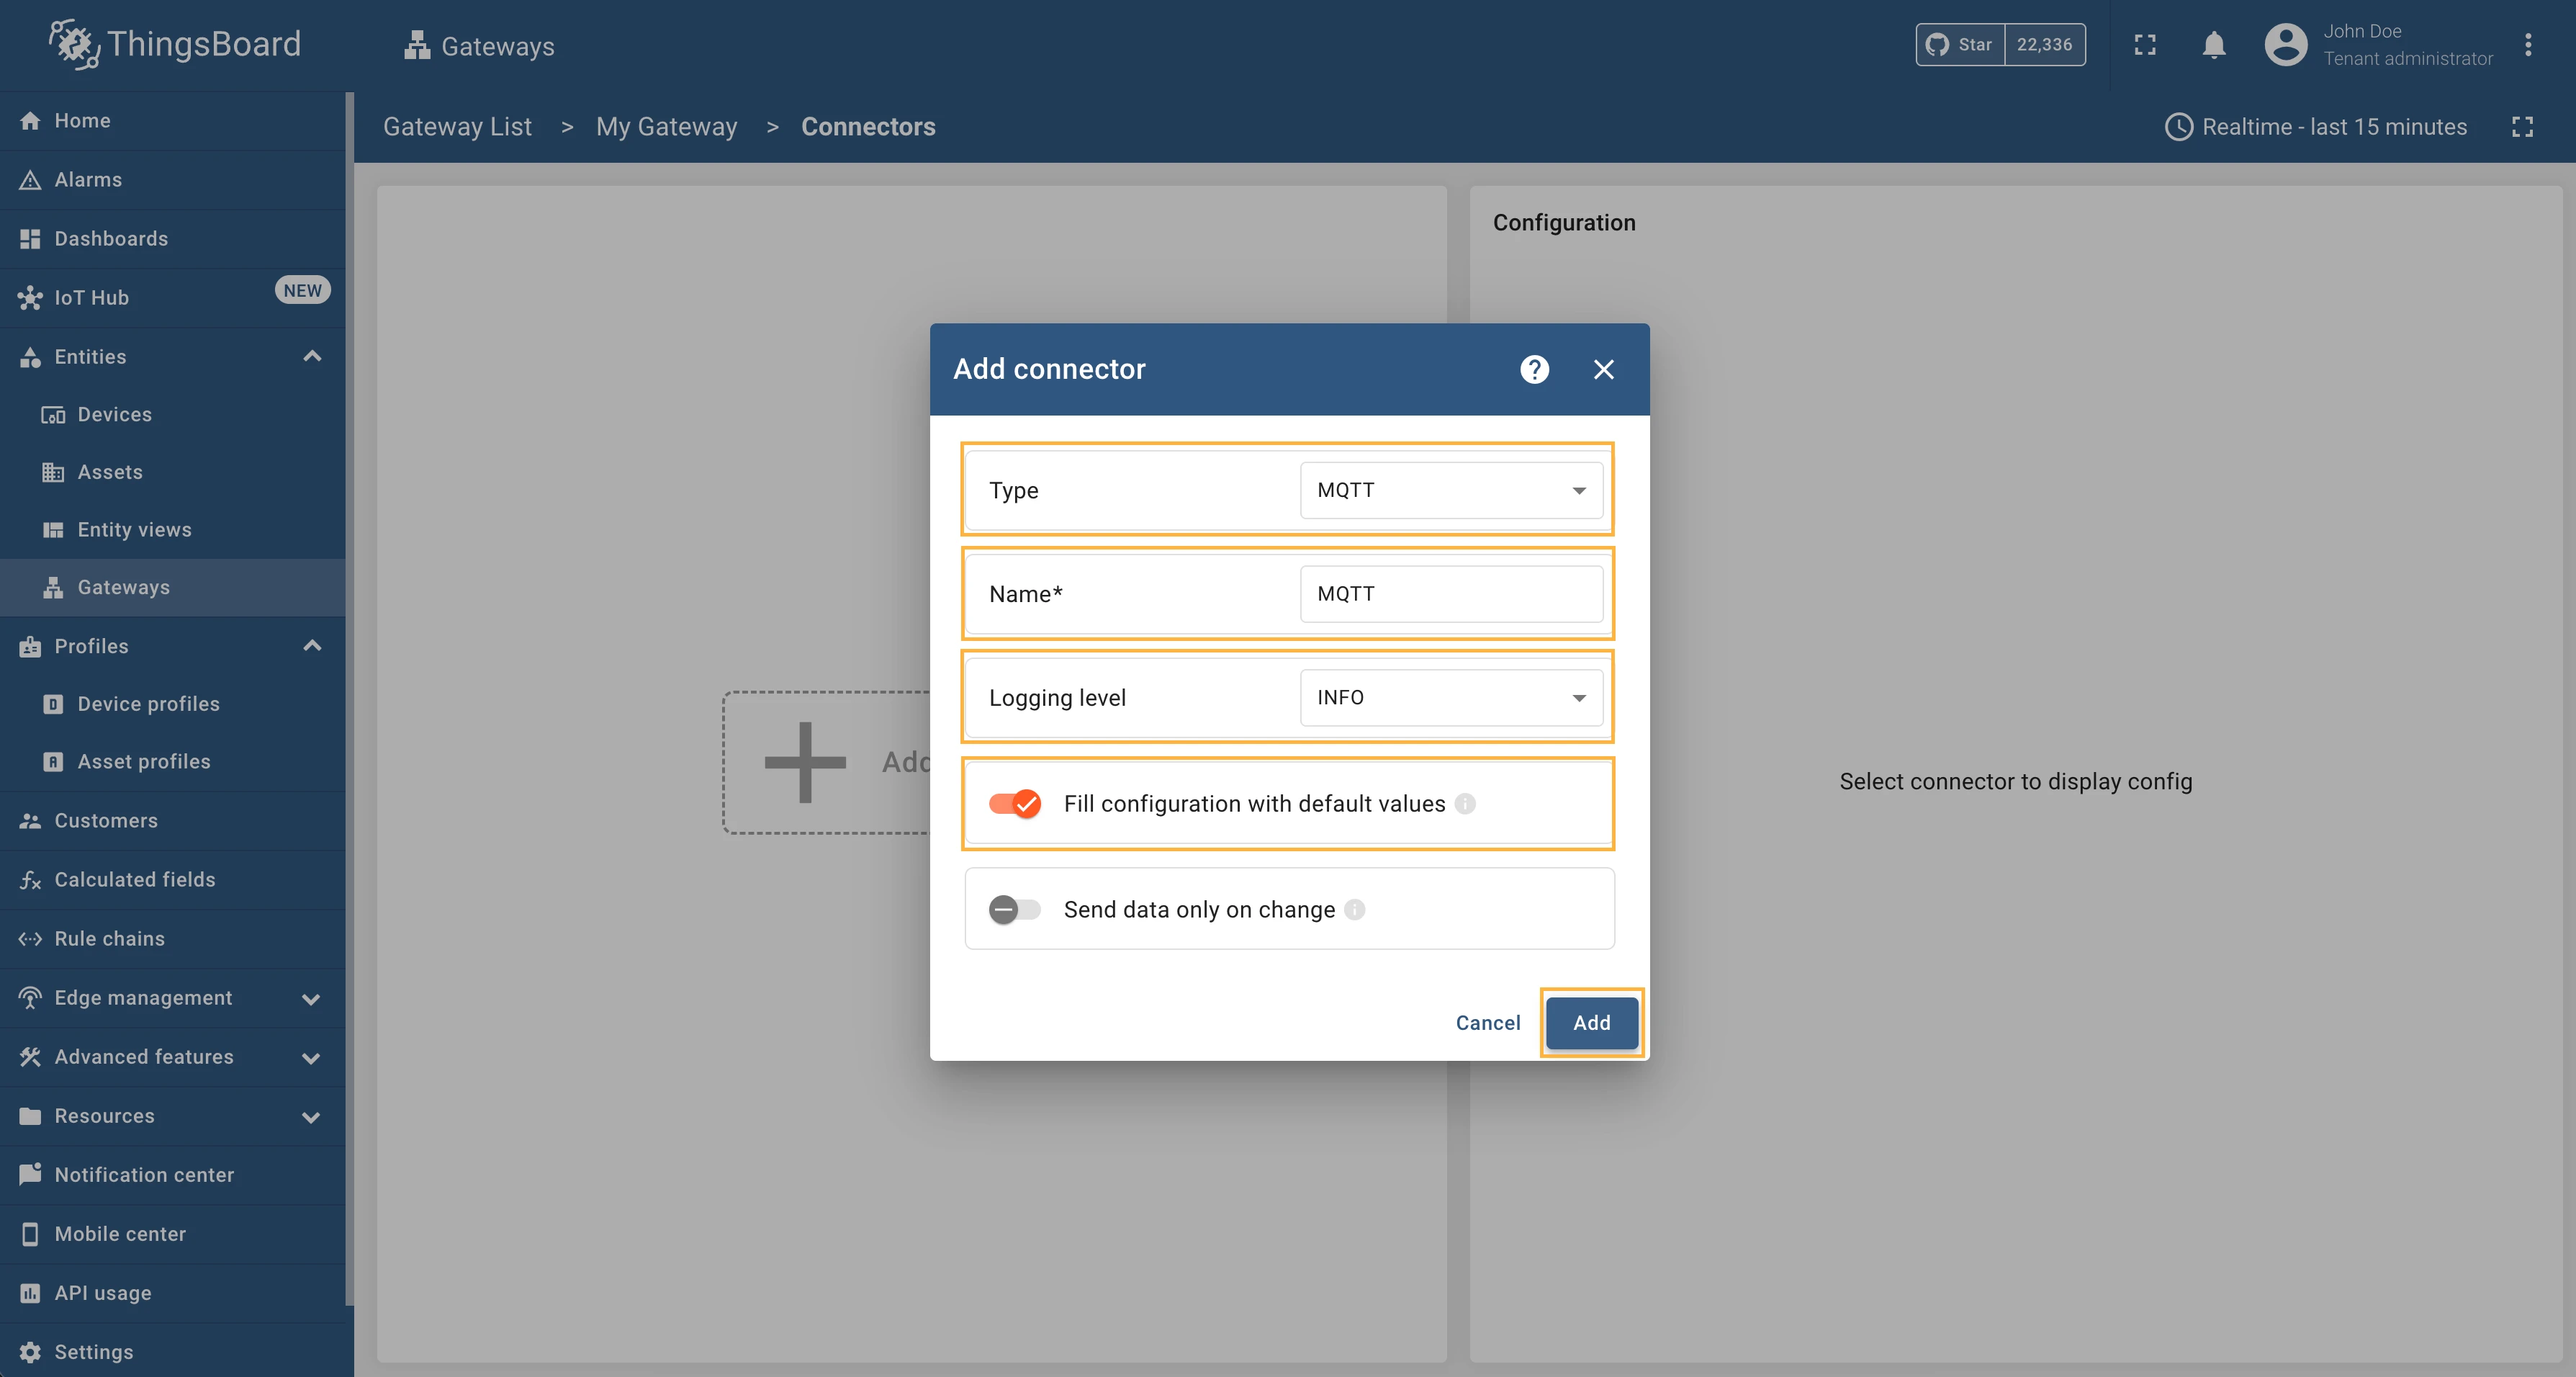
Choose MQTT connector type from the dropdown, fill in the Name field, set the Logging level to INFO, leave the Fill configuration with default values option enabled, and click the Add button.
-
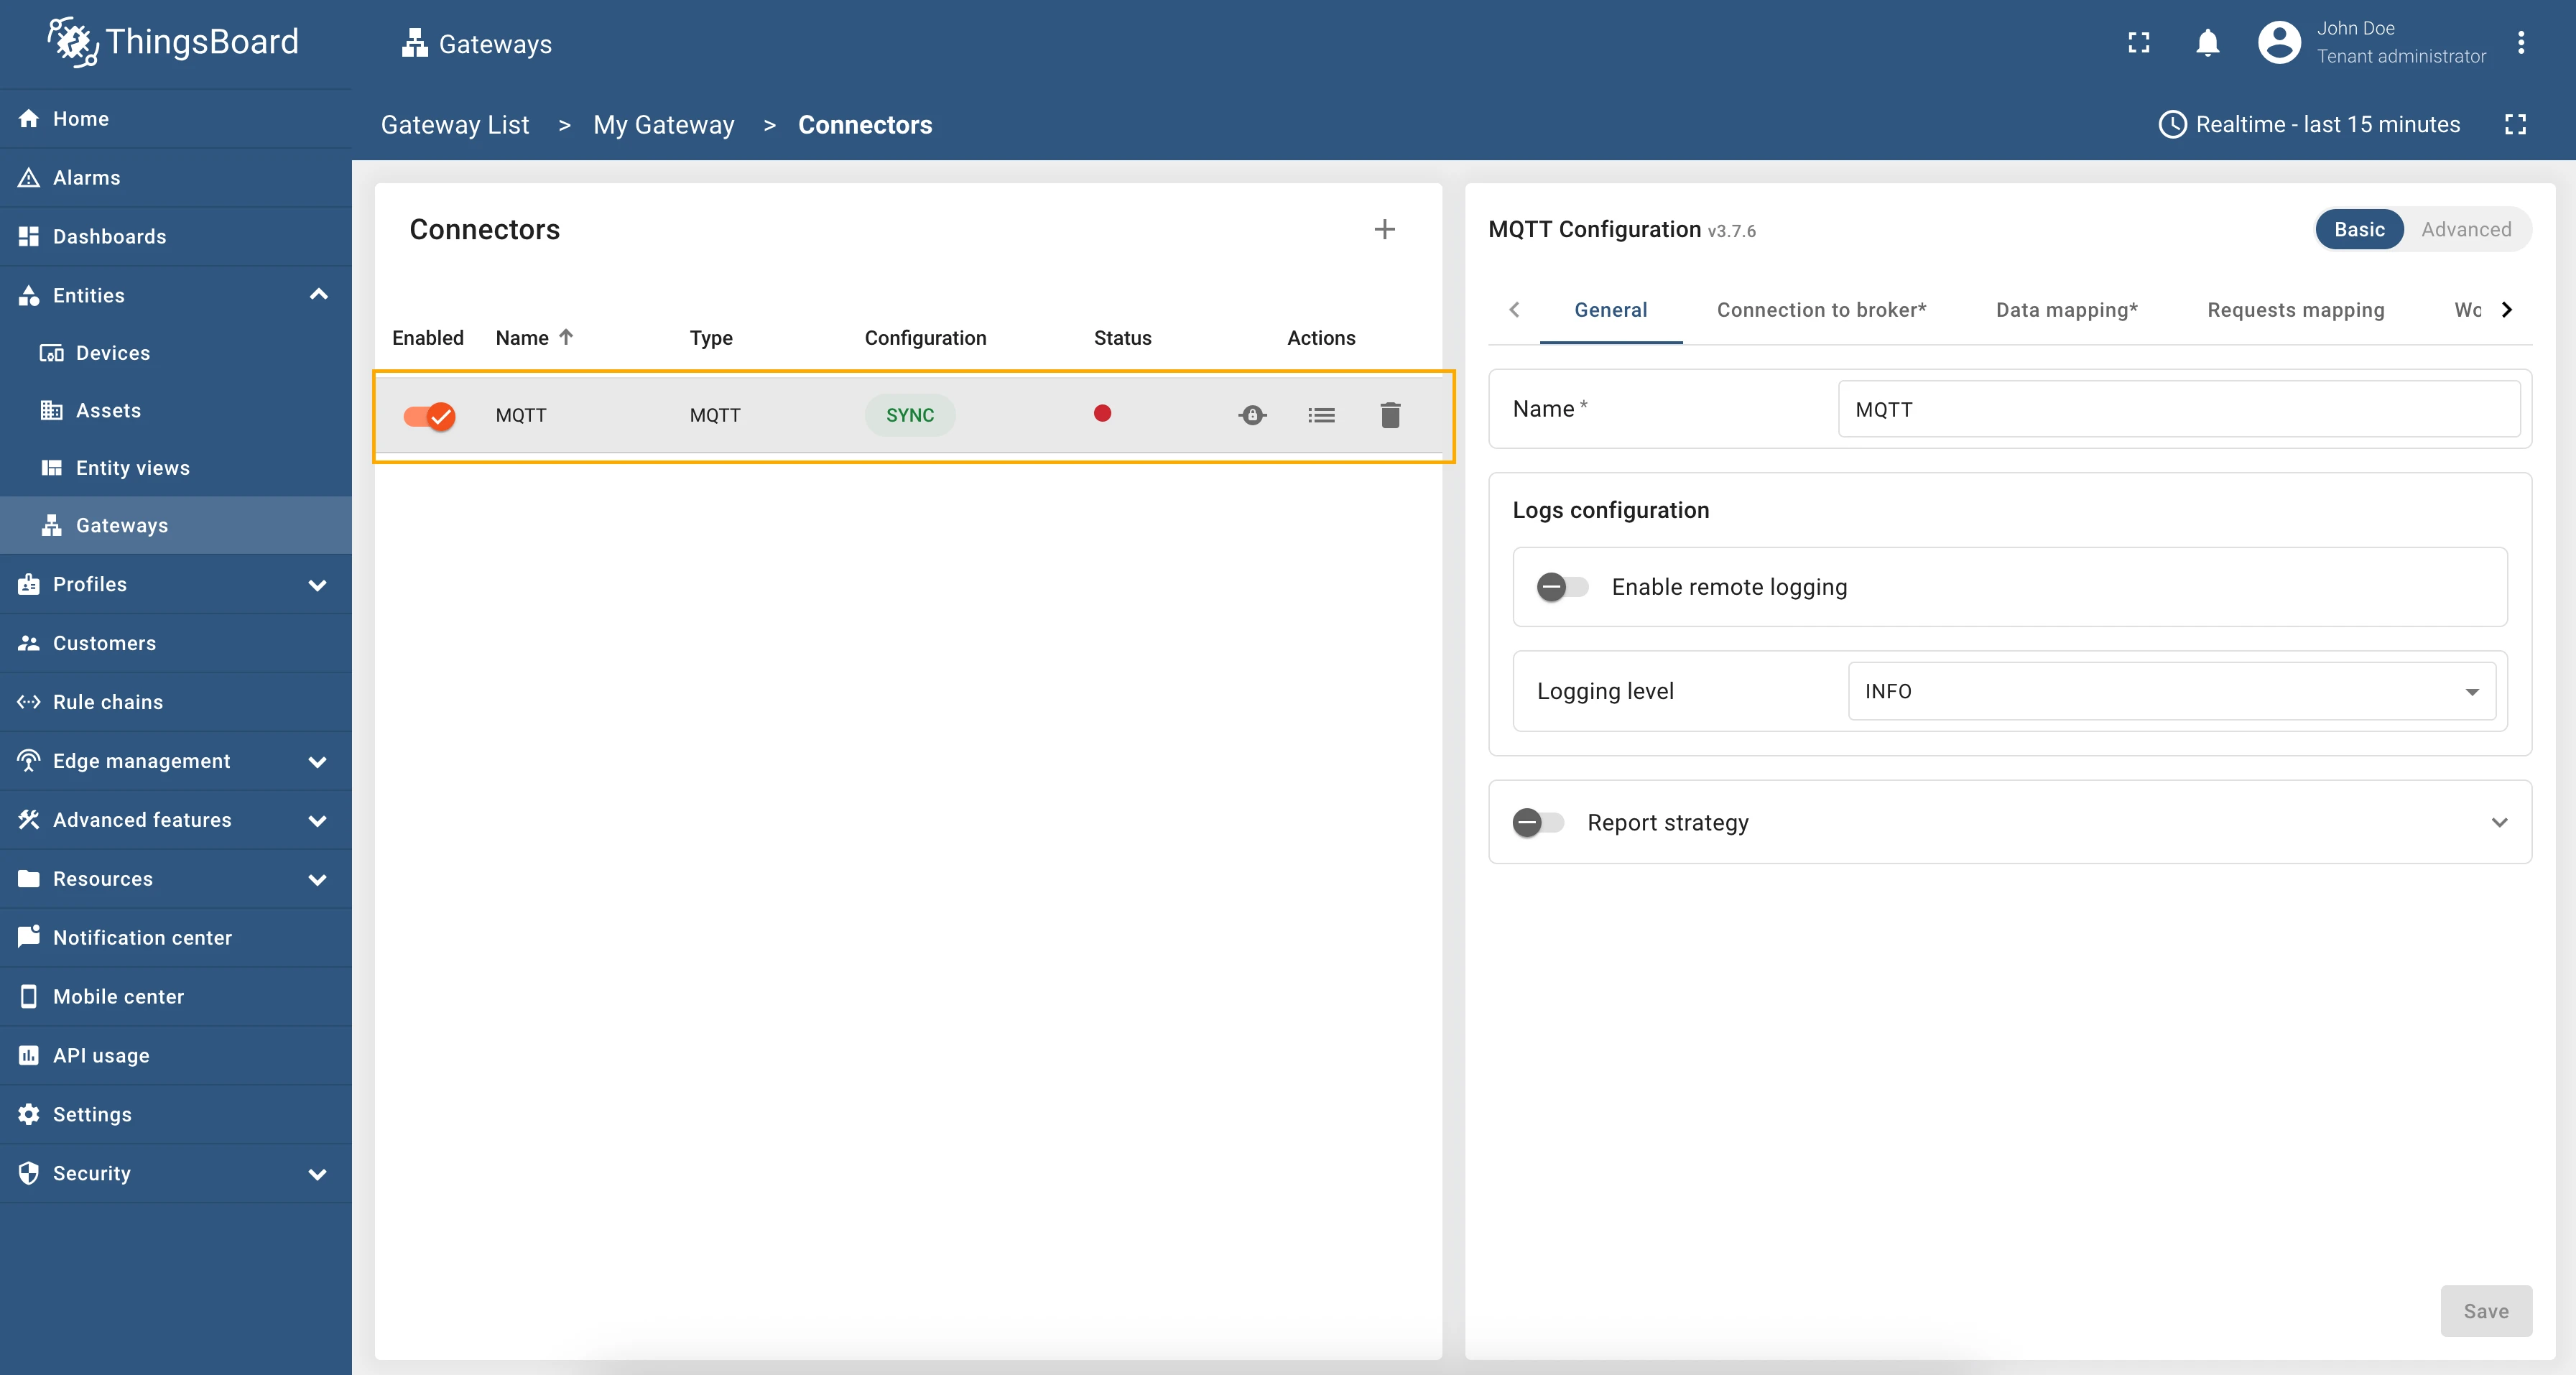
The connector is created with the default configuration.
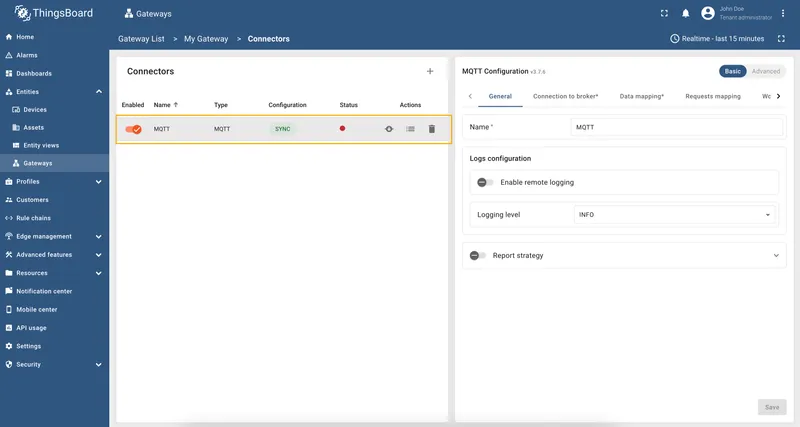
-
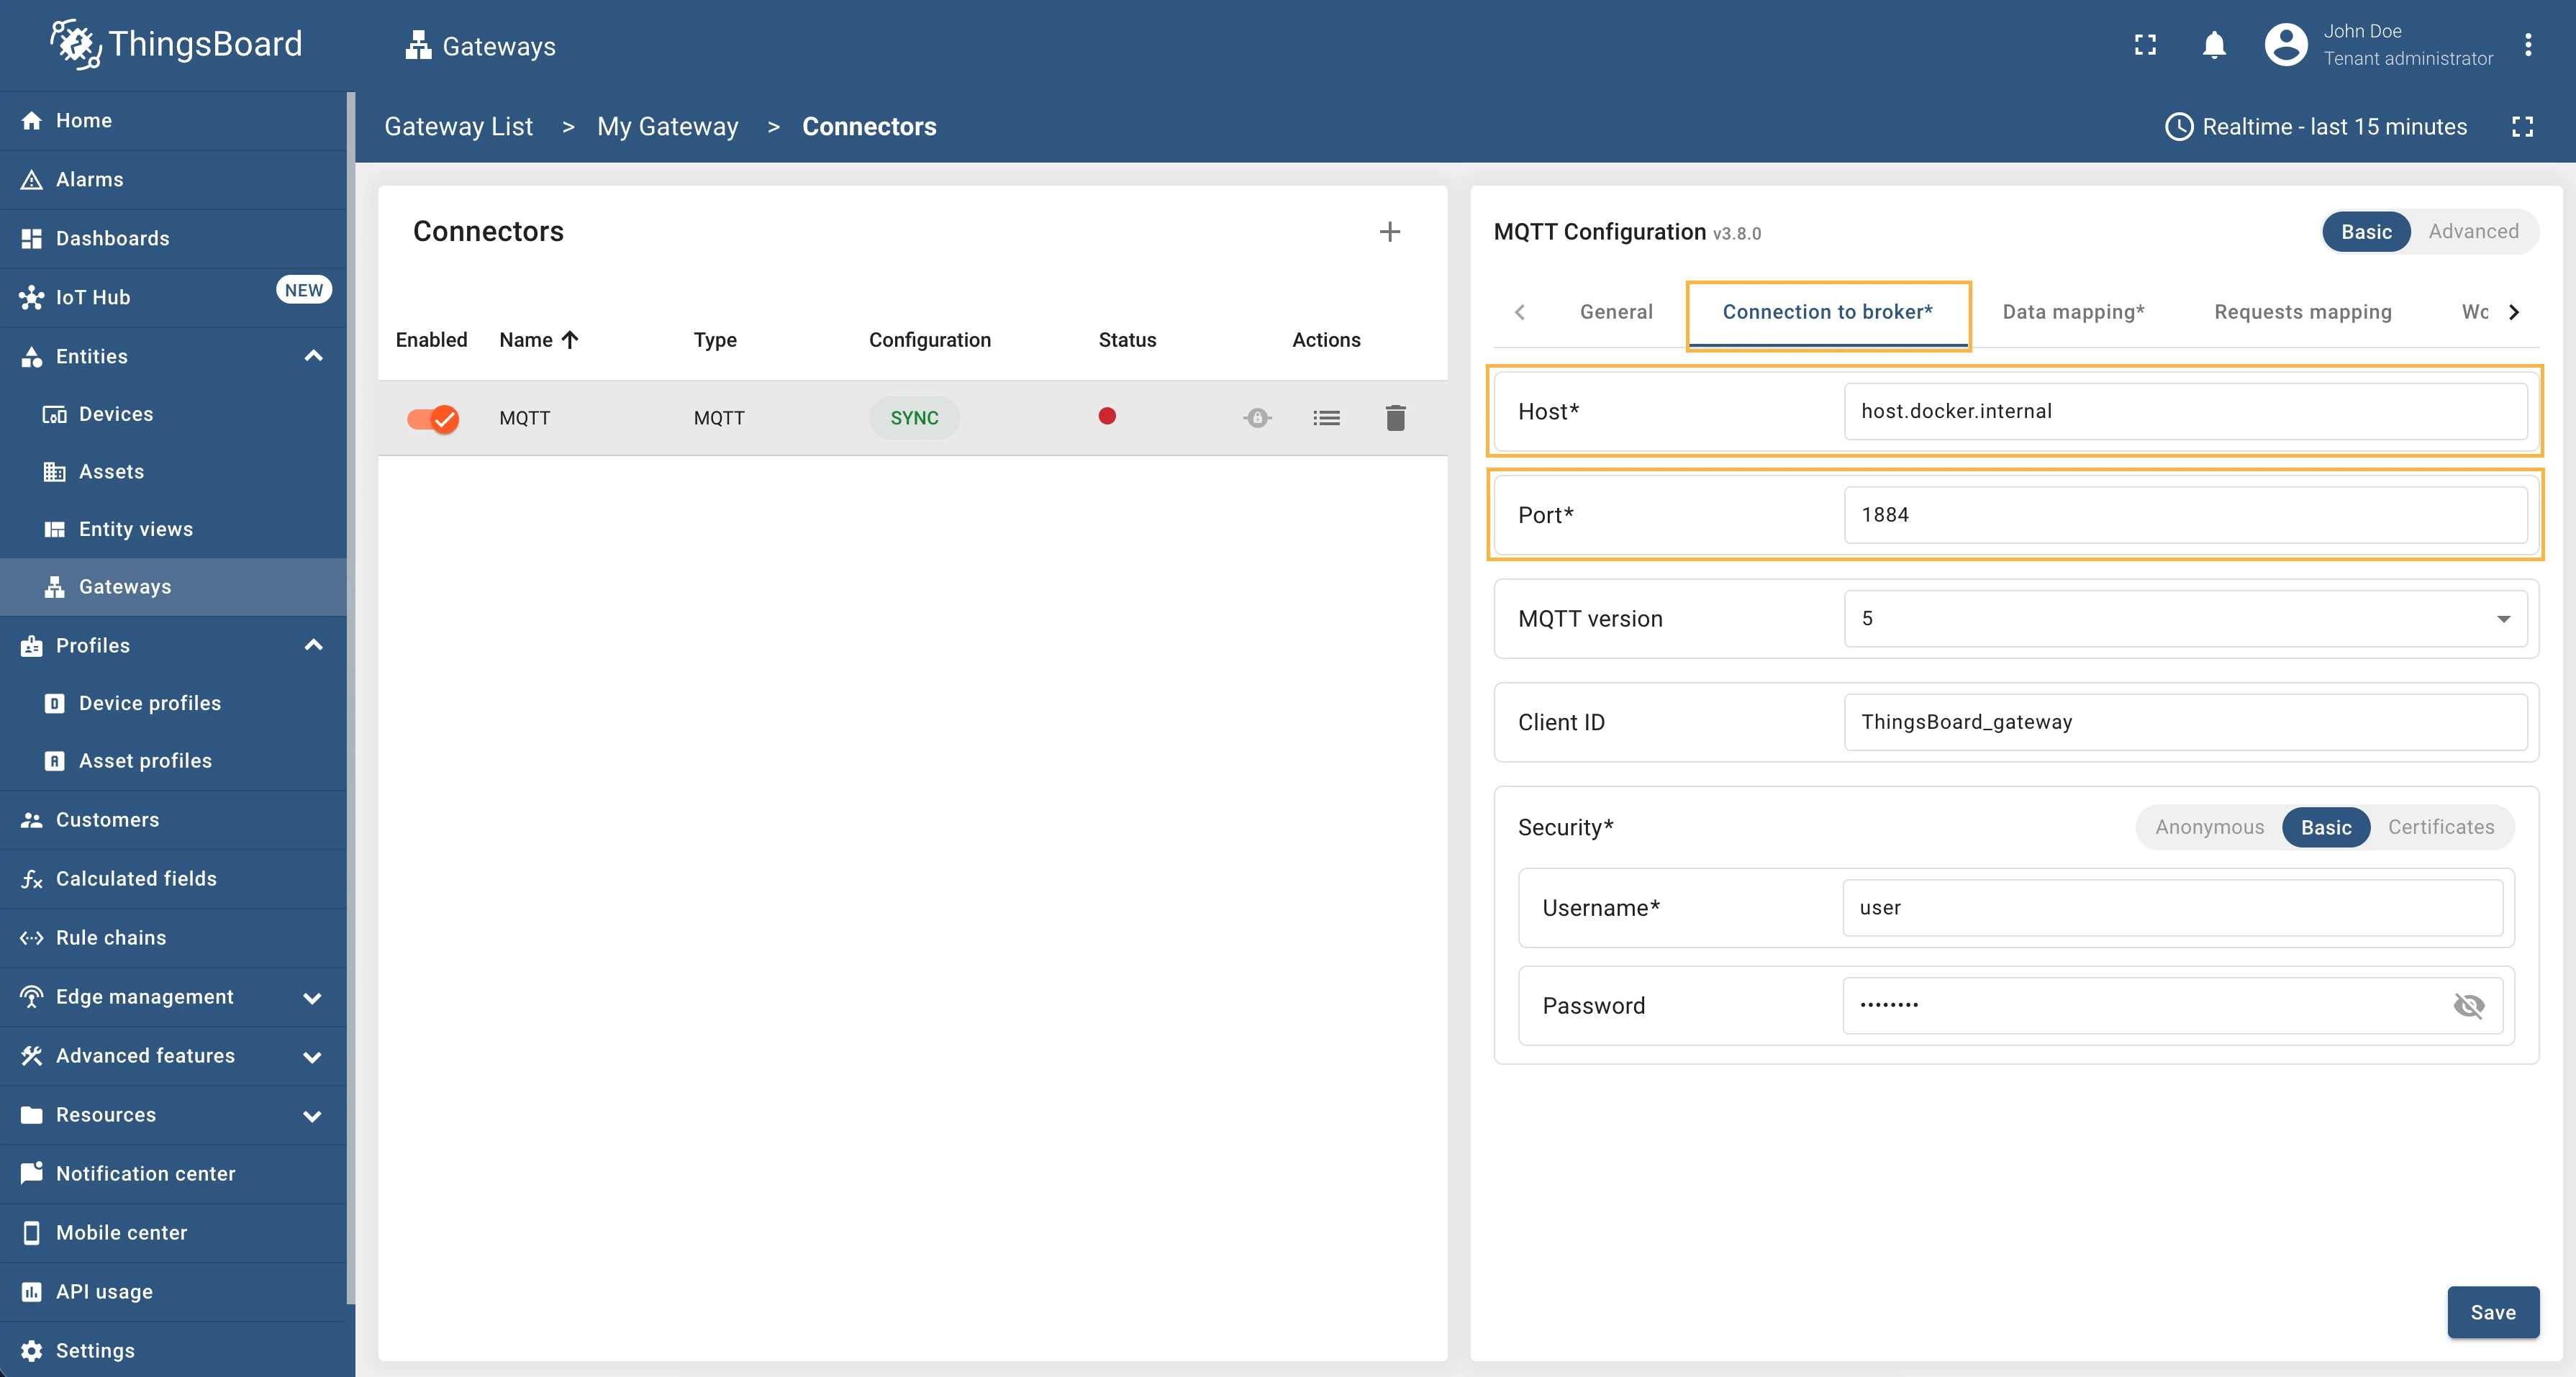
Let’s change default
127.0.0.1host tohost.docker.internal. Click on “Connection to broker” tab and change the host tohost.docker.internal, and set the port to 1884. Click the “Save” button to apply changes.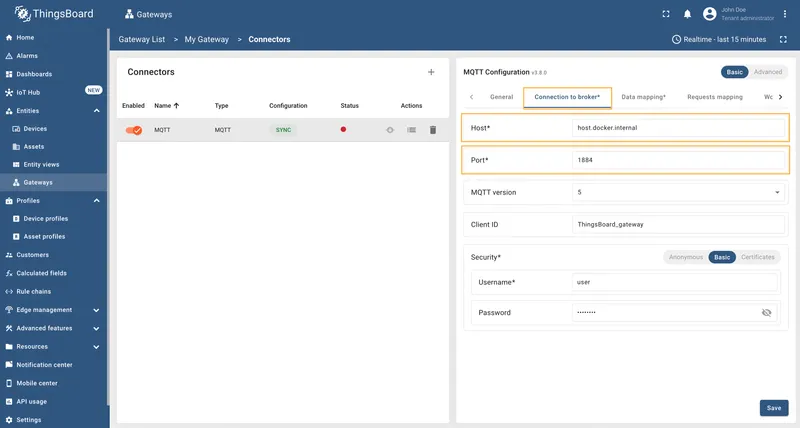
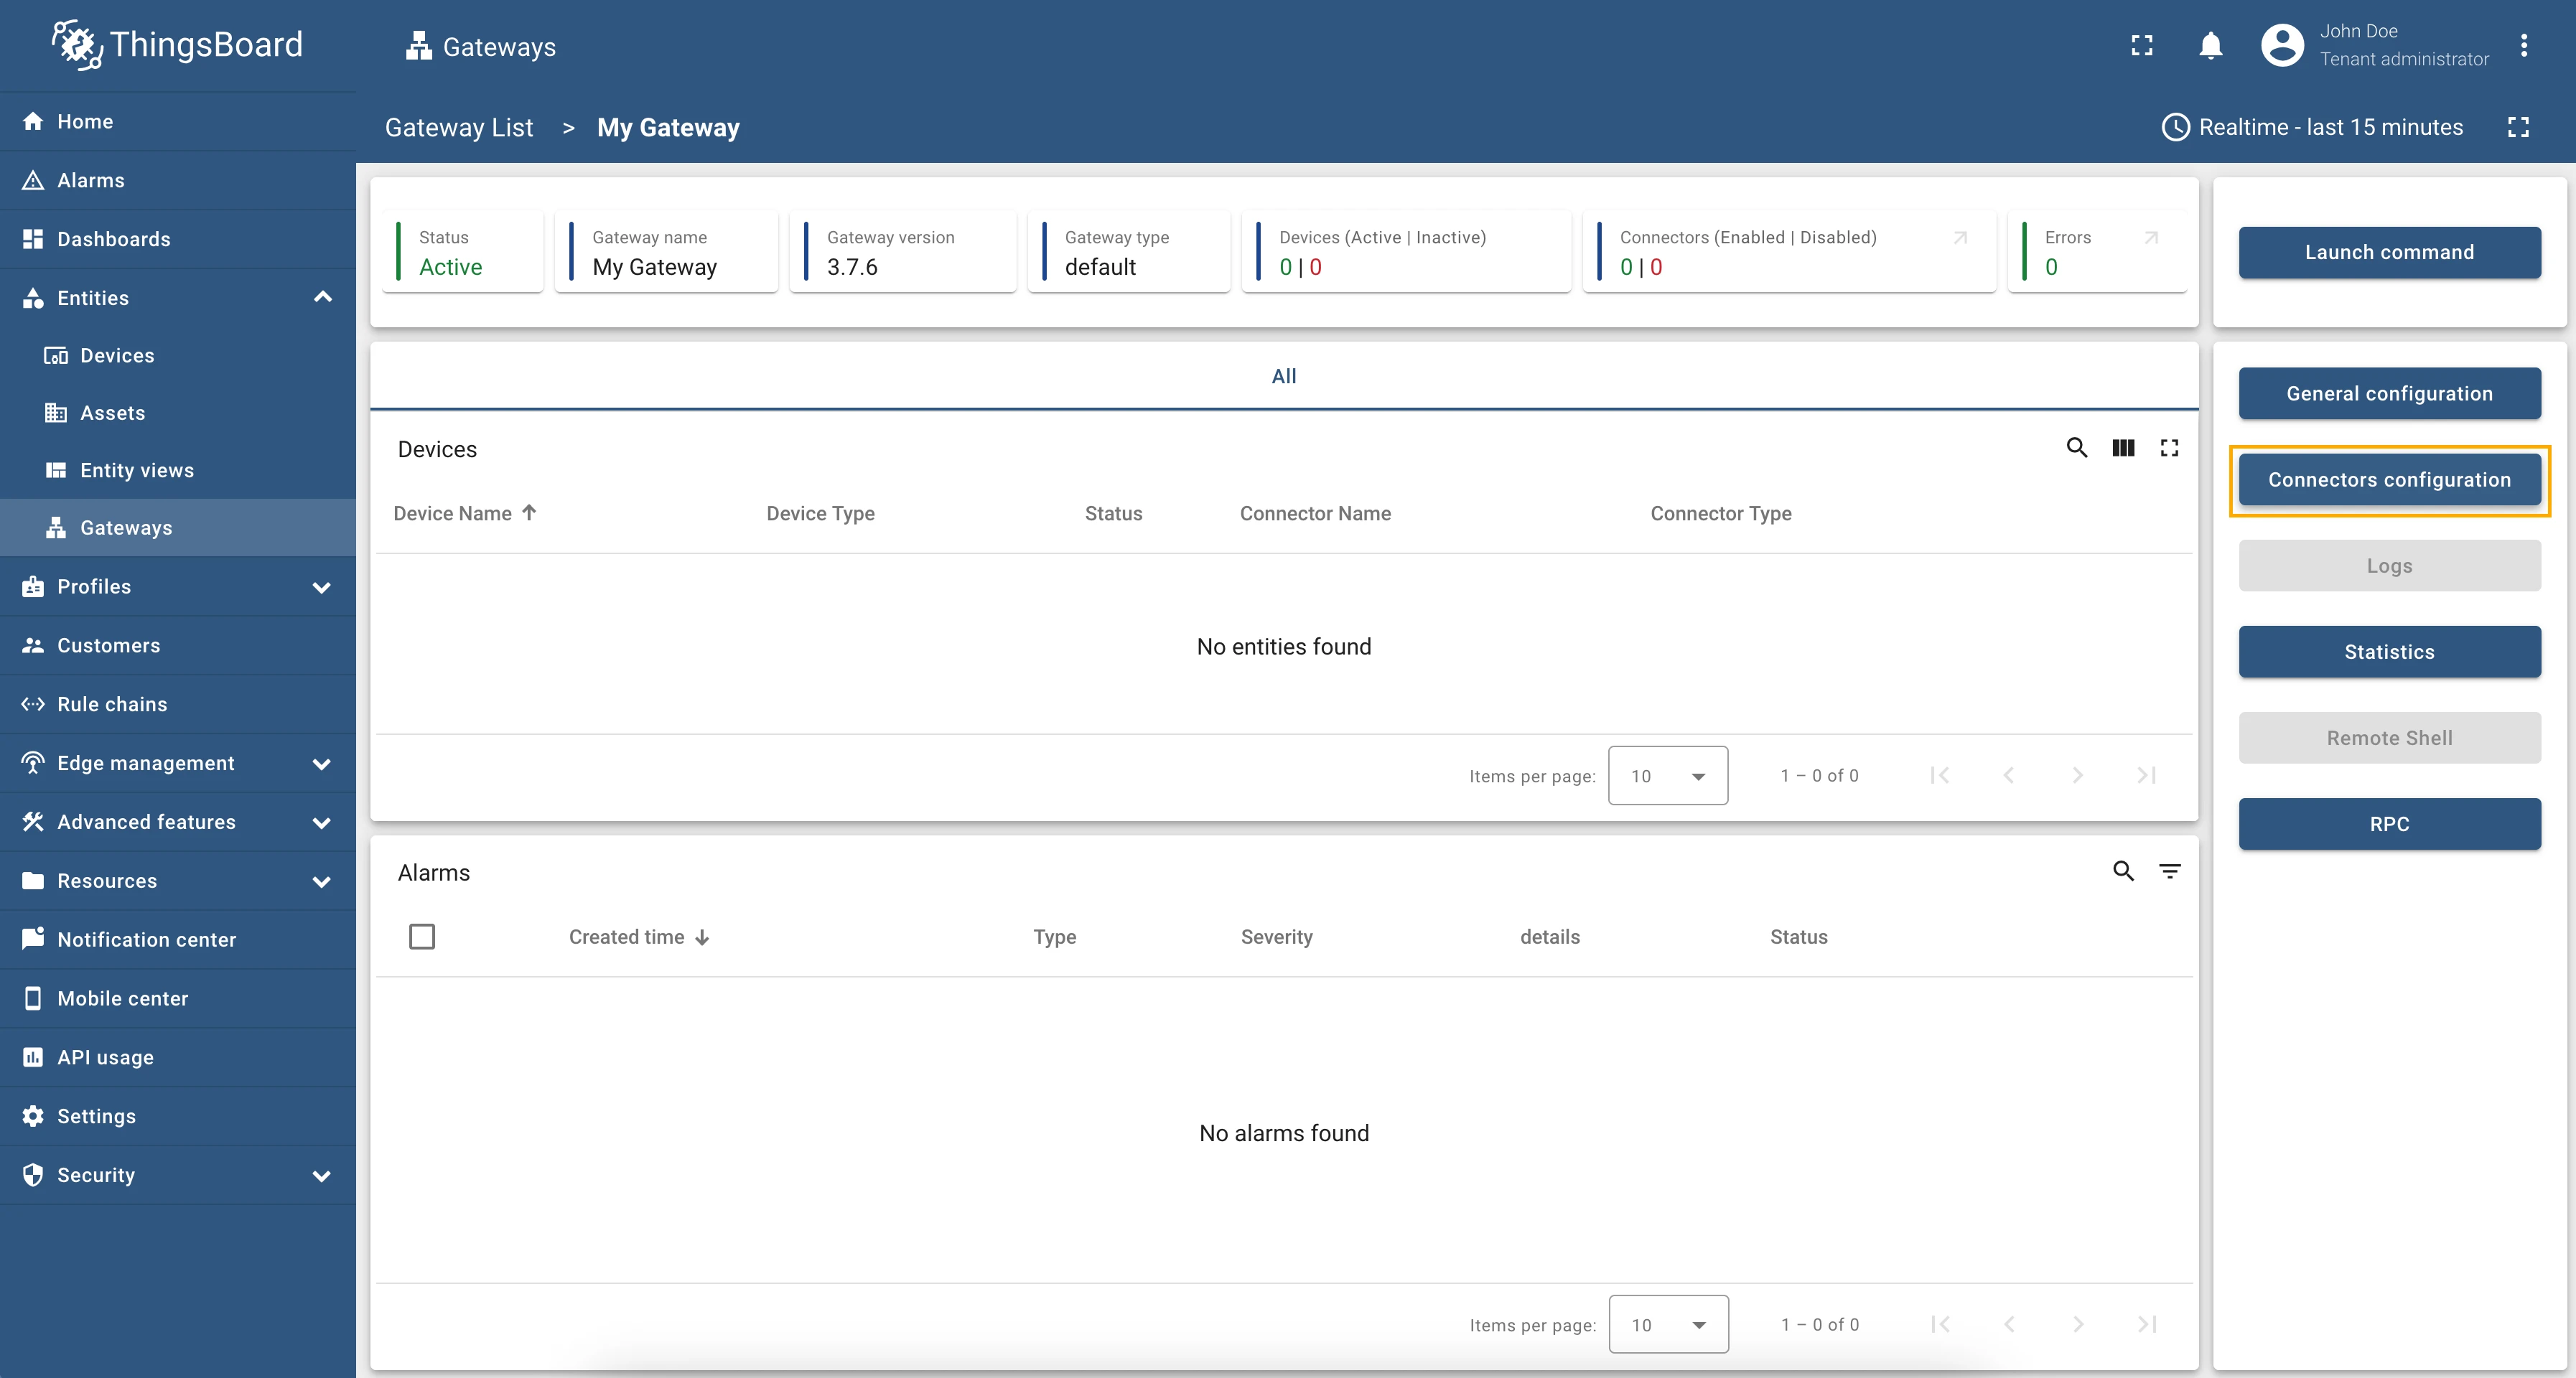
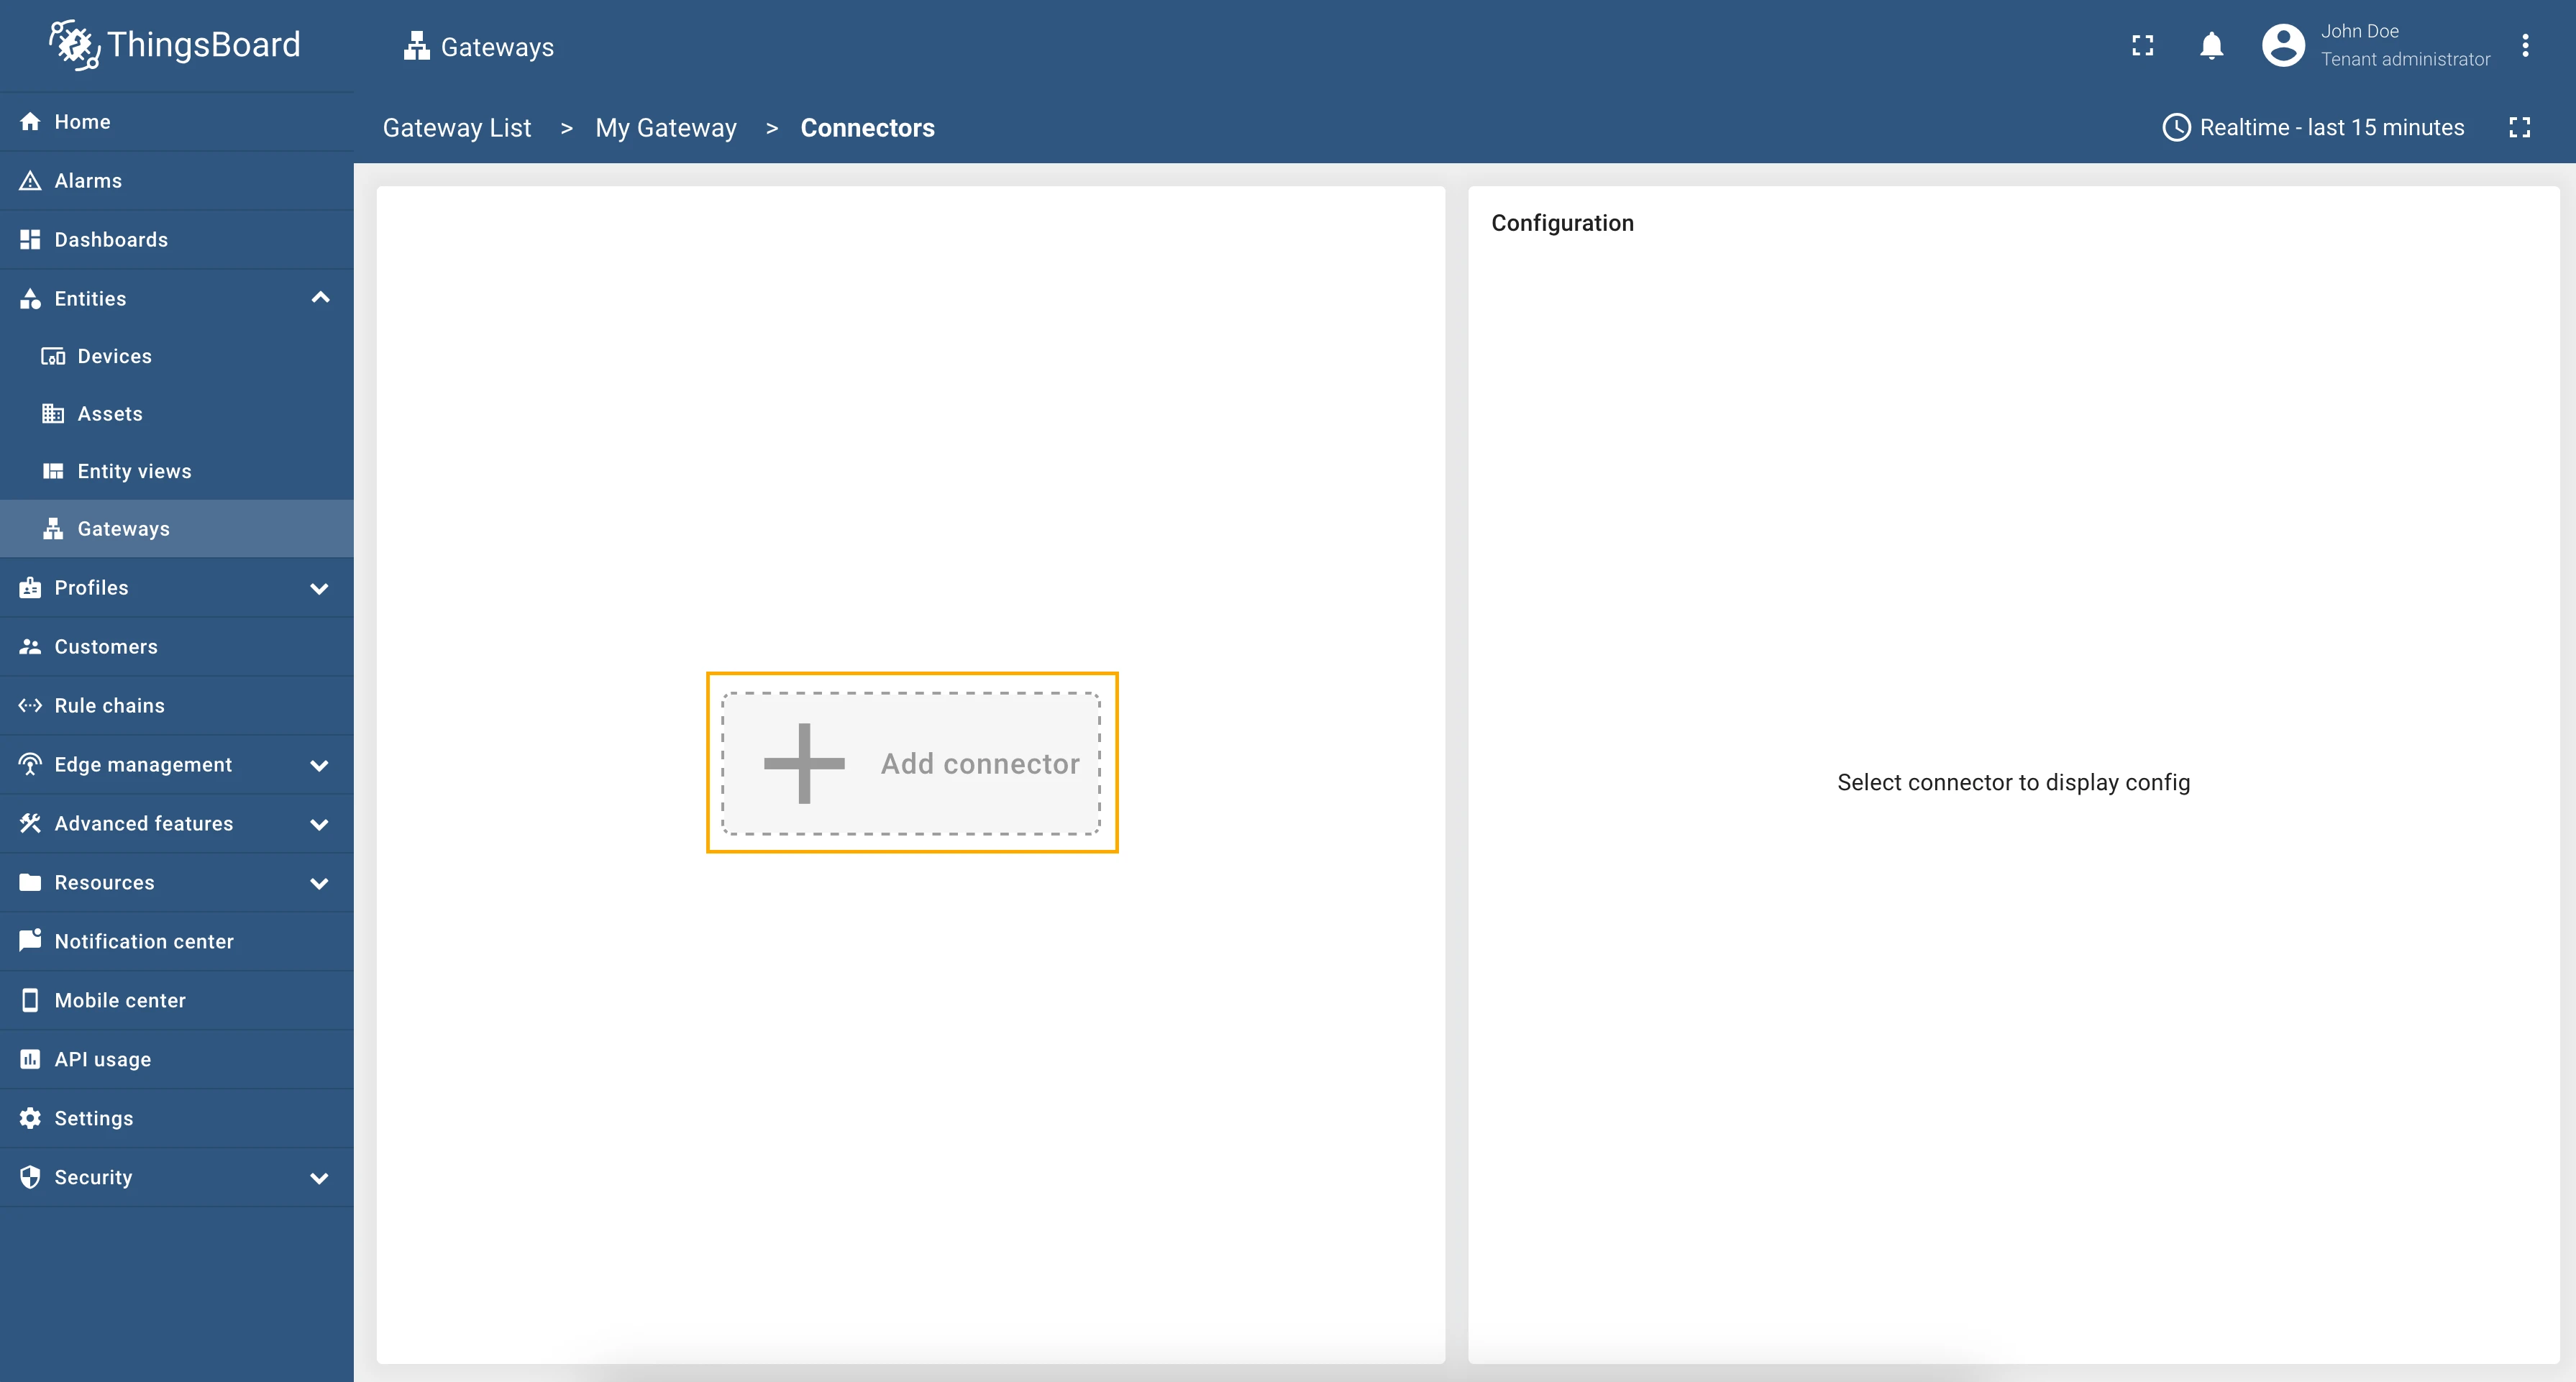
Also, you can see the connector logs to make sure that the connector works, for this purpose, follow these steps:
-
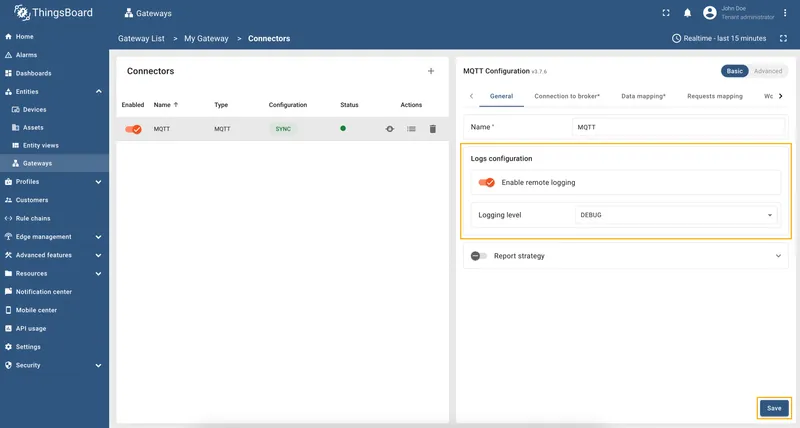
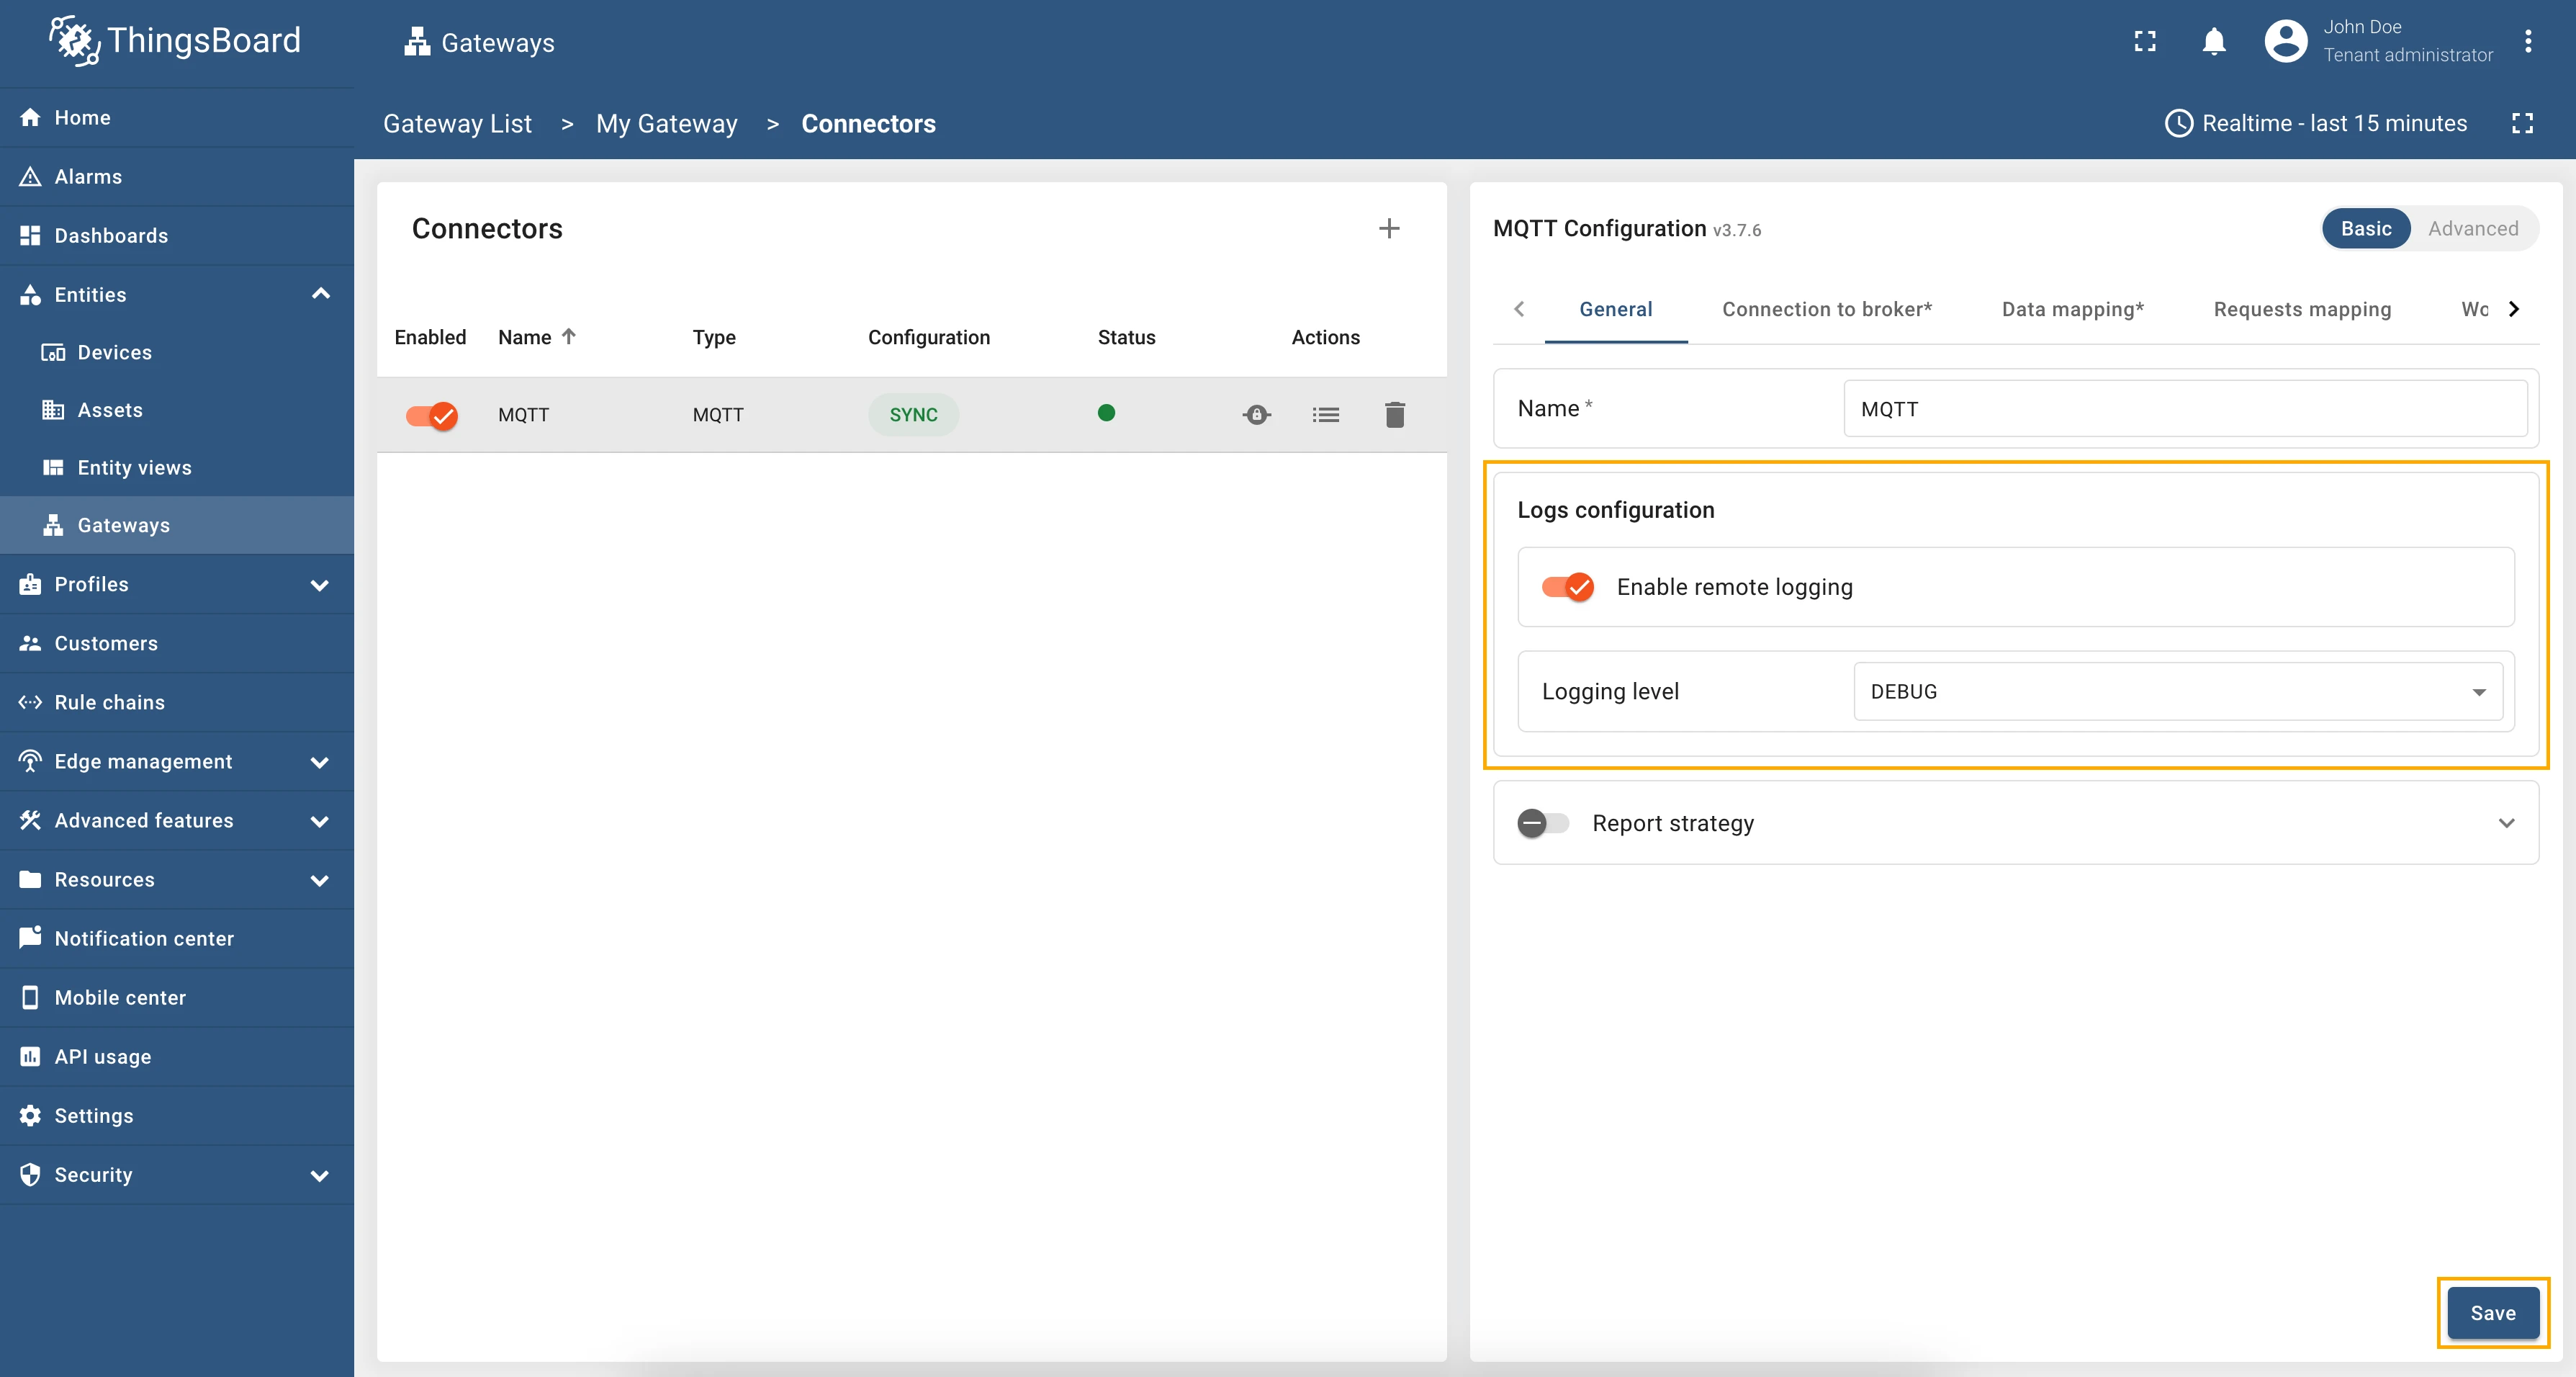
In the General connector tab enable remote logging by turning on the Enable remote logging toggle. Choose DEBUG in the Logging level drop-down menu. Click on the Save button to apply changes.
-
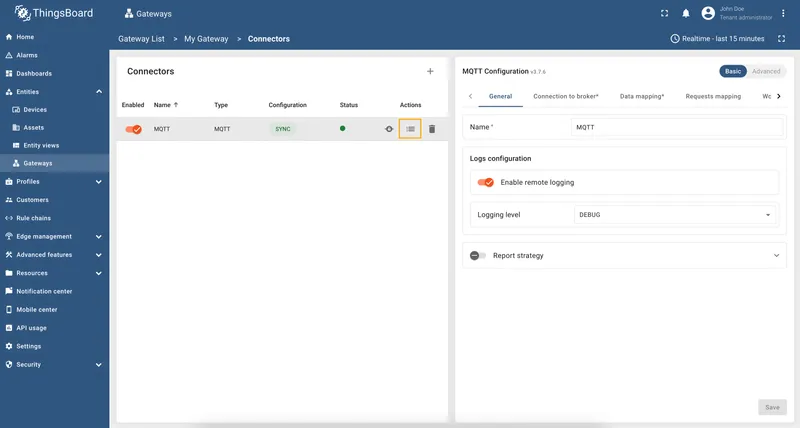
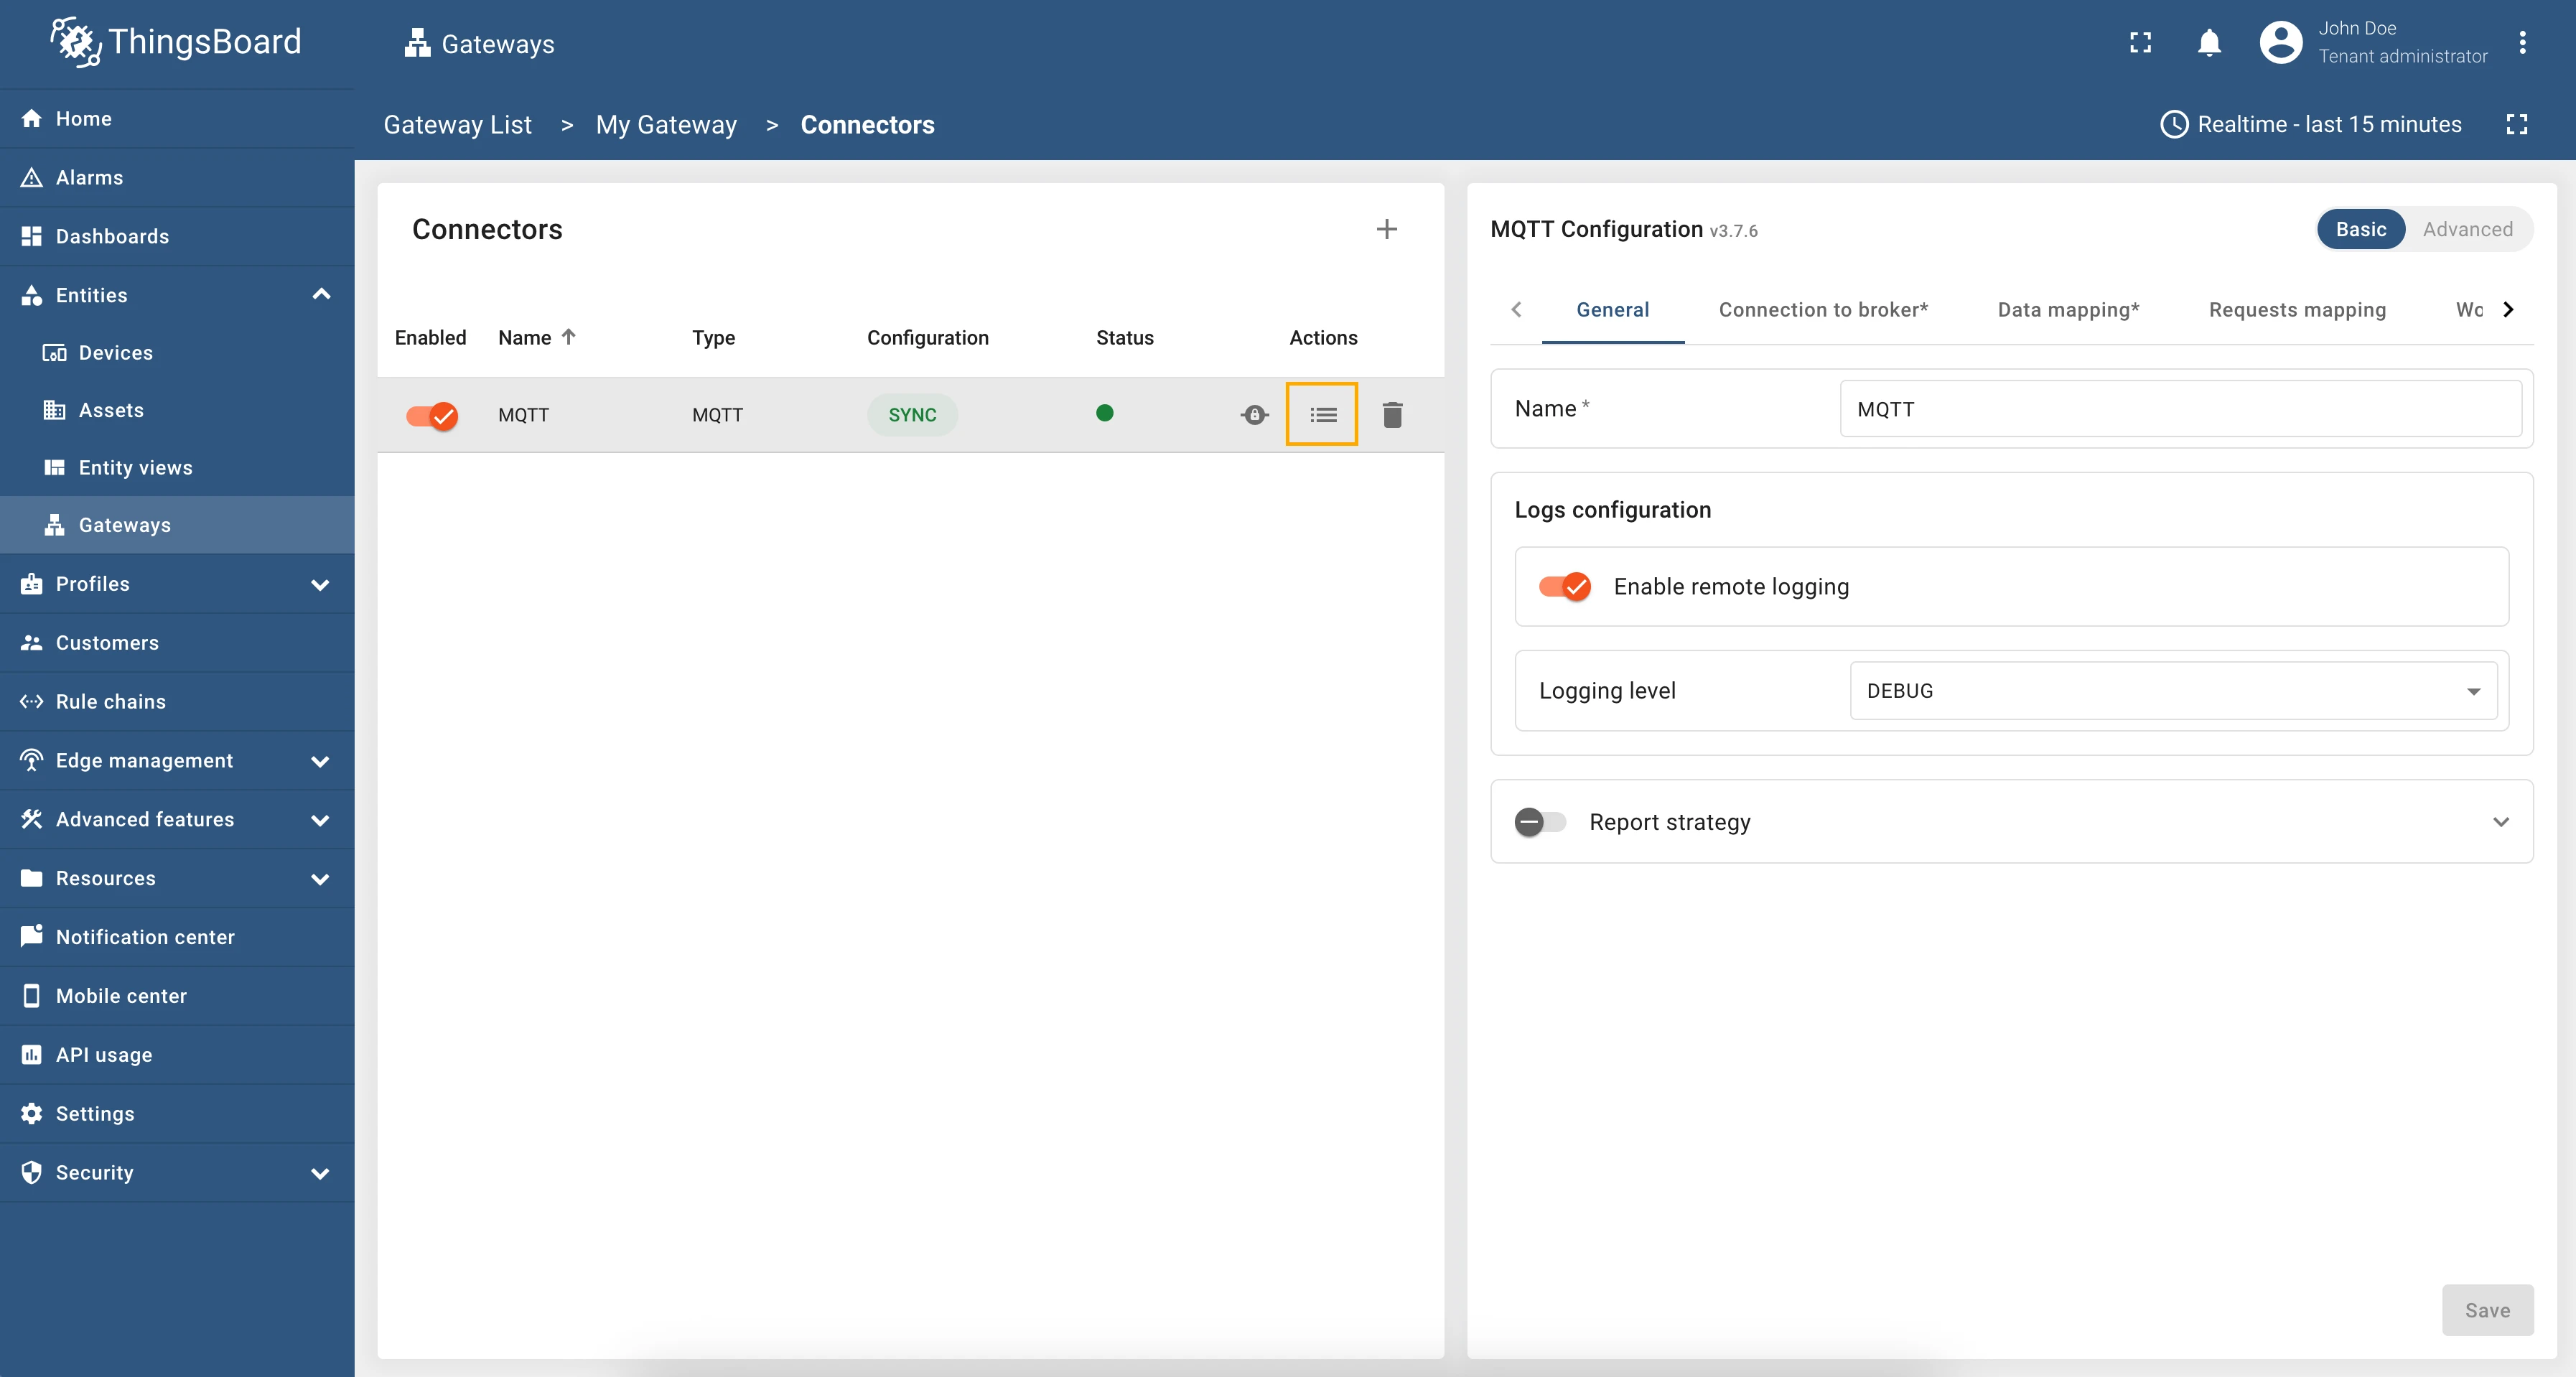
Click on logs icon to open connector logs page.
-
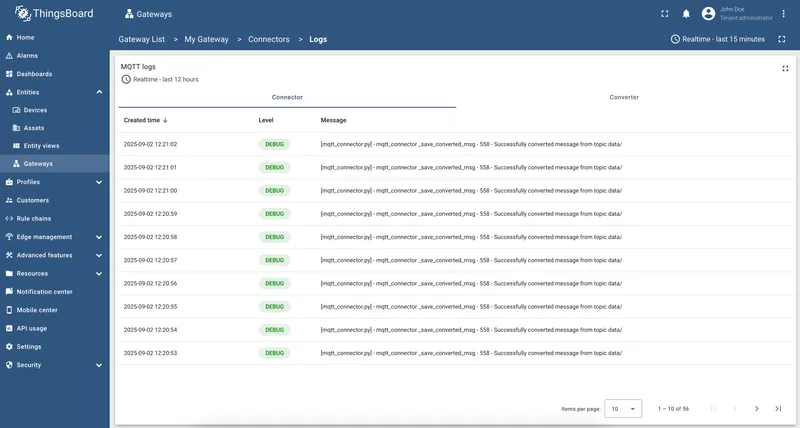
You can see the Logs table that consists of Created time, Level and Message columns.
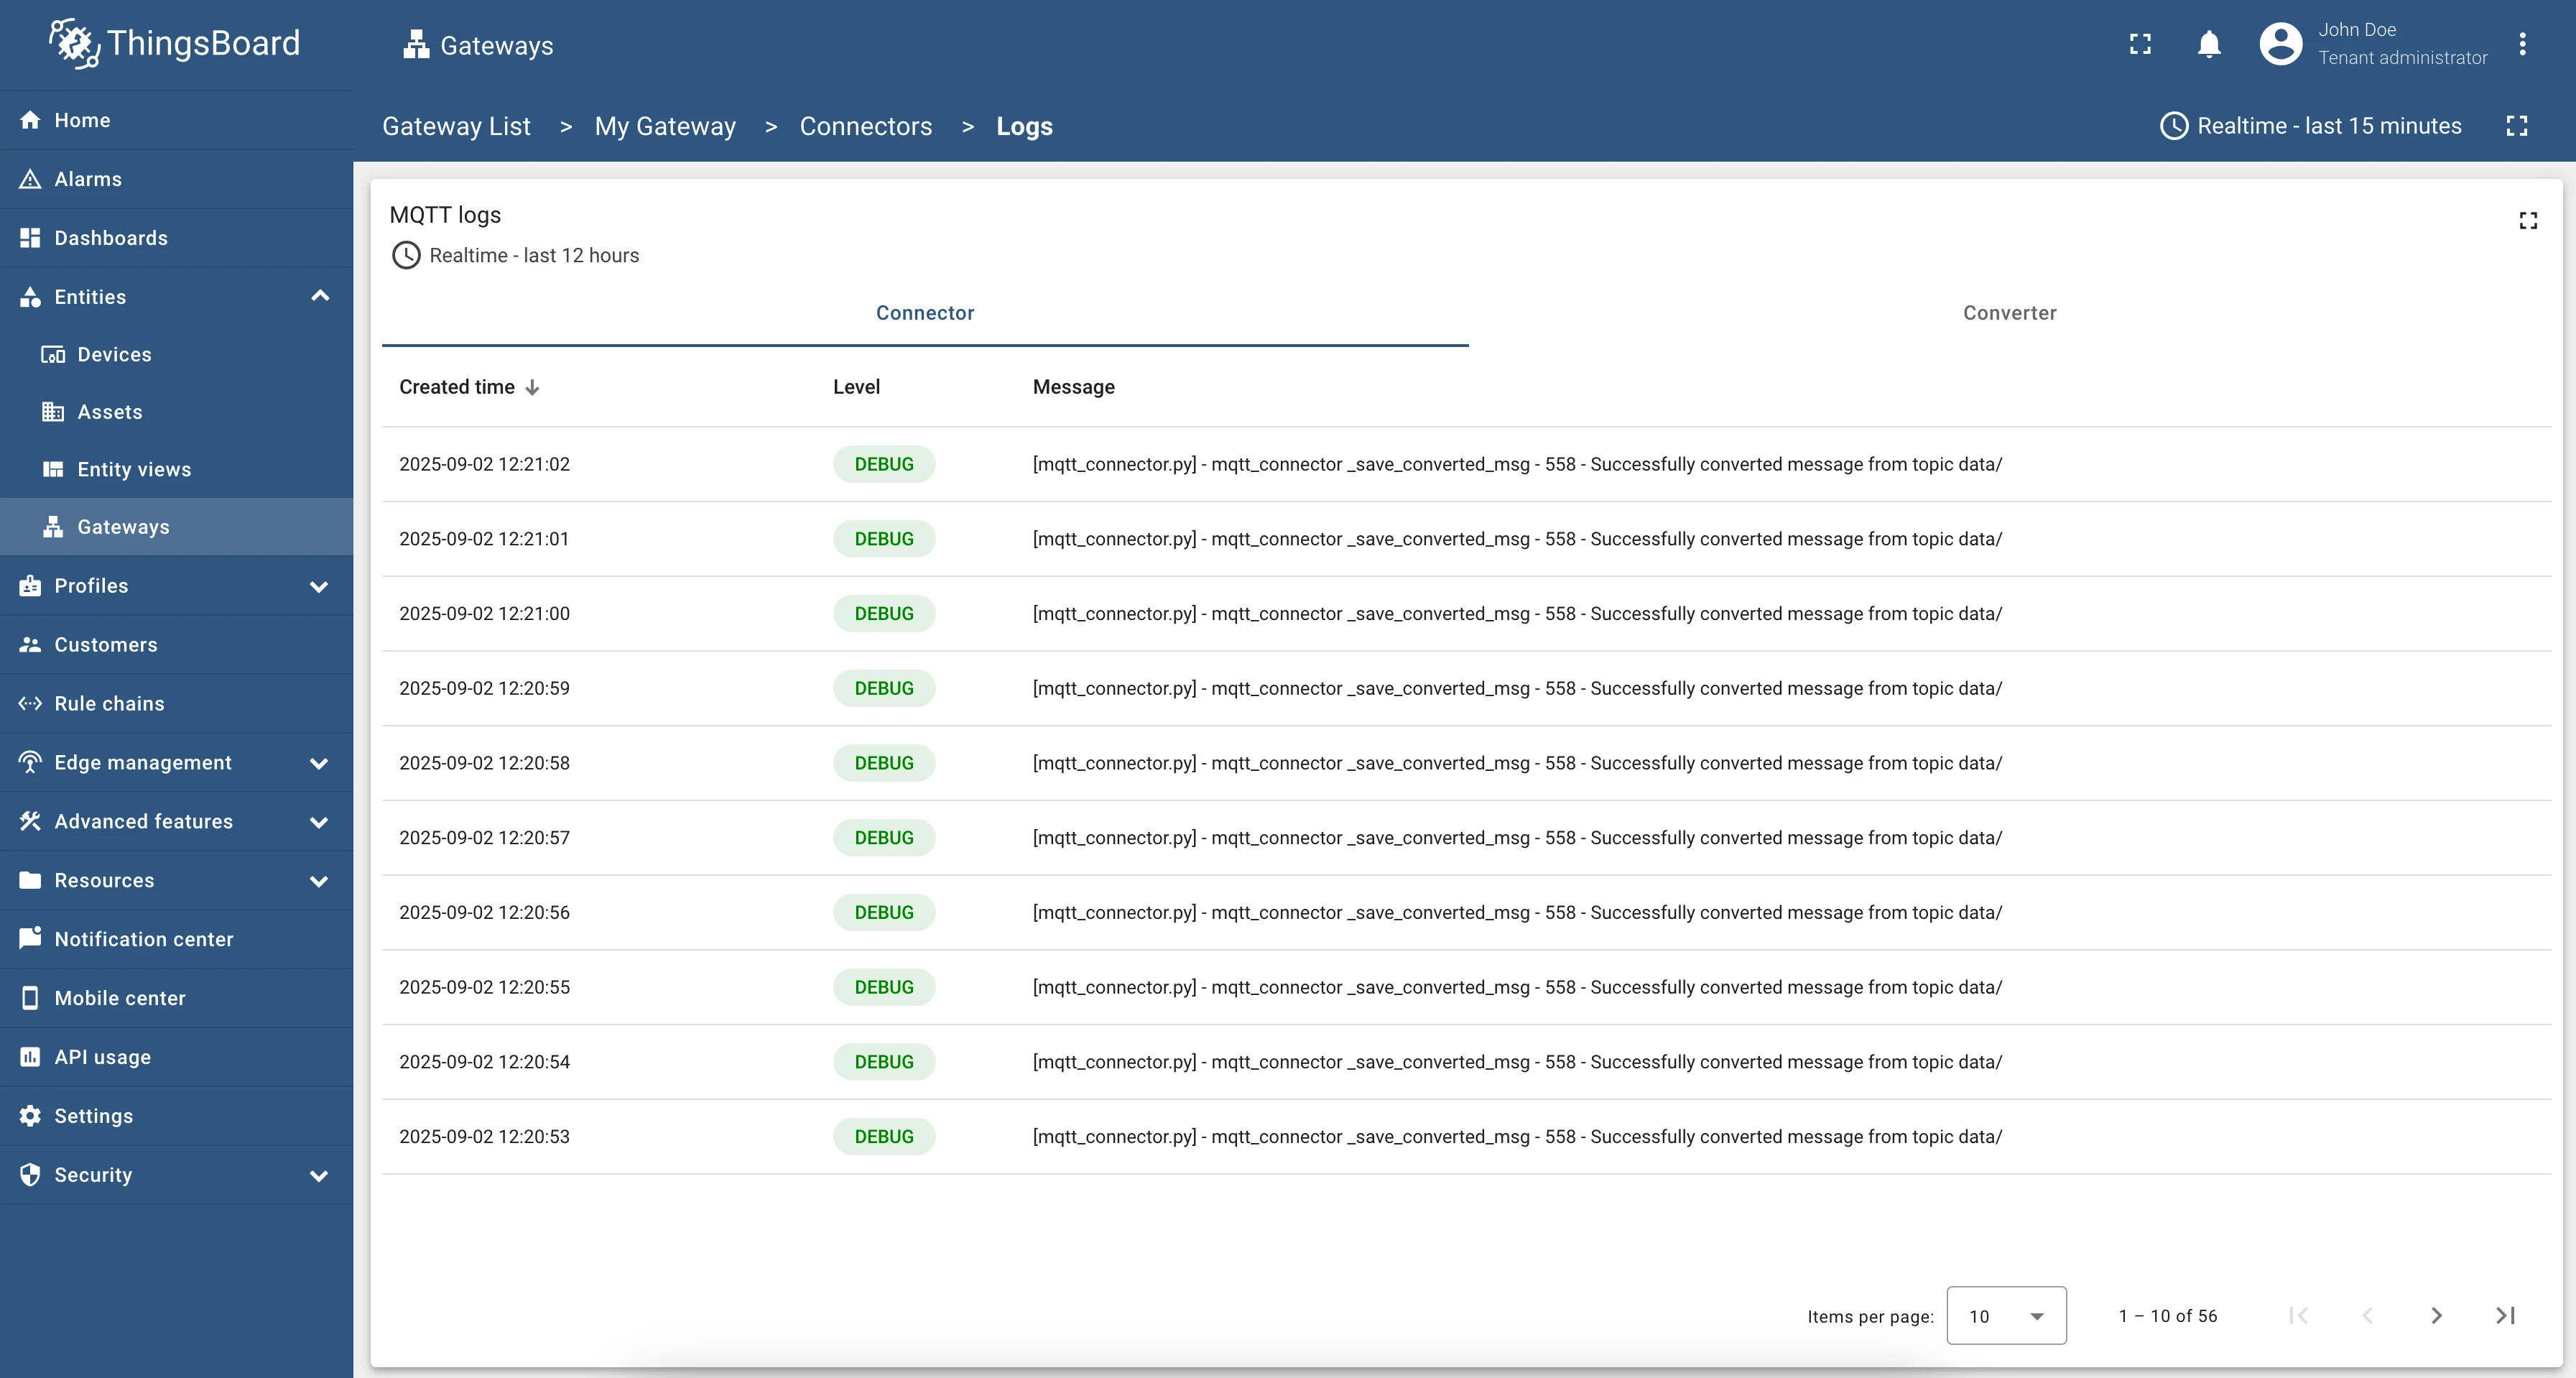
For now, the gateway is ready to process data through the newly created and configured MQTT connector.
Let’s add a Modbus connector, which will read some data from the demo slave to the created gateway.
Setup demo server
Section titled “Setup demo server”As a demo simulation slave, we will use a Docker image, that can be installed and run using the following command:
docker run -it -p 5021:5021 thingsboard/tb-gw-modbus-server:latestAfter running docker image, you can see the following logs in your terminal:

Setup connector
Section titled “Setup connector”To create a connector with the default configuration, follow these steps:
-
Click on Connectors configuration button on the right panel.
-
Click the + Add connector button.
-
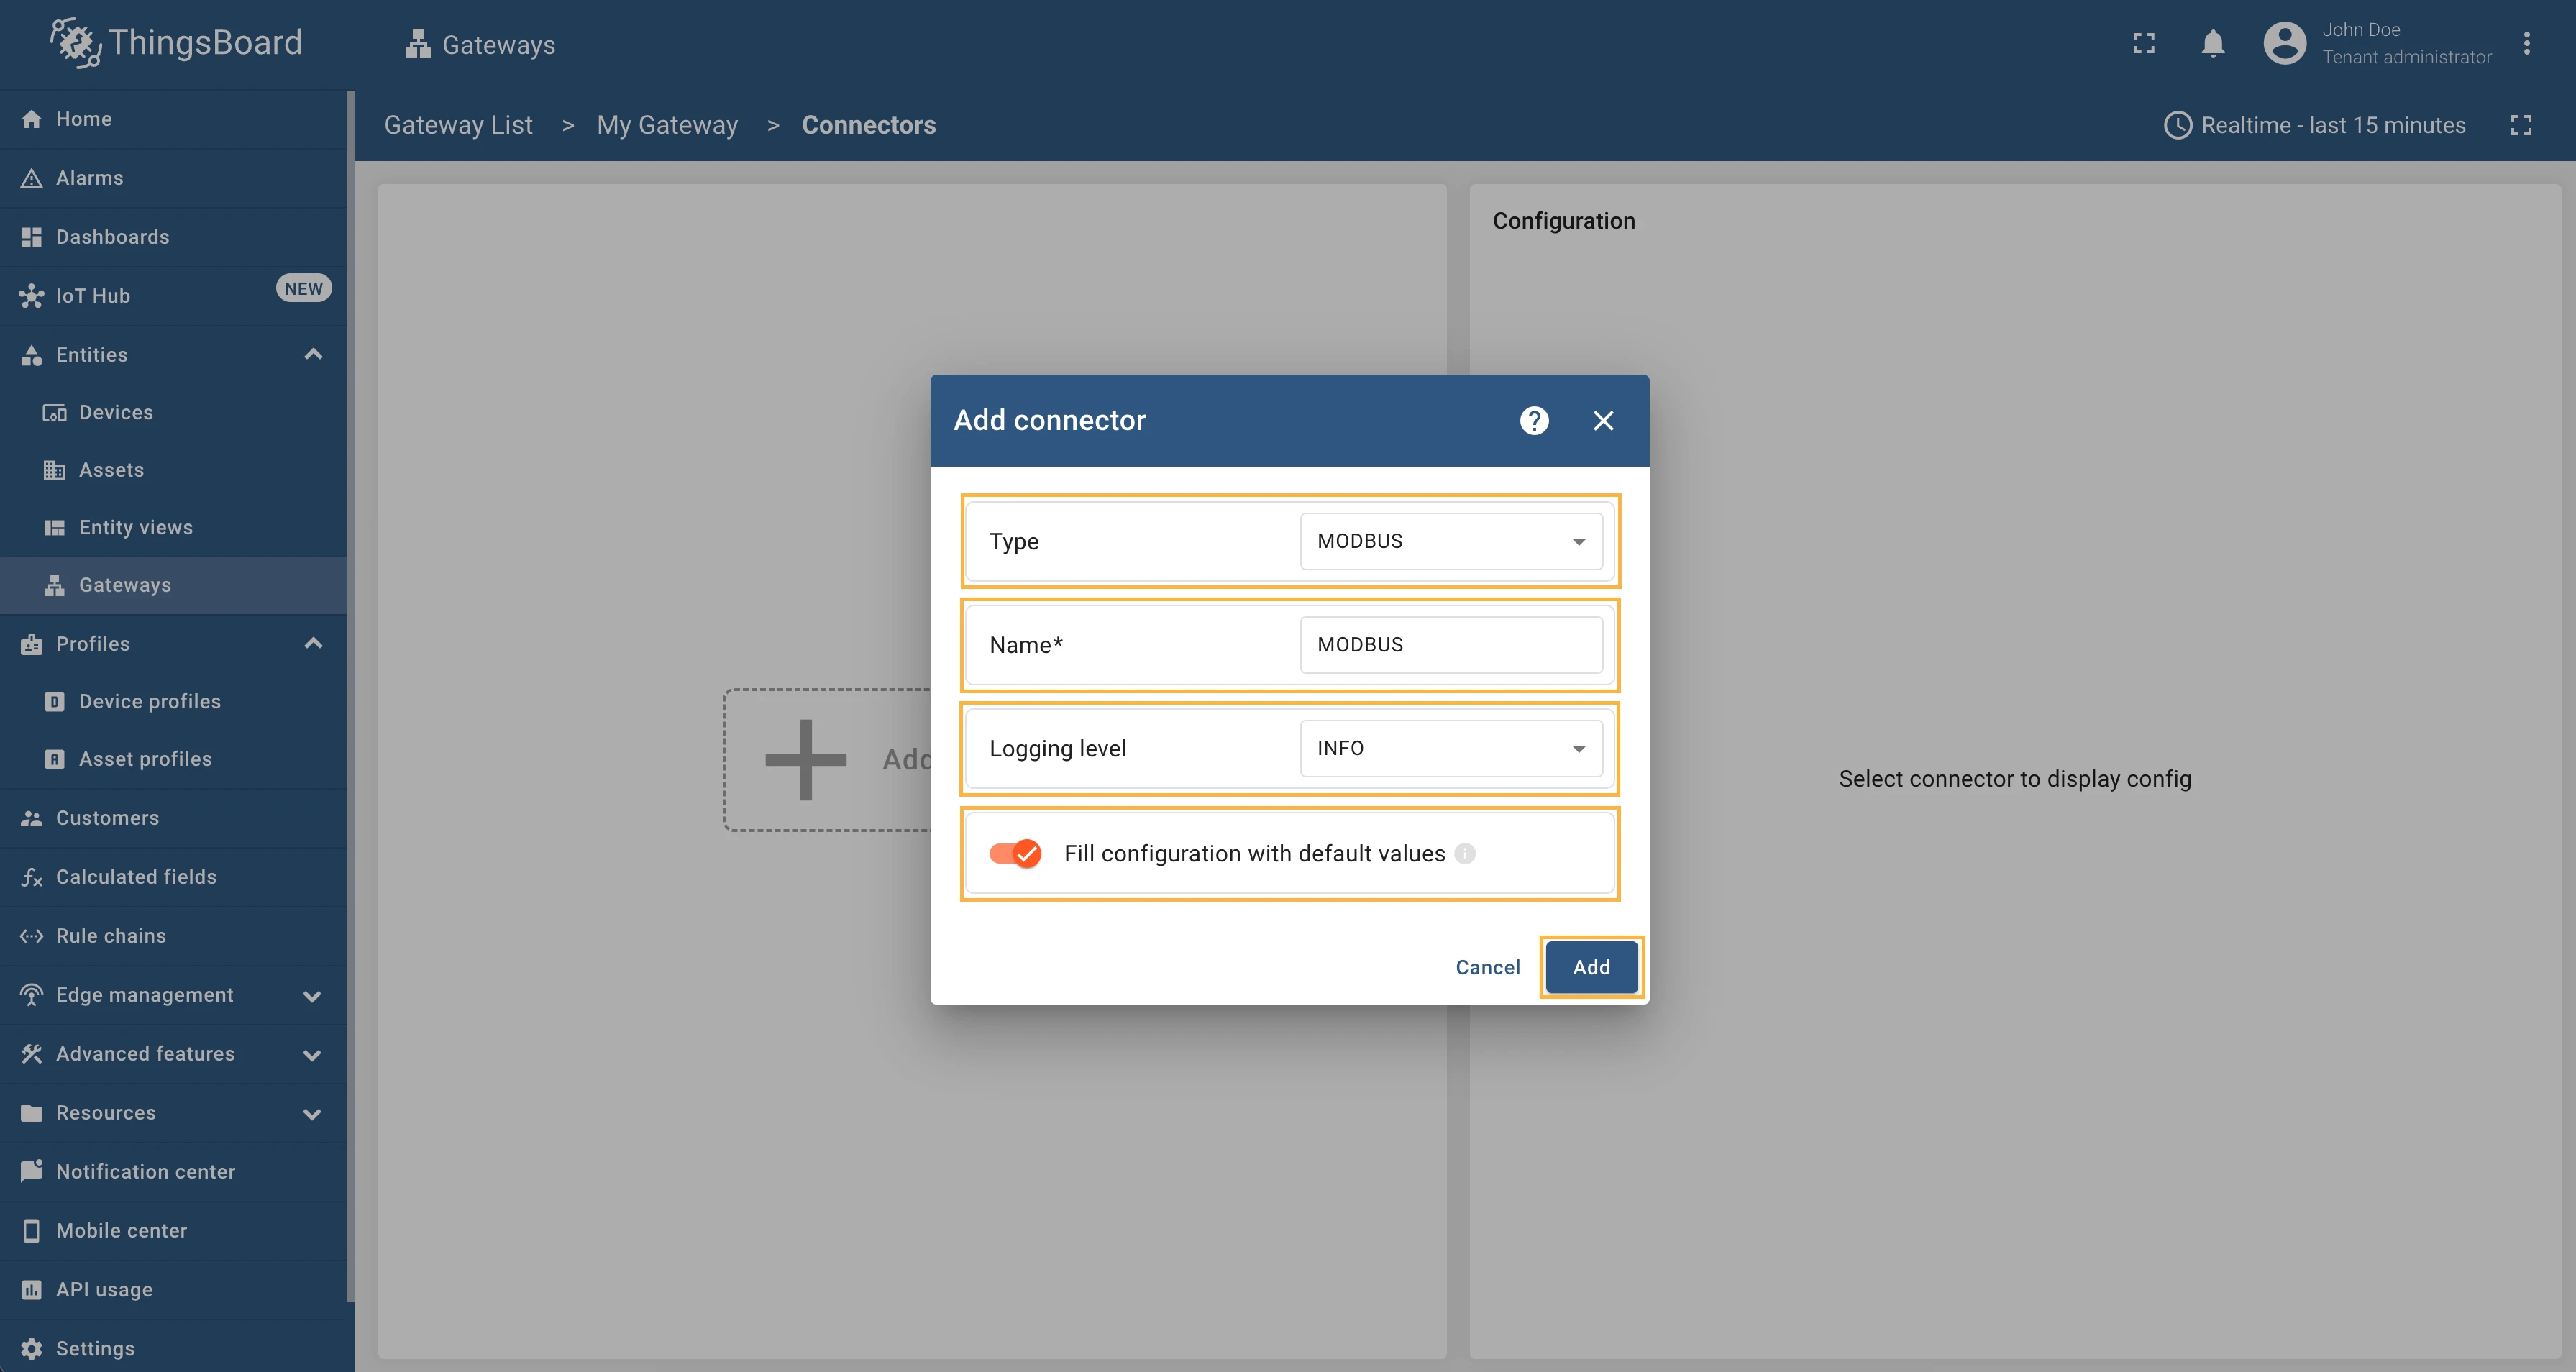
Choose MODBUS connector type from the dropdown, fill in the Name field, set the Logging level to INFO, leave the Fill configuration with default values option enabled, and click the Add button.
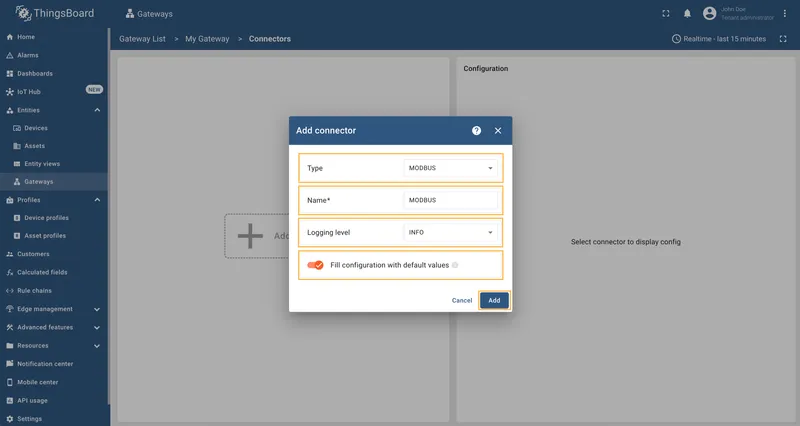
-
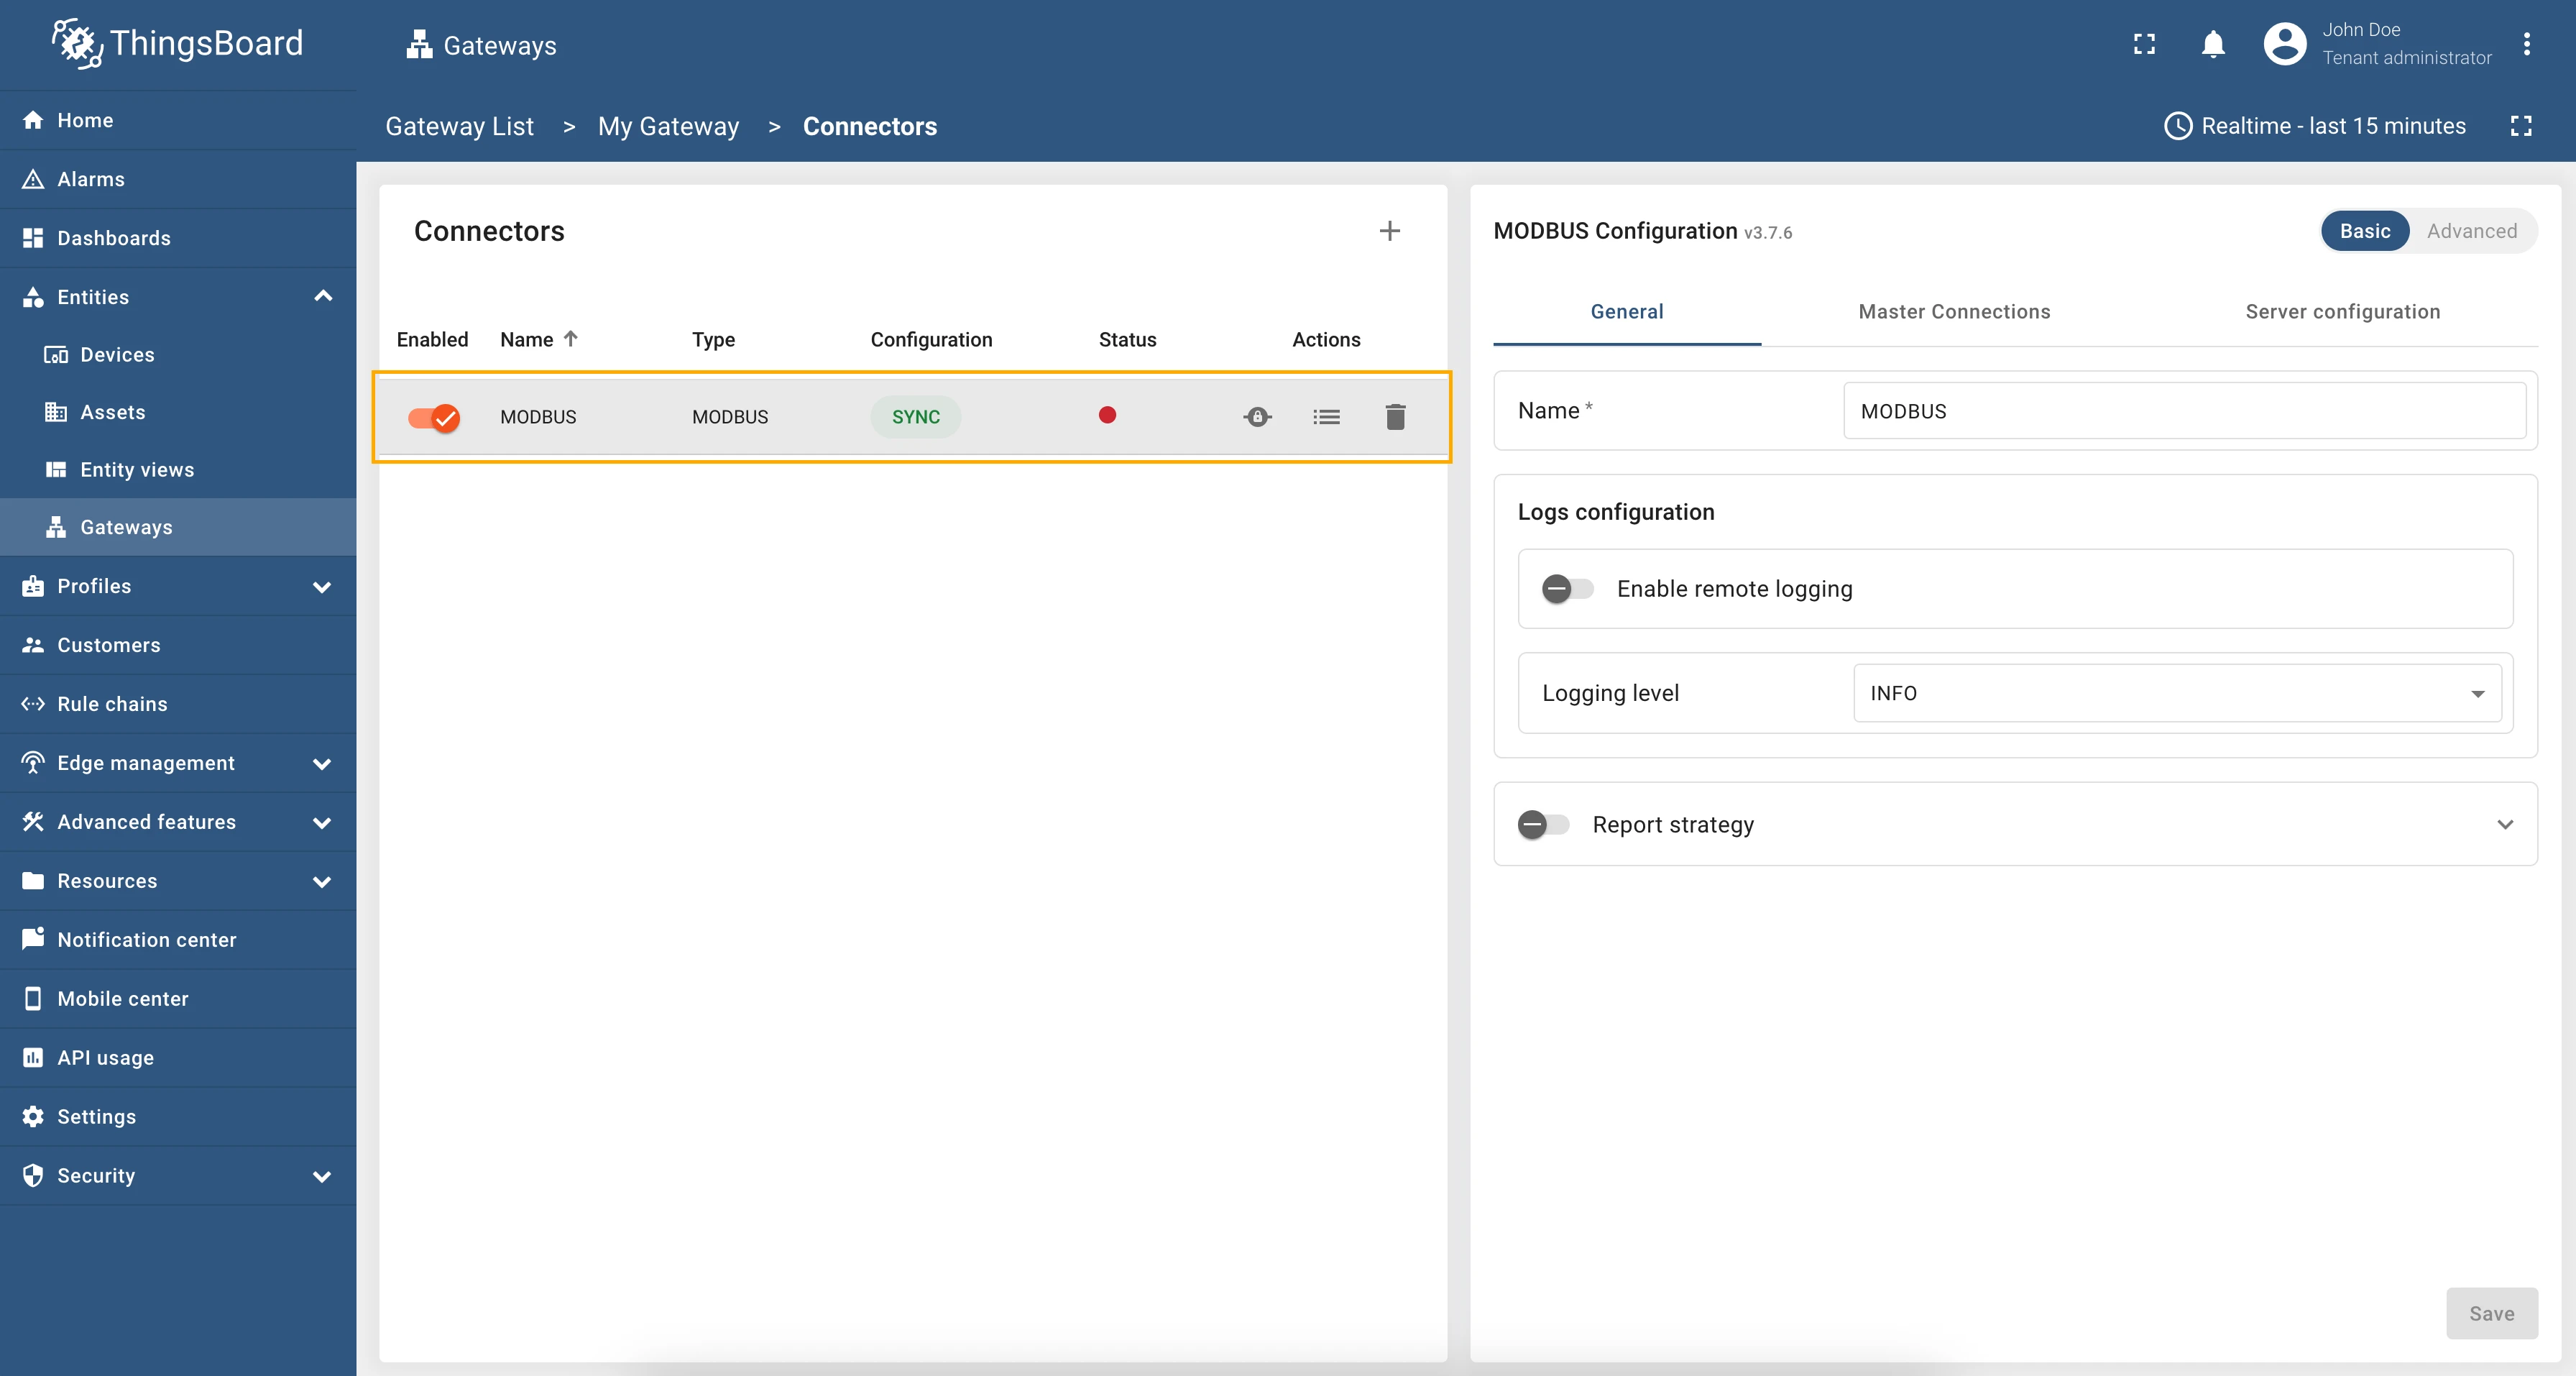
The connector is created with the default configuration.
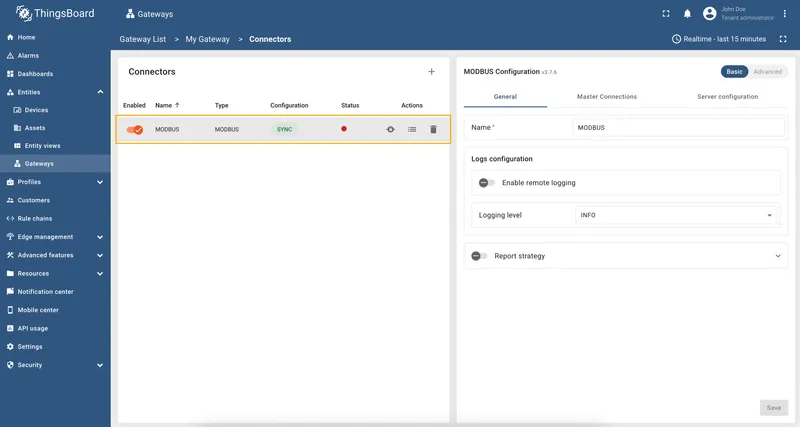
-
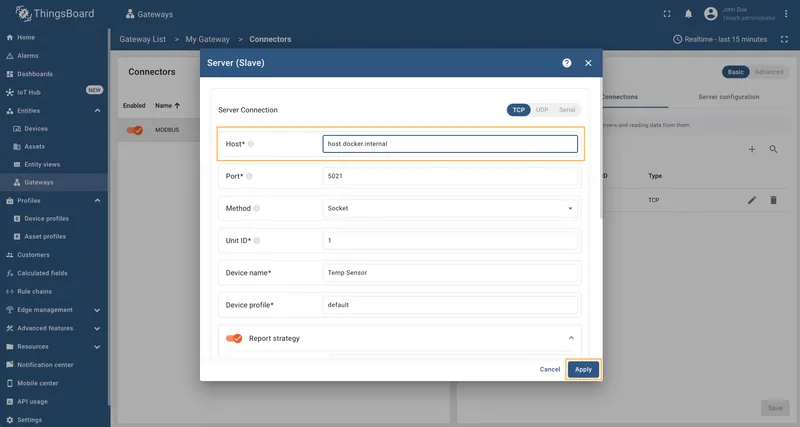
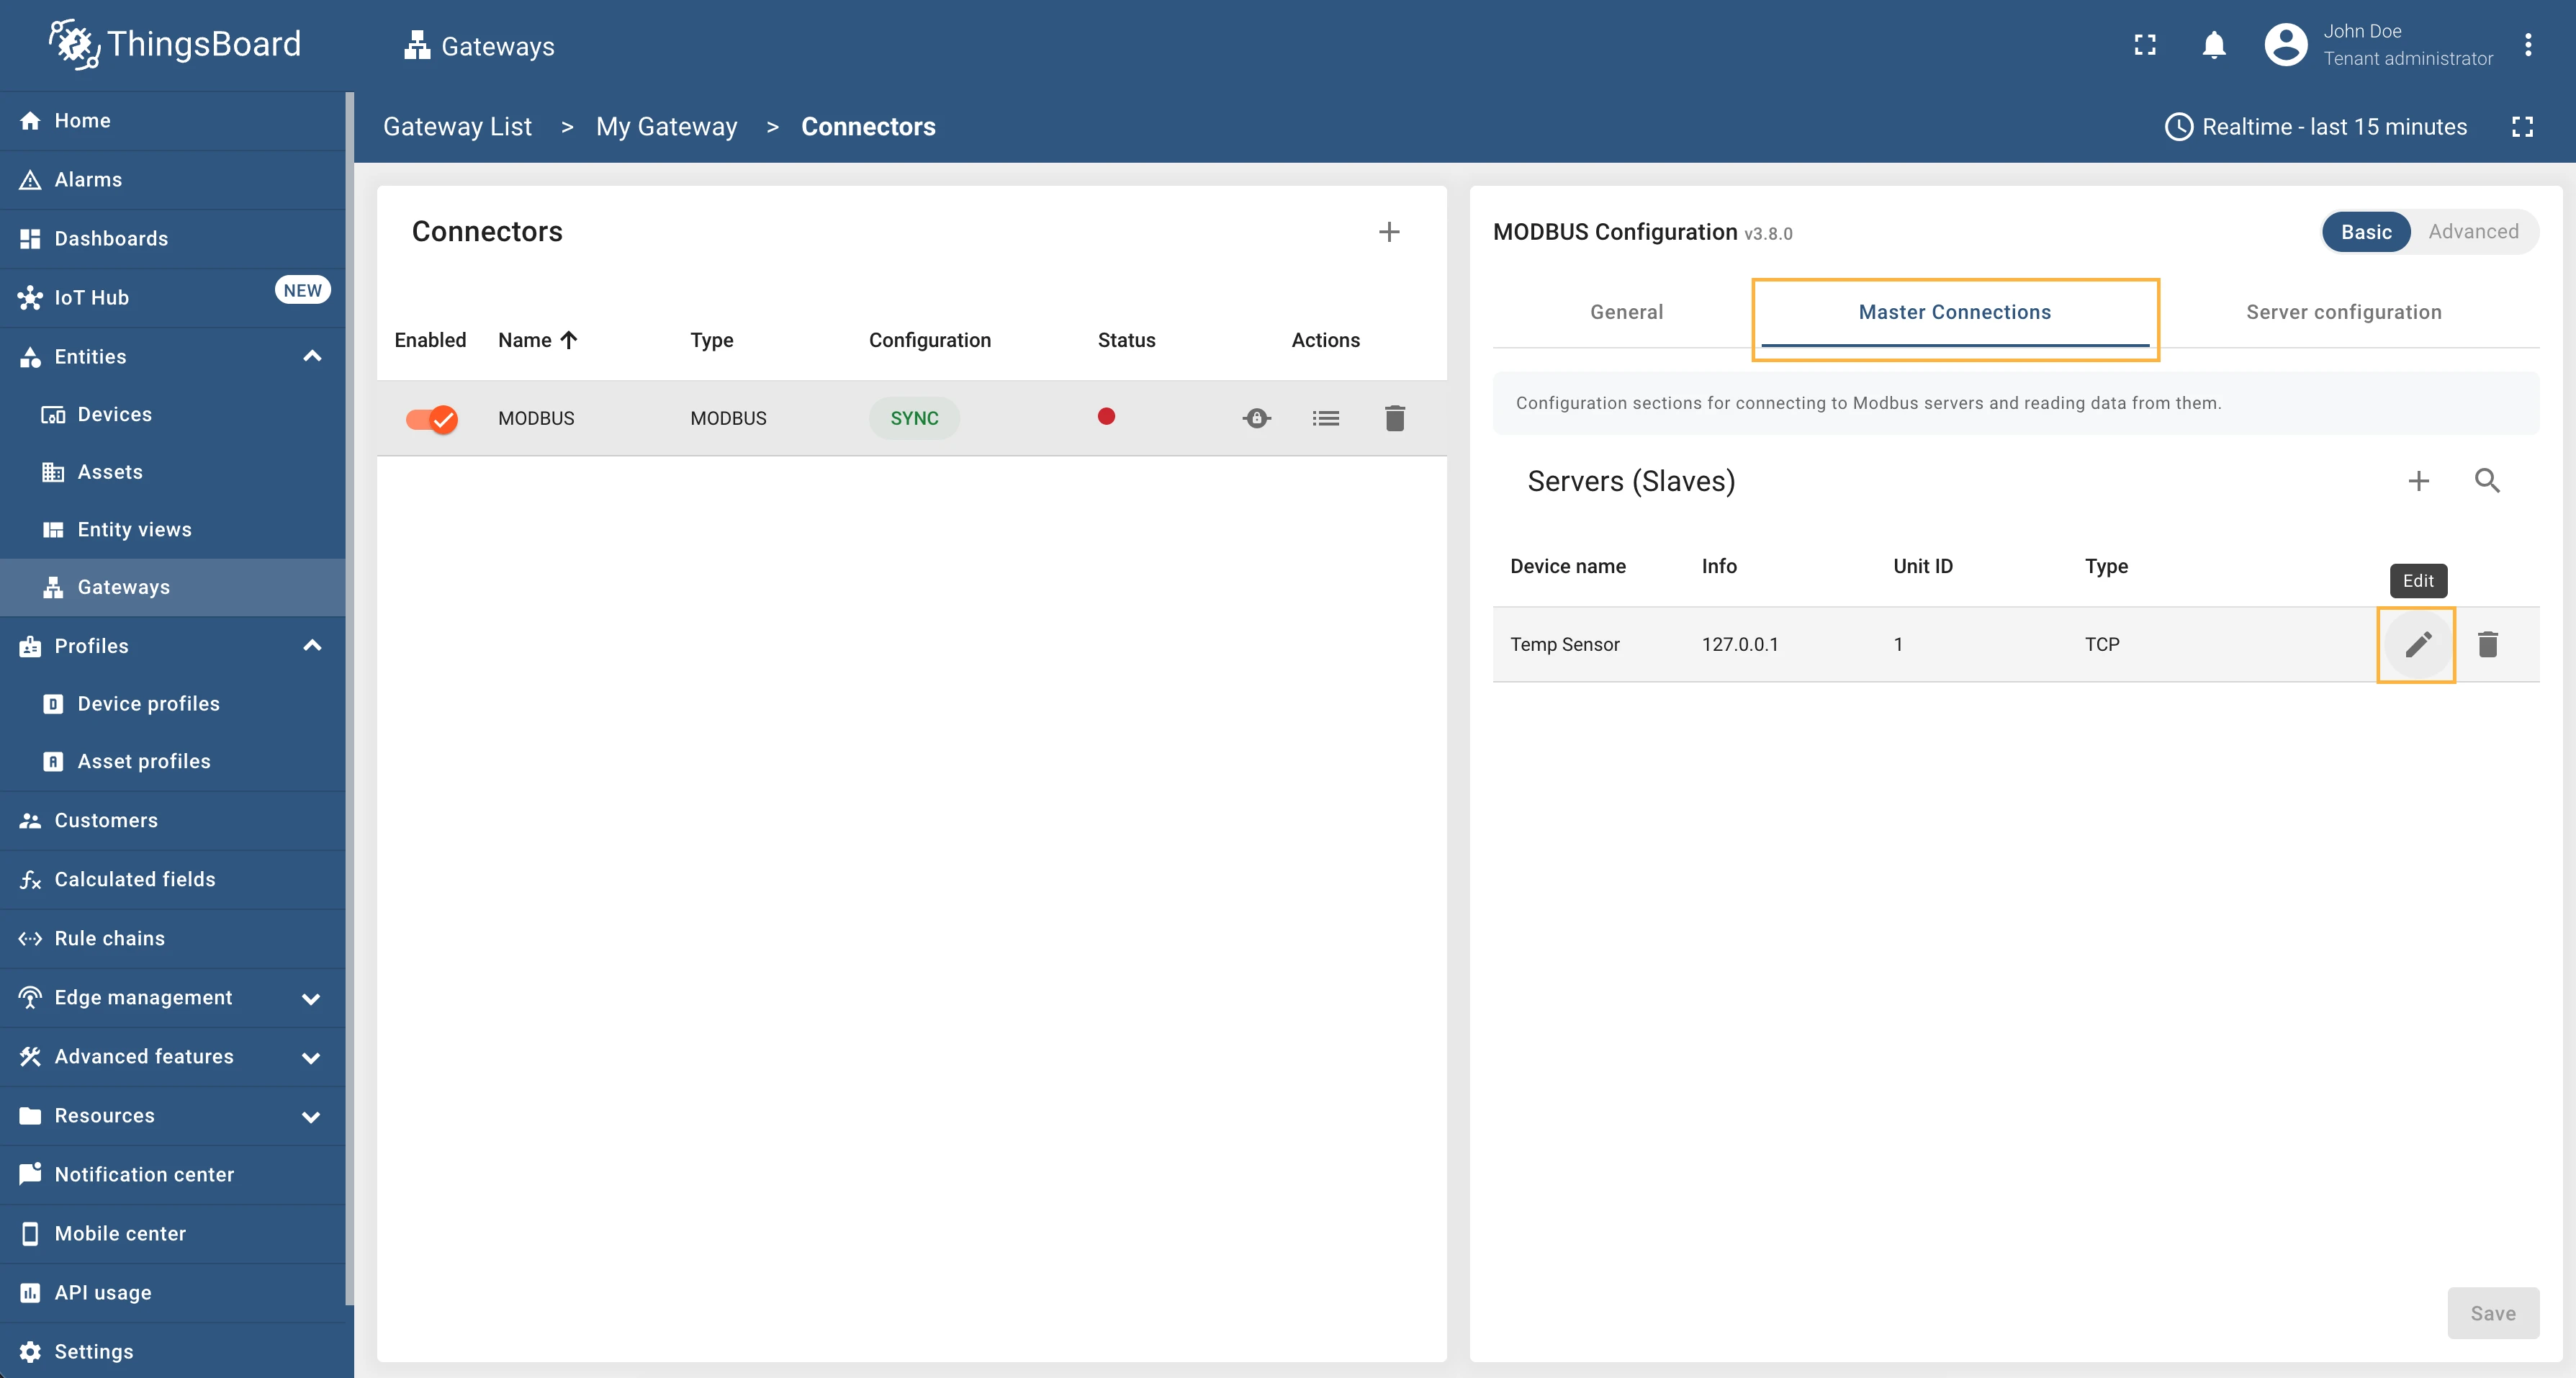
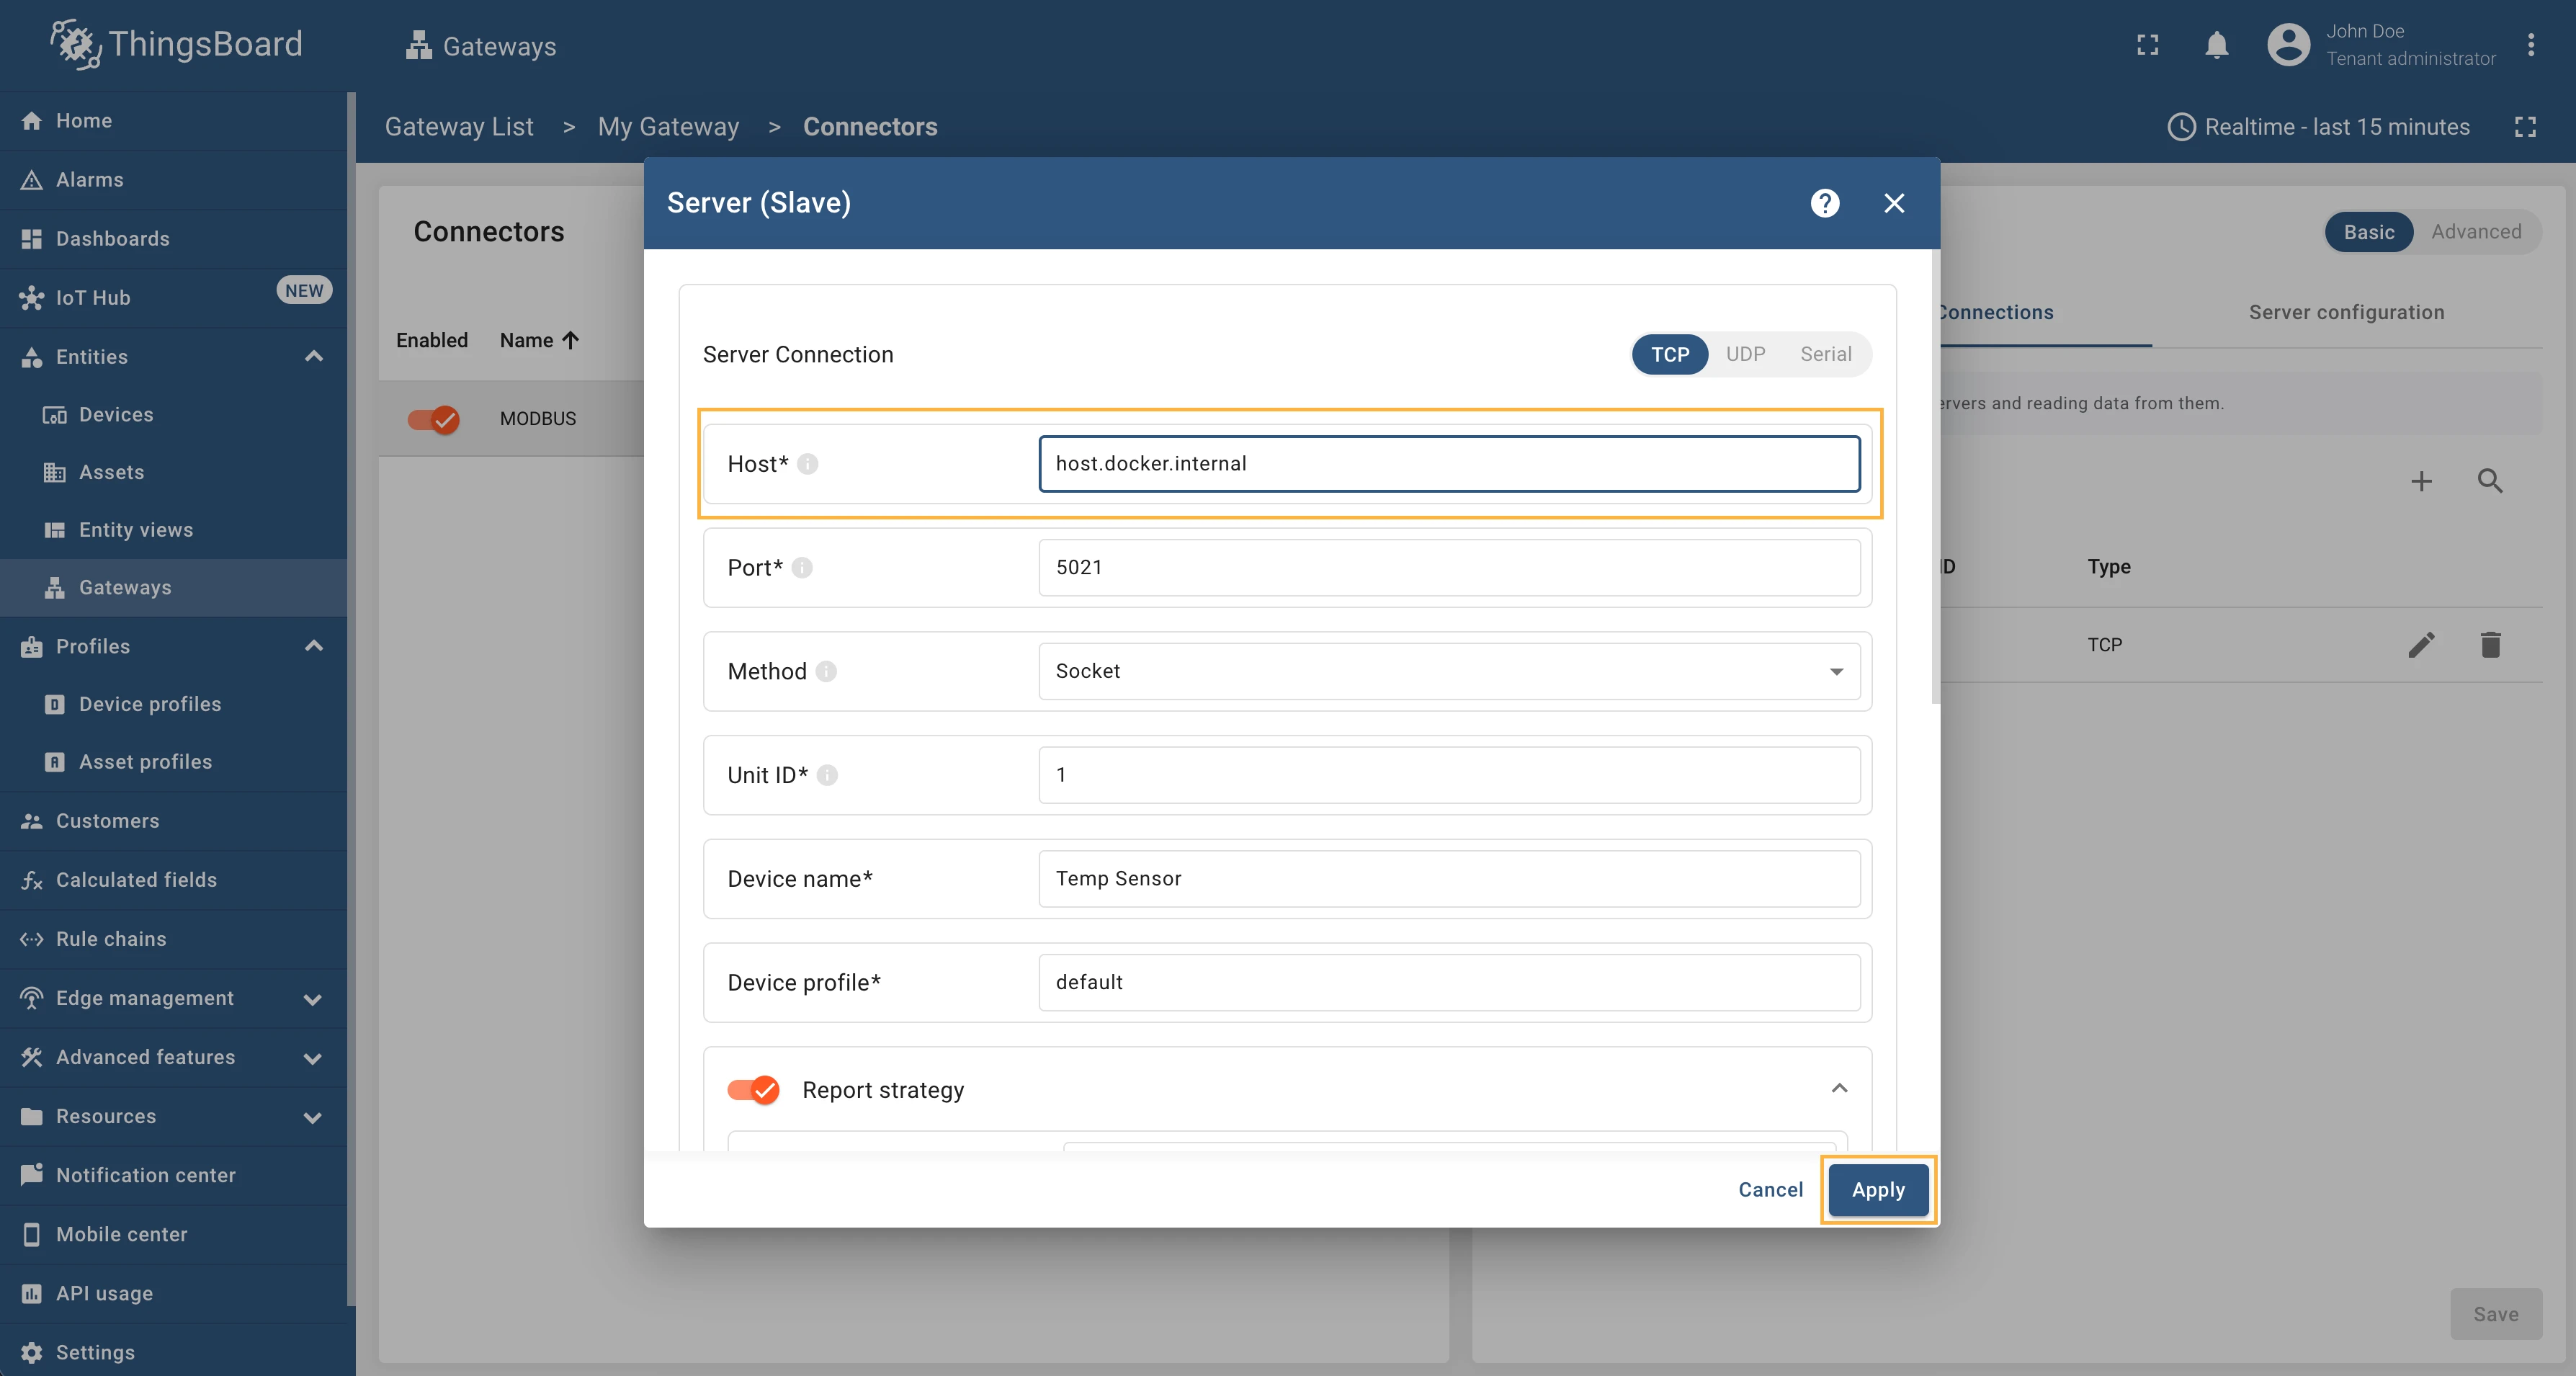
Let’s change default
127.0.0.1host tohost.docker.internal. Select “Basic” mode, then click on “Master Connections” tab, click on “pencil” icon and change the host tohost.docker.internal. Click the “Apply” button and then “Save” button to apply changes.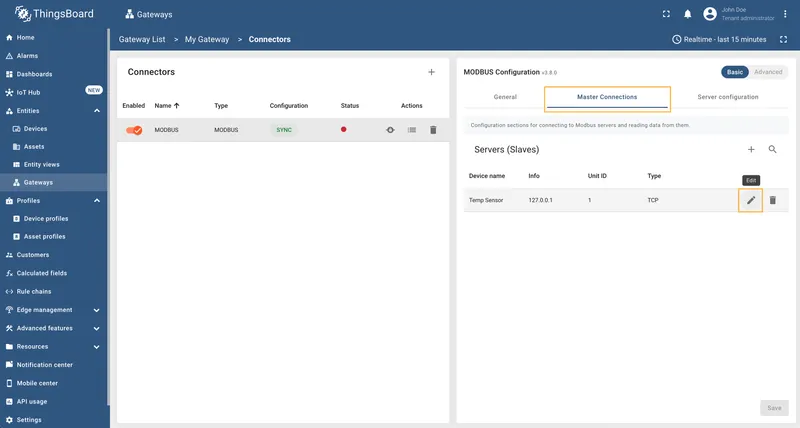
Also, you can see the connector logs to make sure that the connector works, for this purpose, follow these steps:
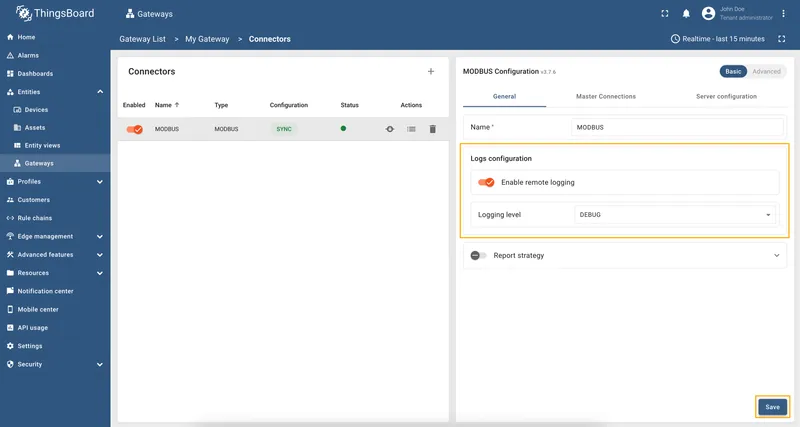
-
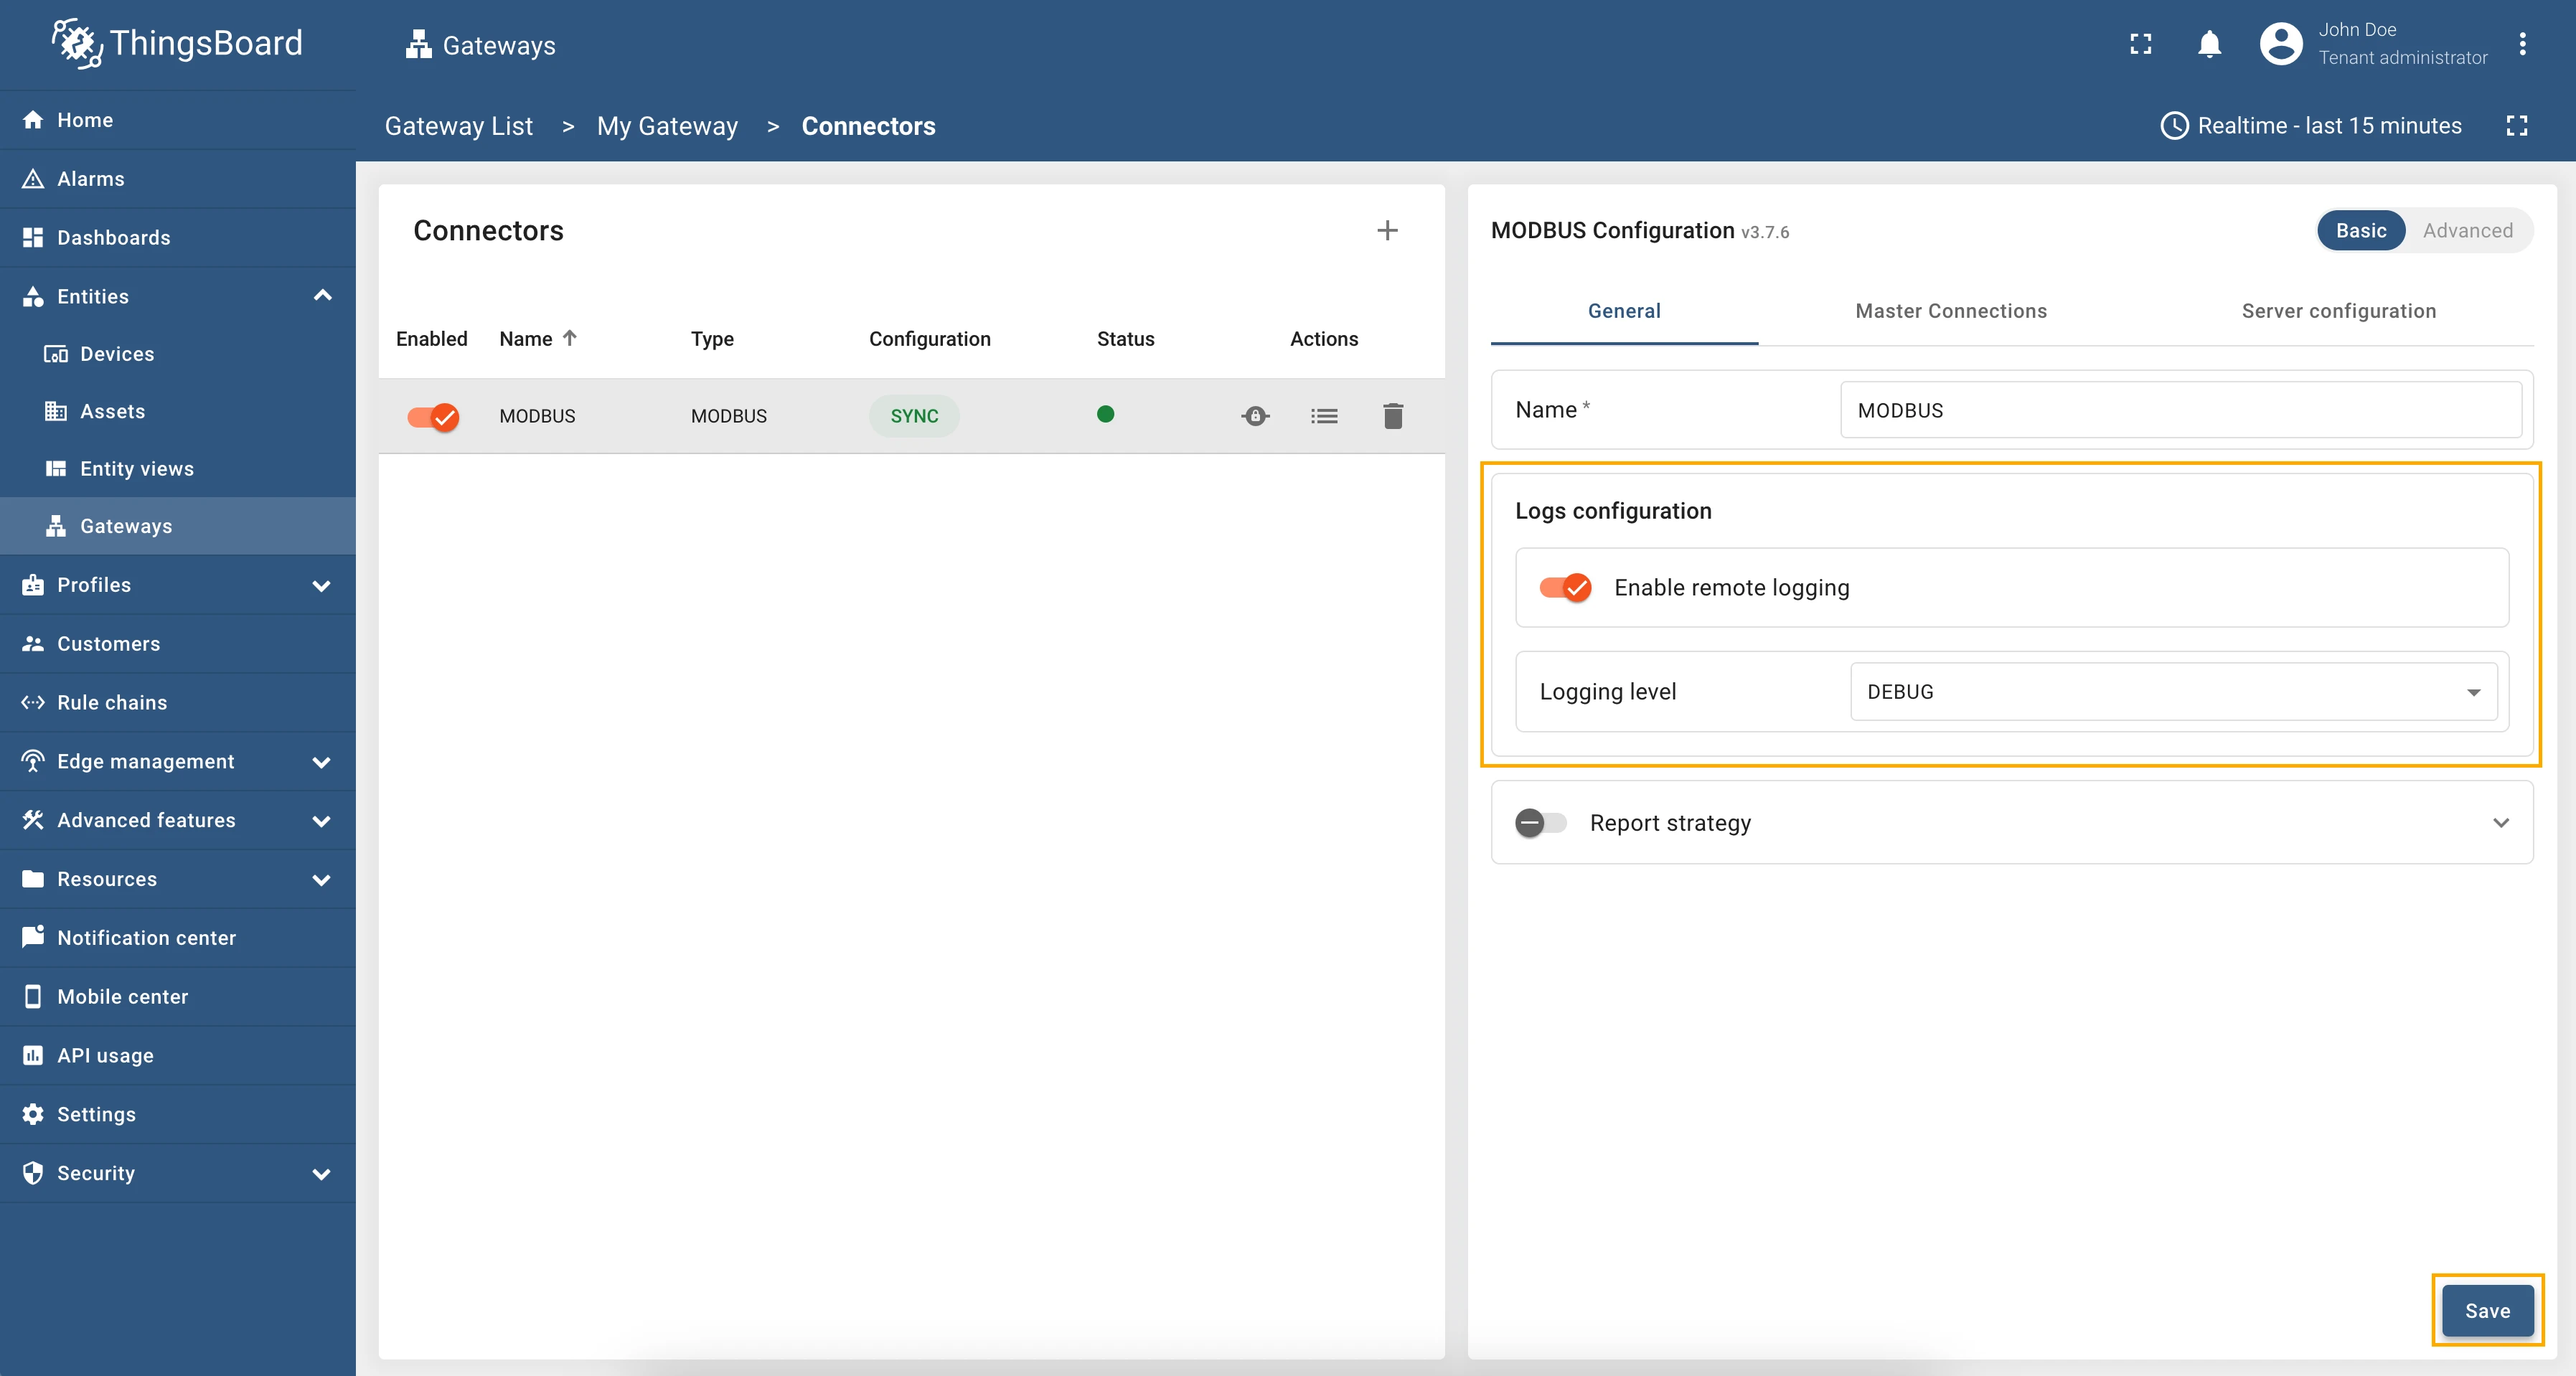
In the General connector tab enable remote logging by turning on the Enable remote logging toggle. Choose DEBUG in the Logging level drop-down menu. Click on the Save button to apply changes.
-
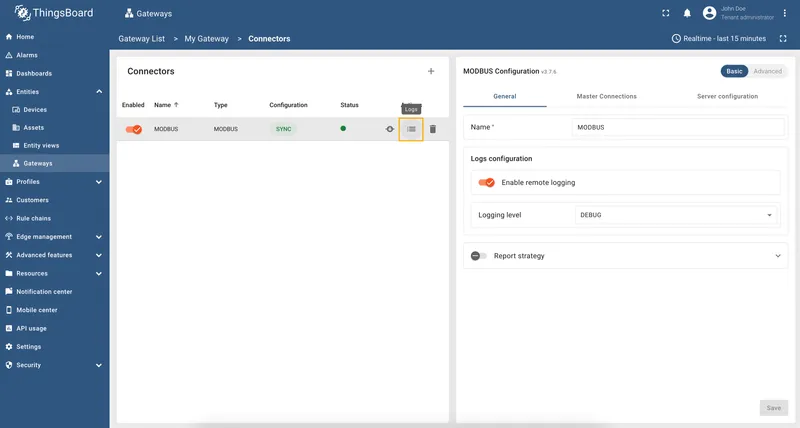
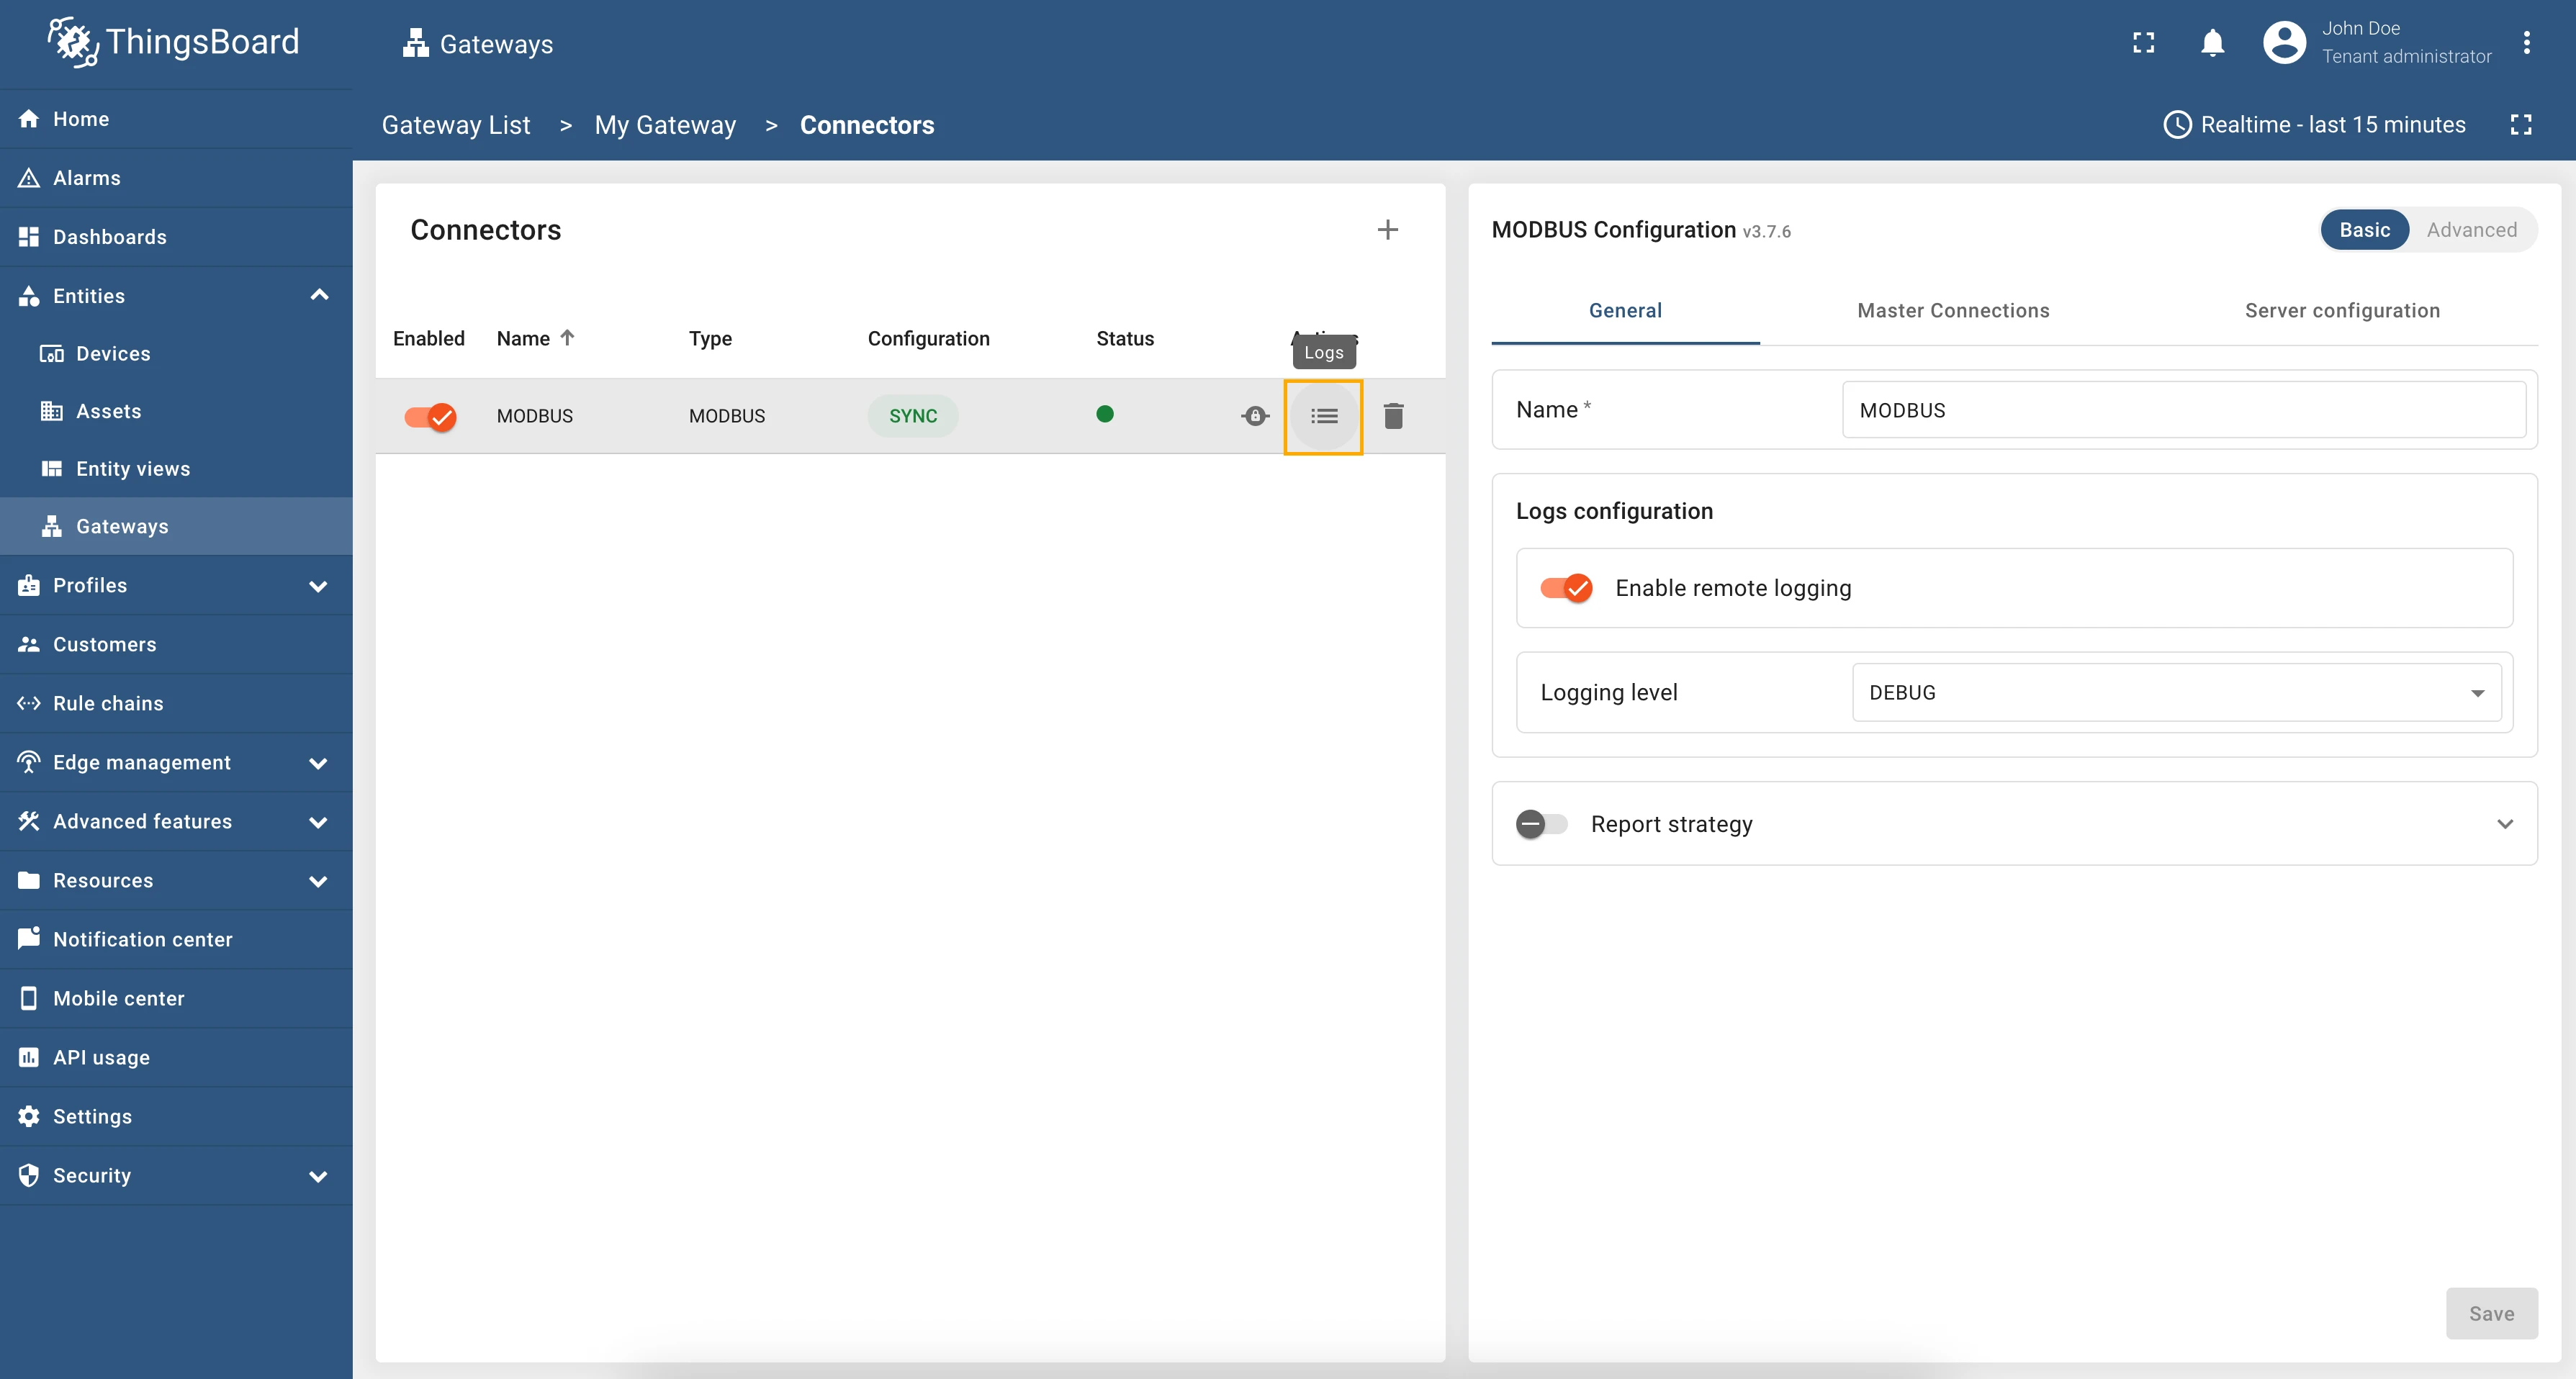
Click on logs icon to open connector logs page.
-
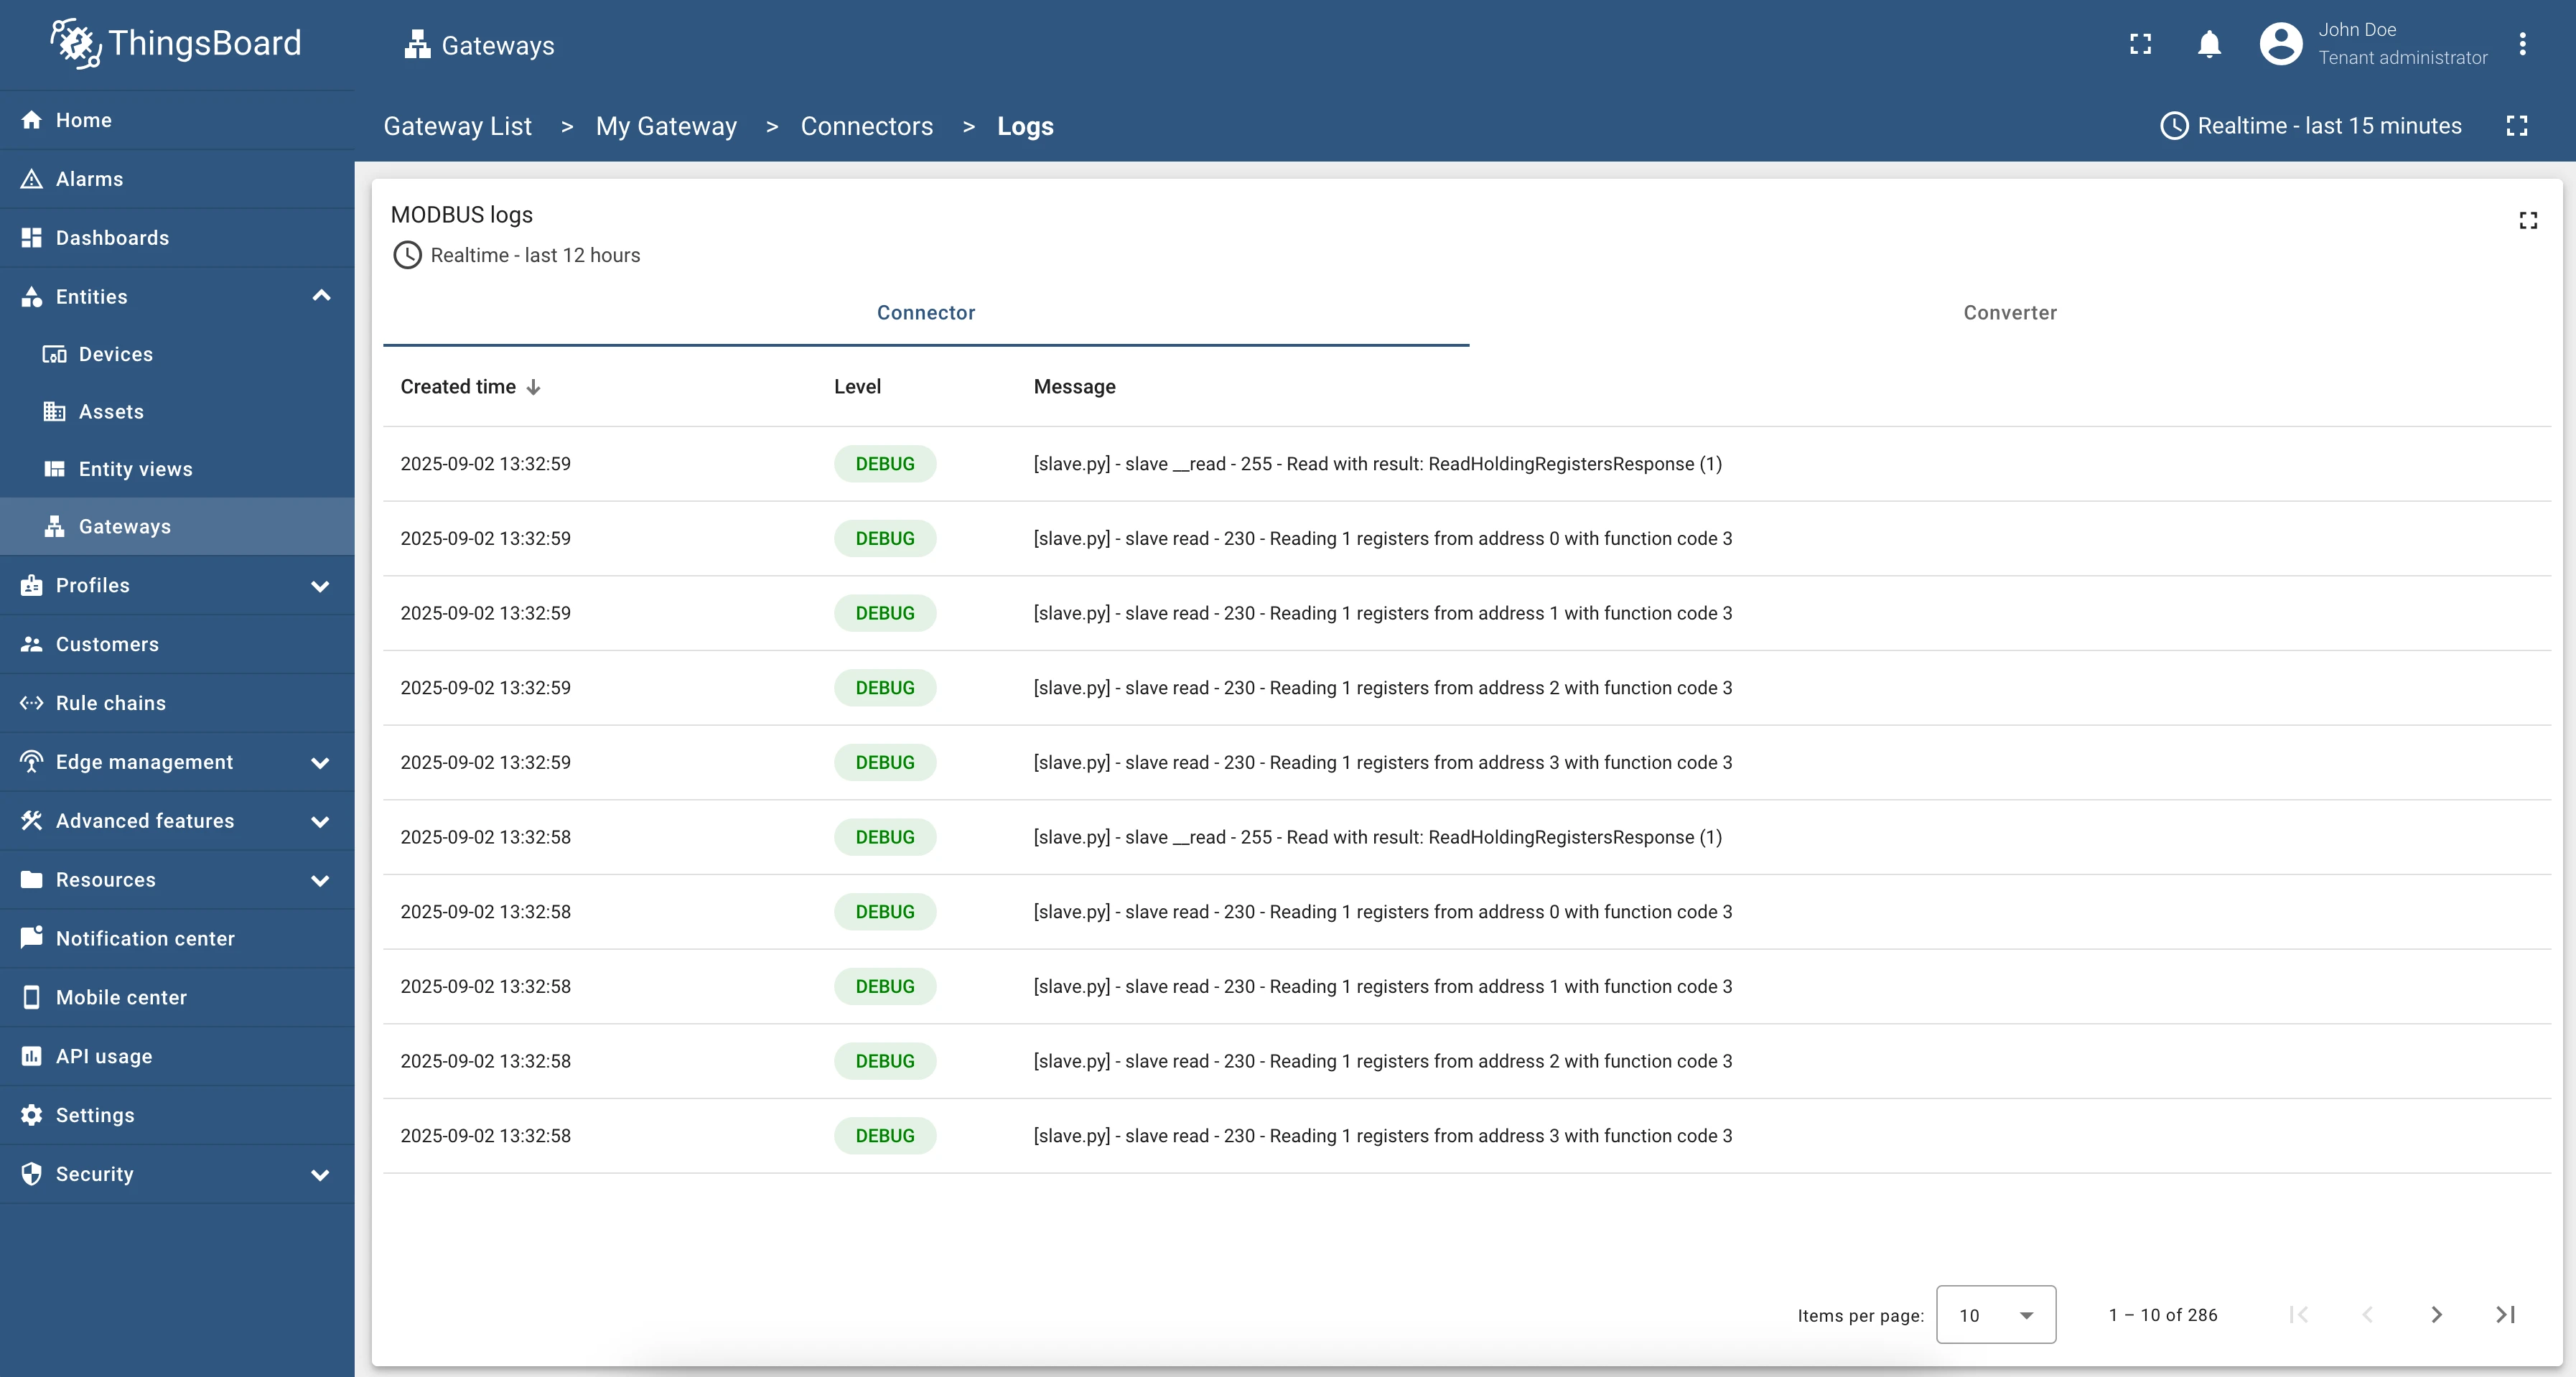
You can see the Logs table that consists of Created time, Level and Message columns.
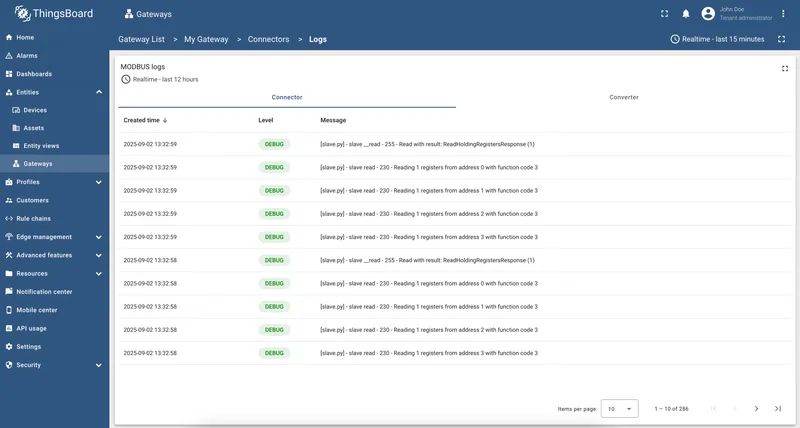
For now, the gateway is ready to process data through the newly created and configured Modbus connector.
Let’s add an OPC-UA connector, which will read some data from the demo server to the created gateway.
Setup demo server
Section titled “Setup demo server”As a demo simulation server, we will use a Docker image, that can be installed and run using the following command:
docker run -it -p 4840:4840 thingsboard/tb-gw-opcua-server:latestAfter running docker image, you can see the following logs in your terminal:

Setup connector
Section titled “Setup connector”To create a connector with the default configuration, follow these steps:
-
Click on Connectors configuration button on the right panel.
-
Click the + Add connector button.
-
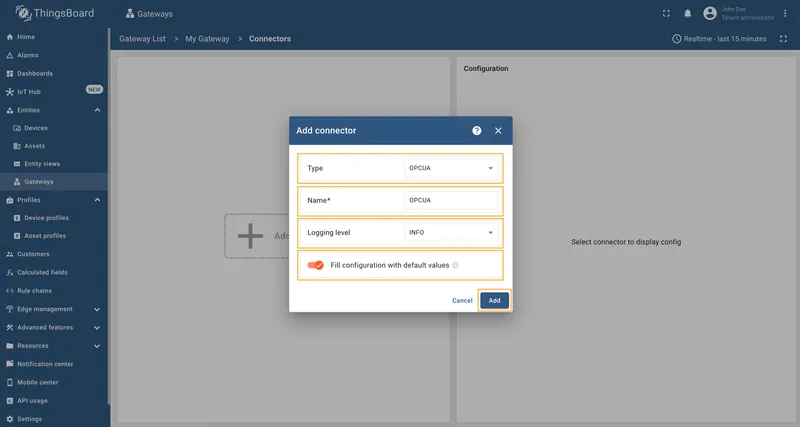
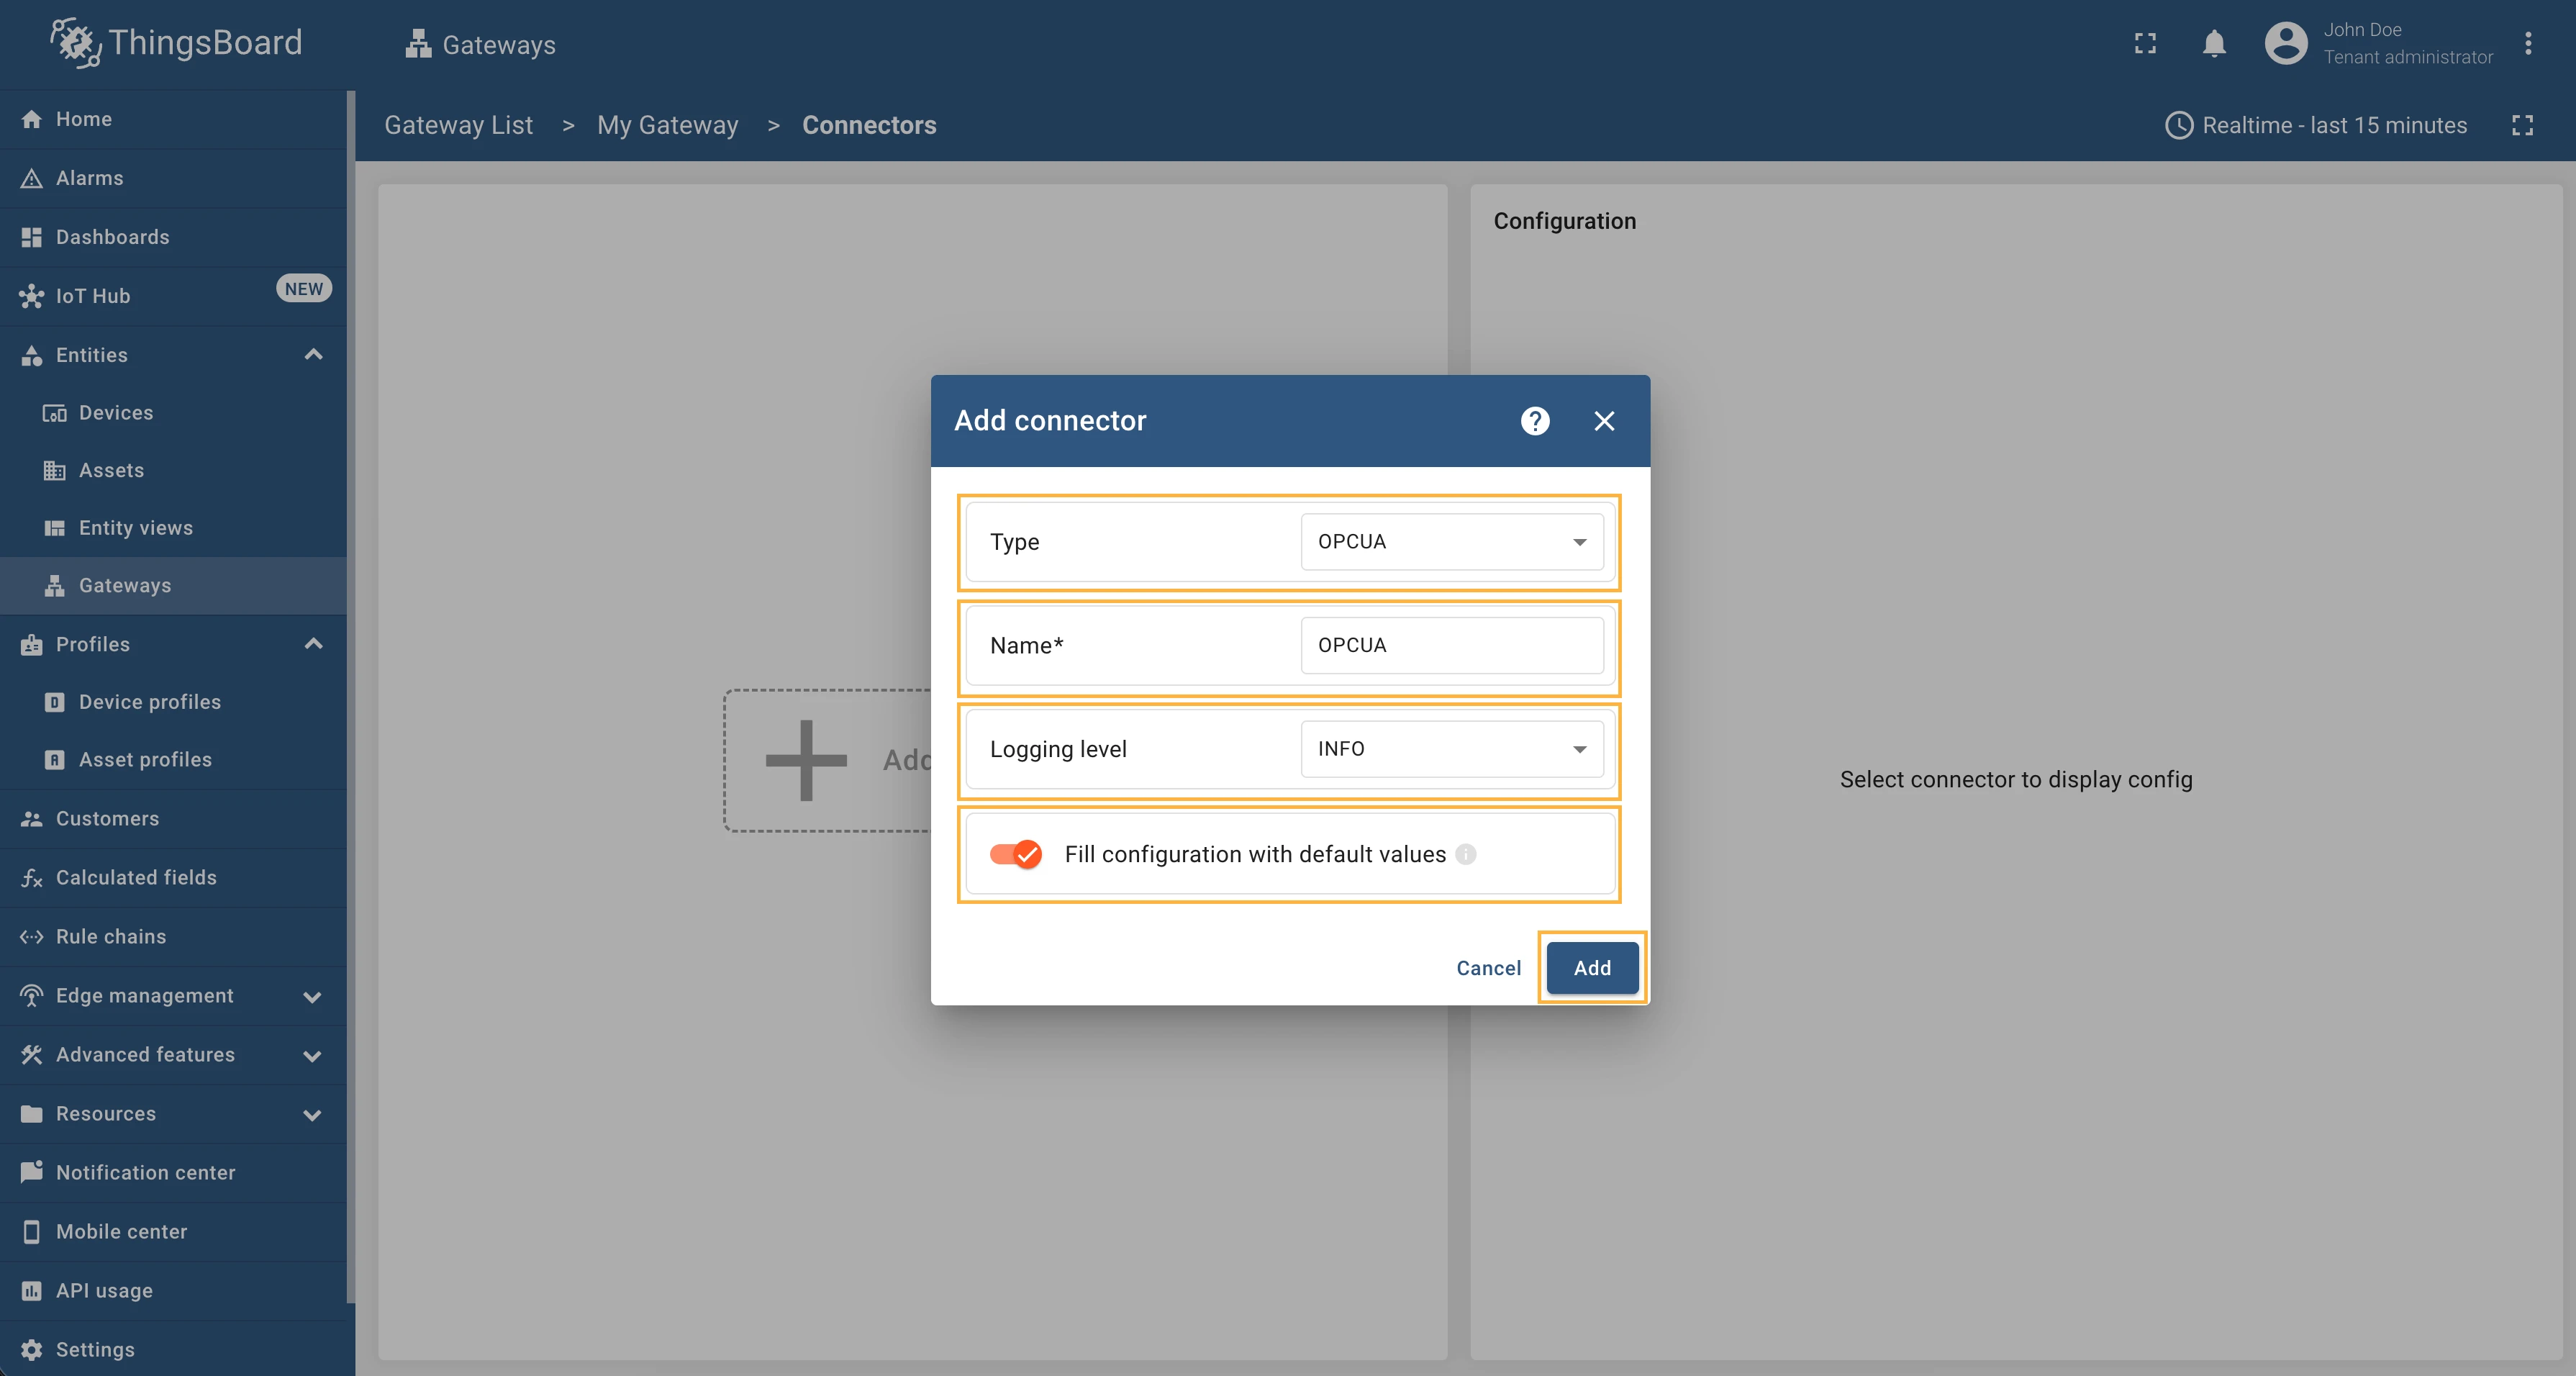
Choose OPCUA connector type from the dropdown, fill in the Name field, set the Logging level to INFO, leave the Fill configuration with default values option enabled, and click the Add button.
-
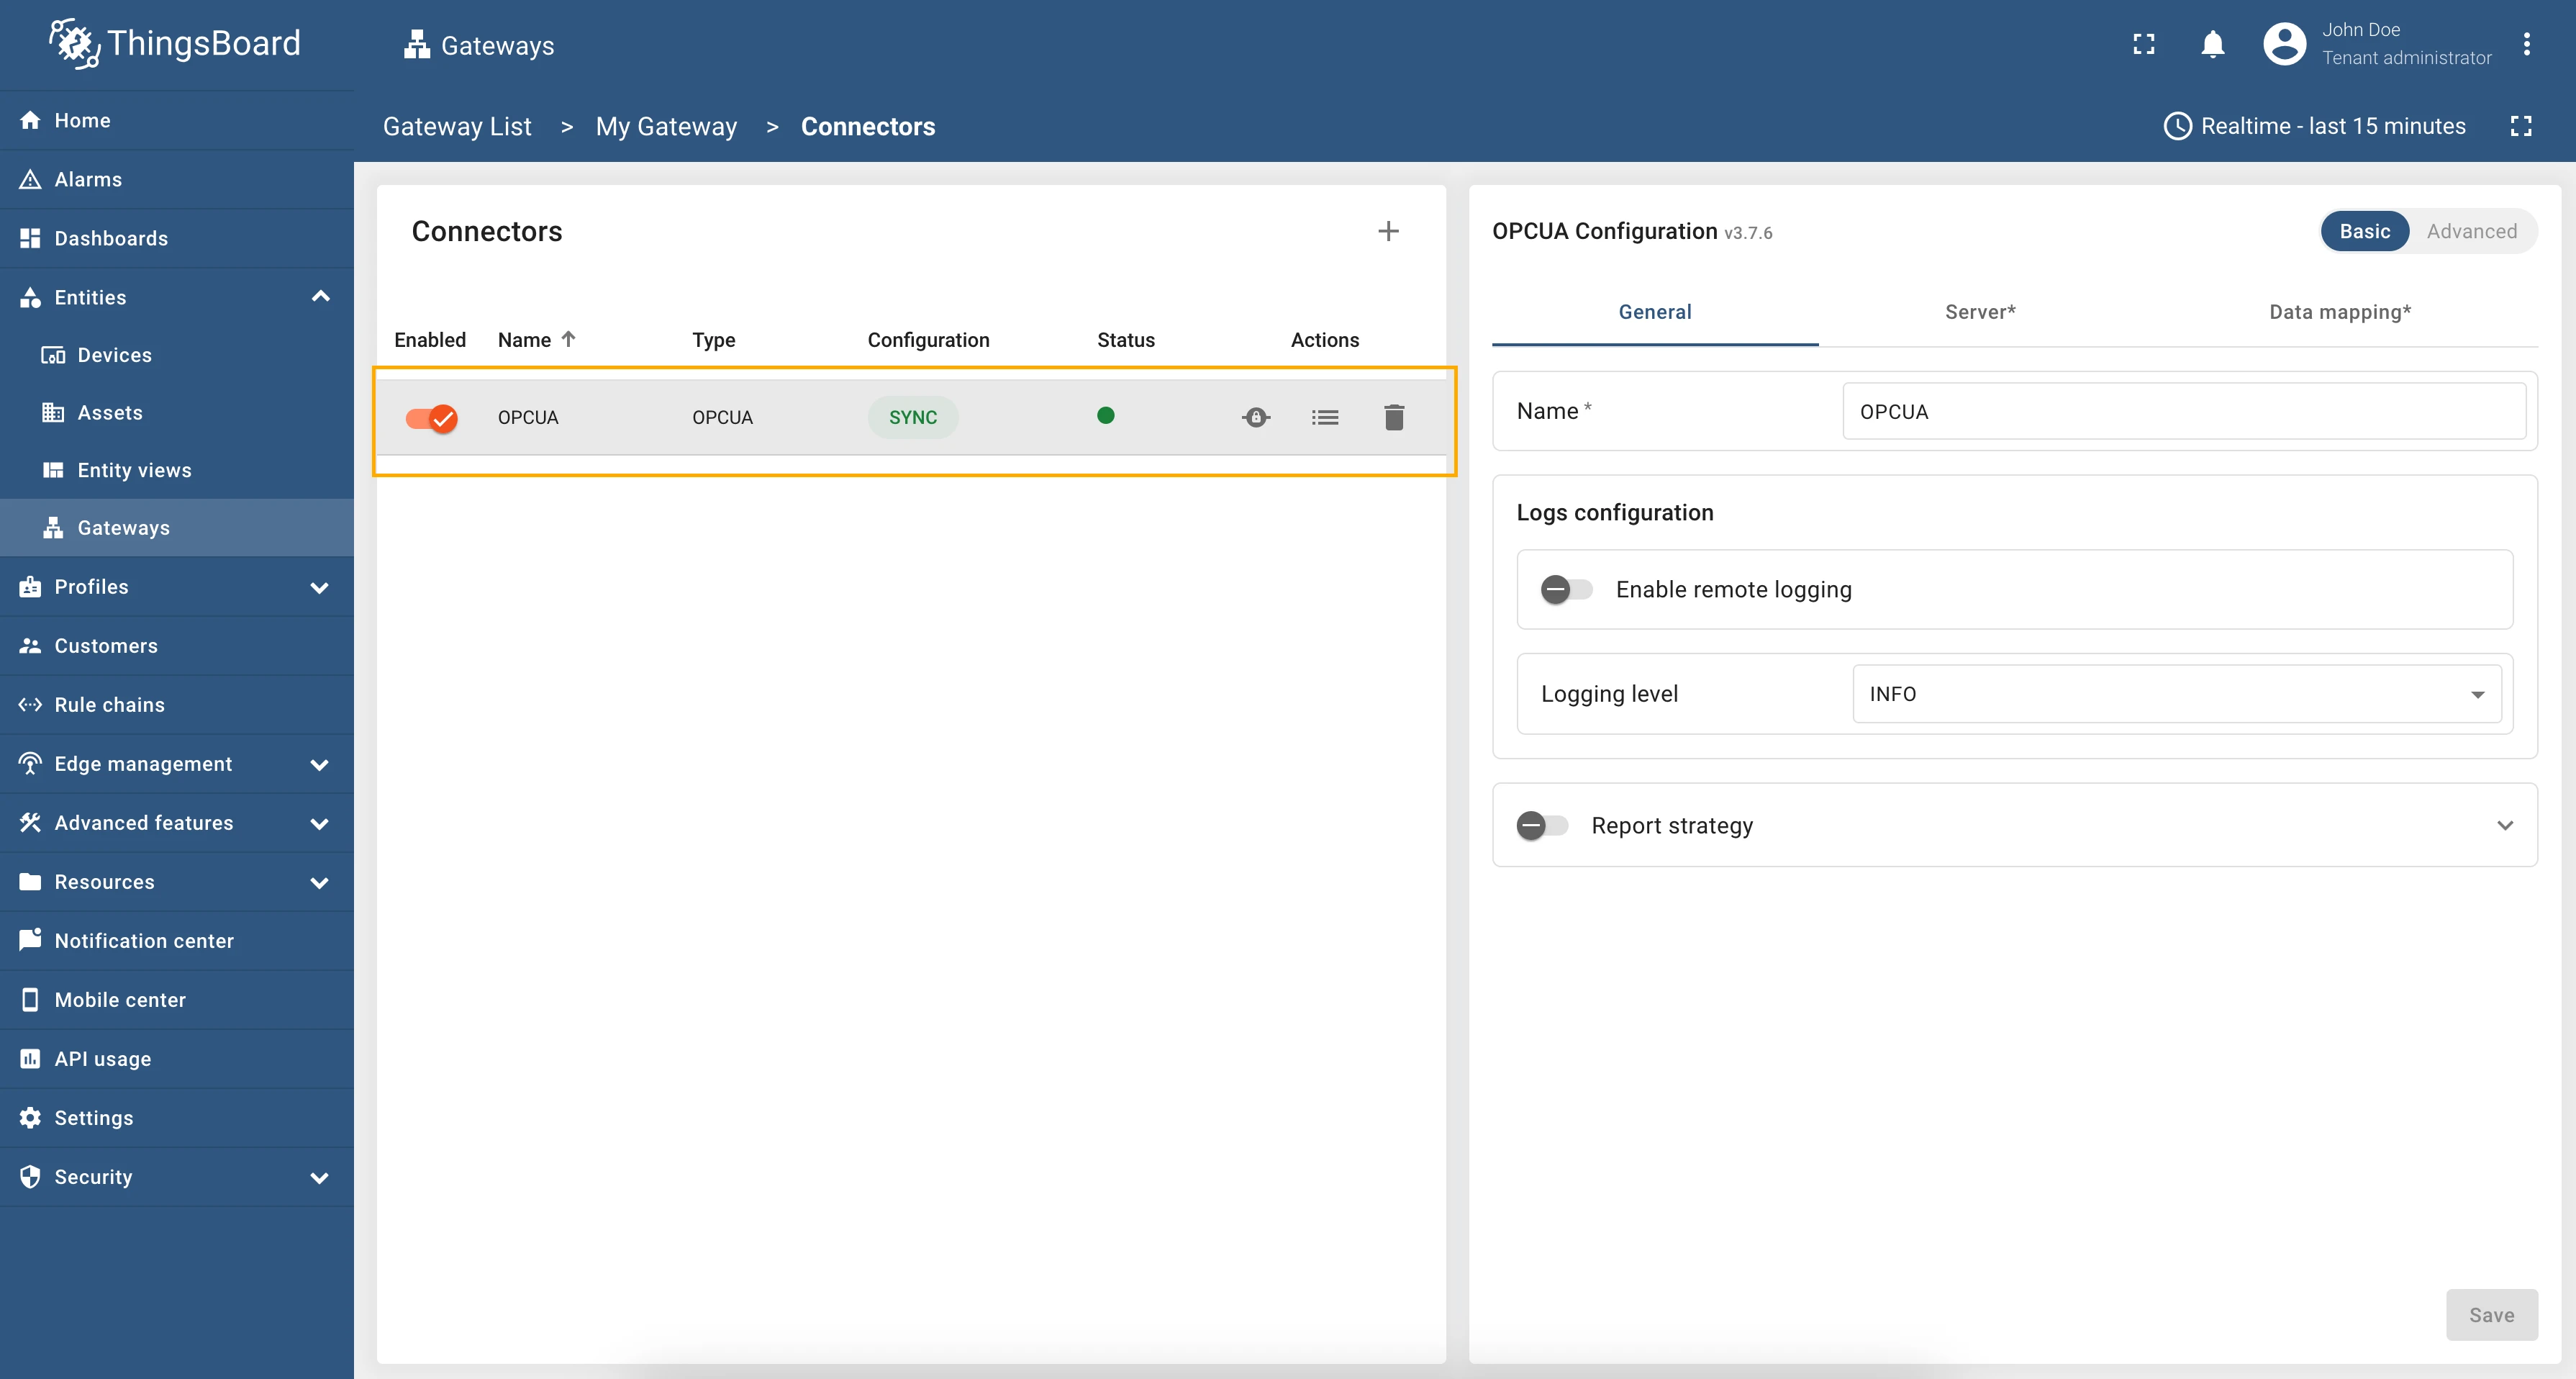
The connector is created with the default configuration.
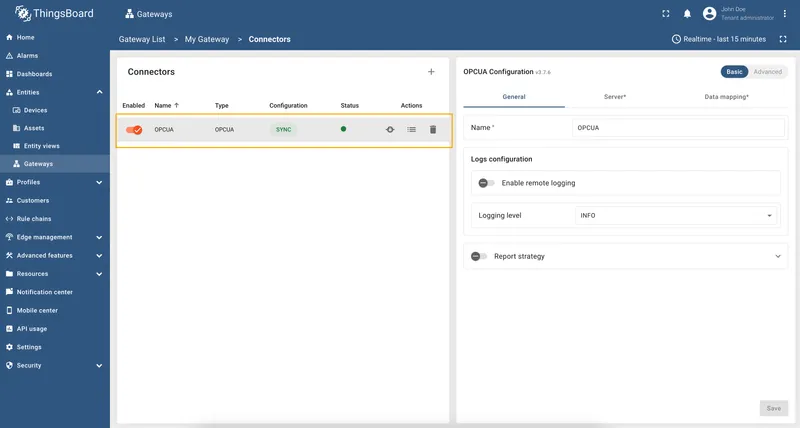
-
Let’s change default
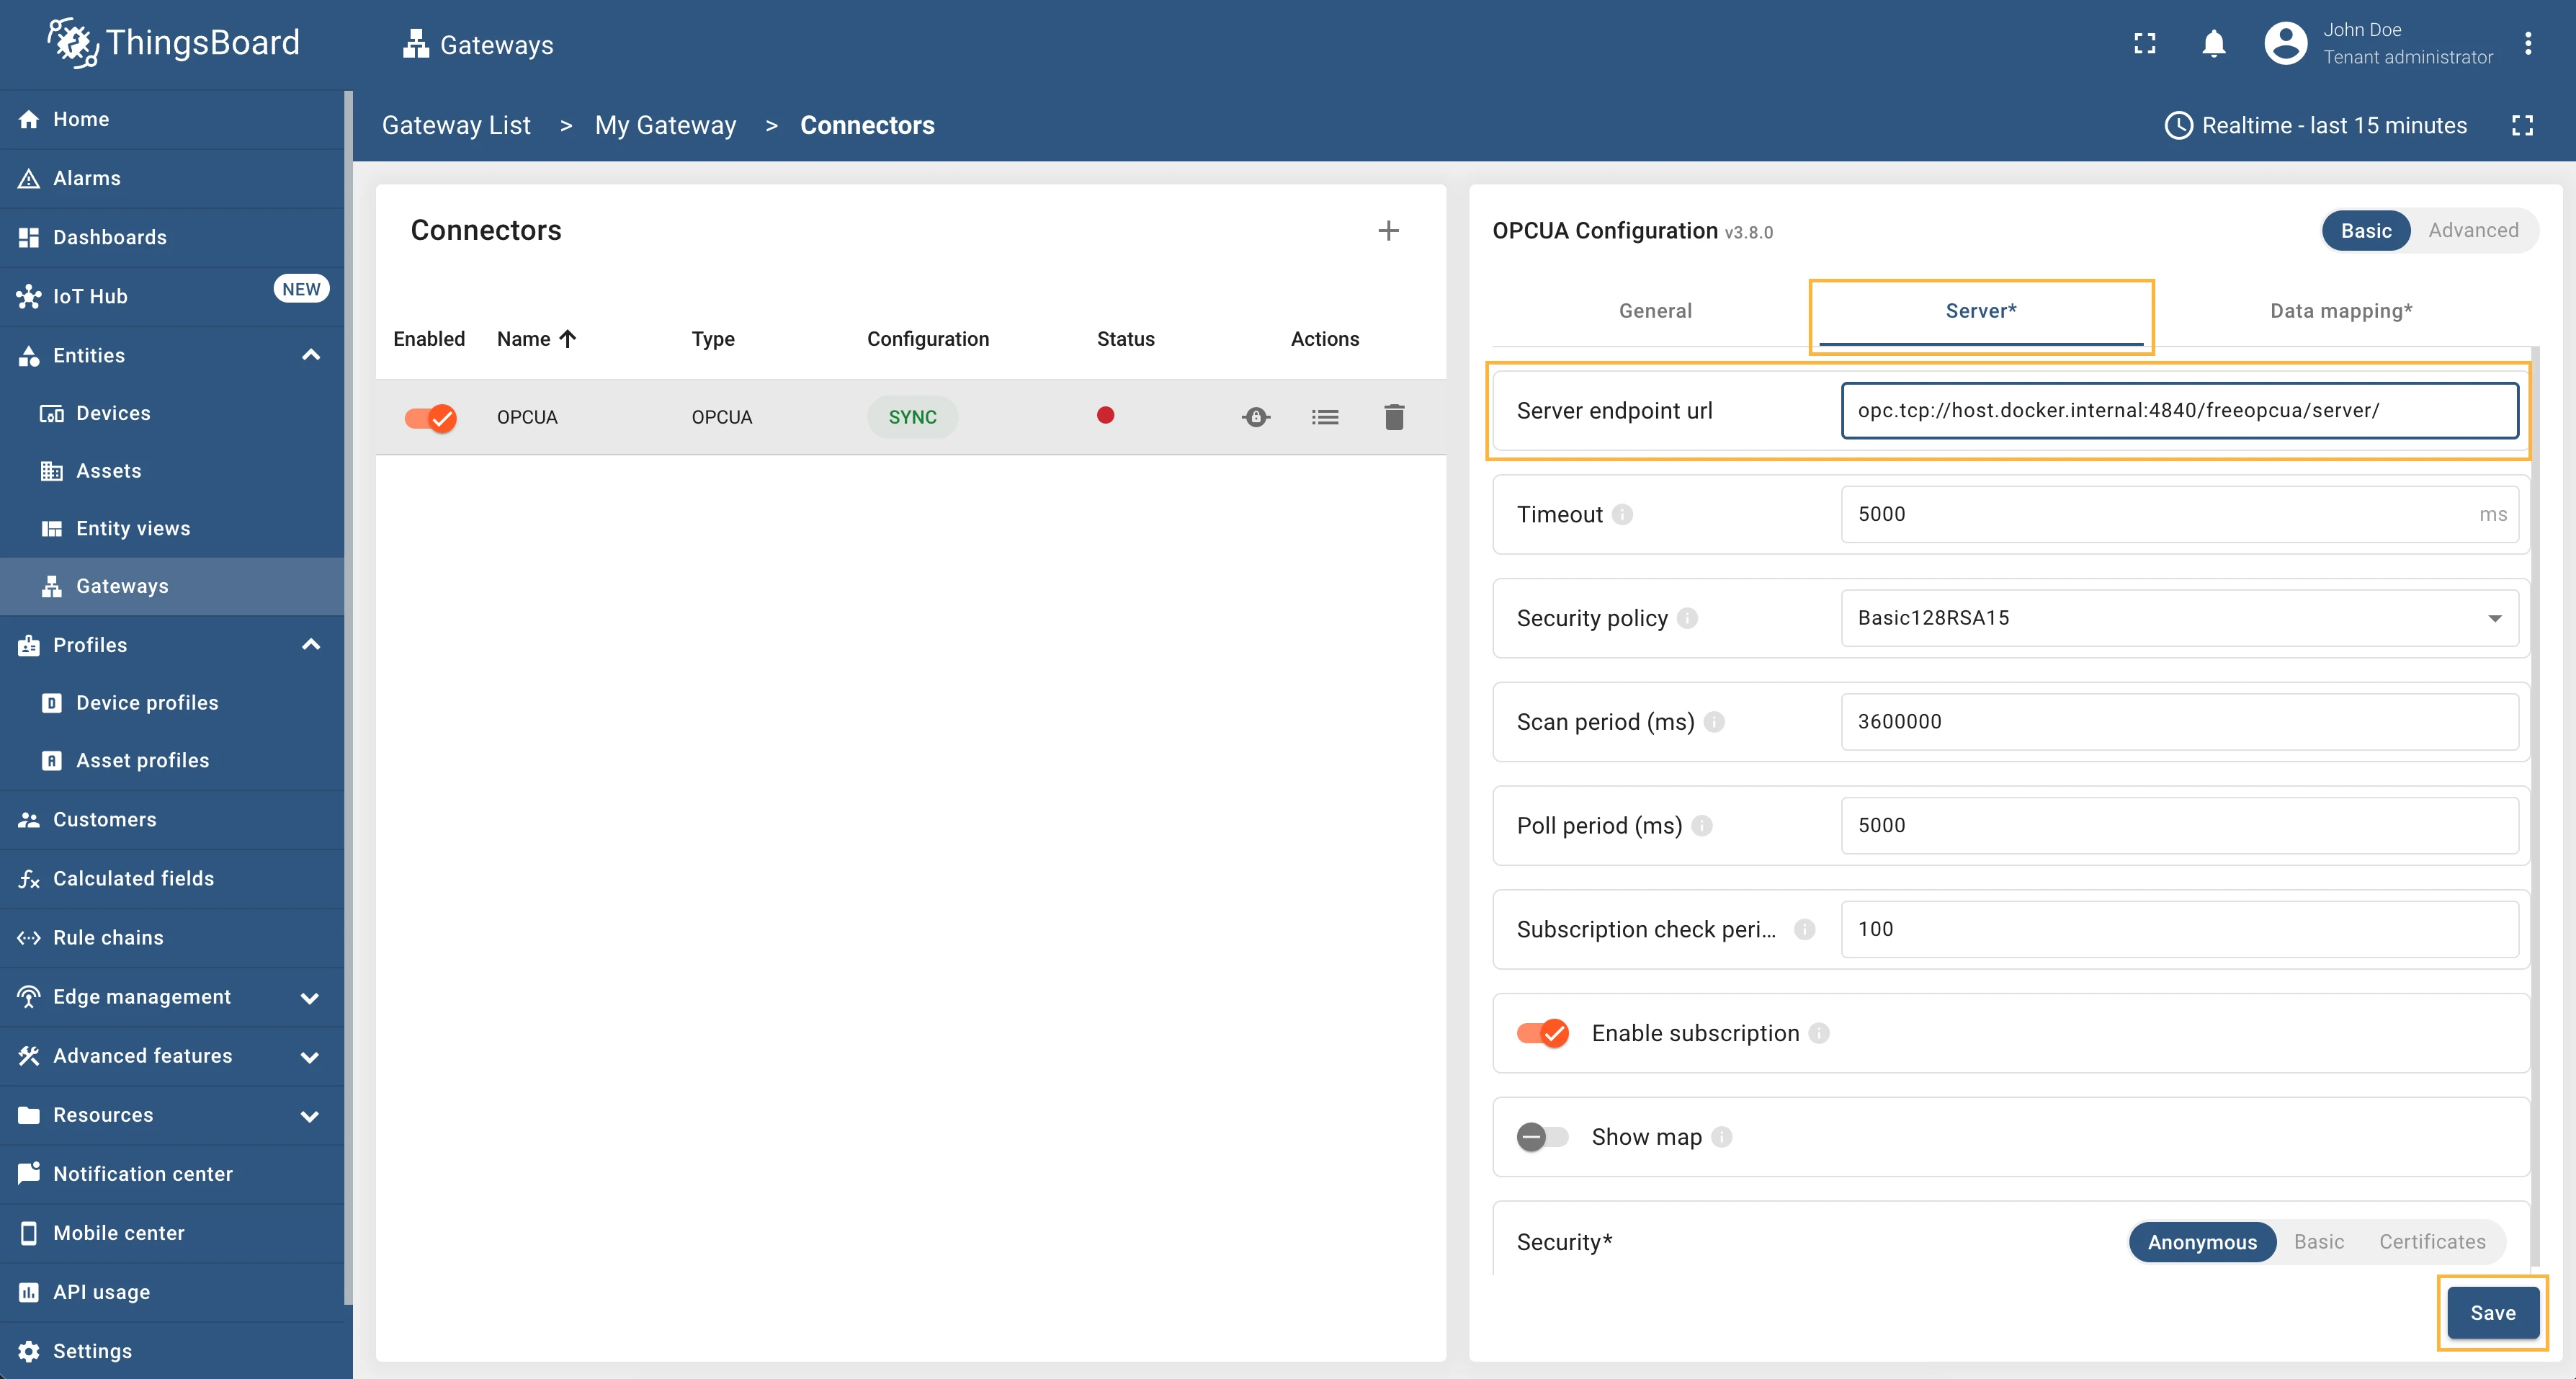
127.0.0.1host tohost.docker.internal. Select “Basic” mode, then click on “Server” tab and change the host toopc.tcp://host.docker.internal:4840/freeopcua/server/. Click the “Save” button to apply changes.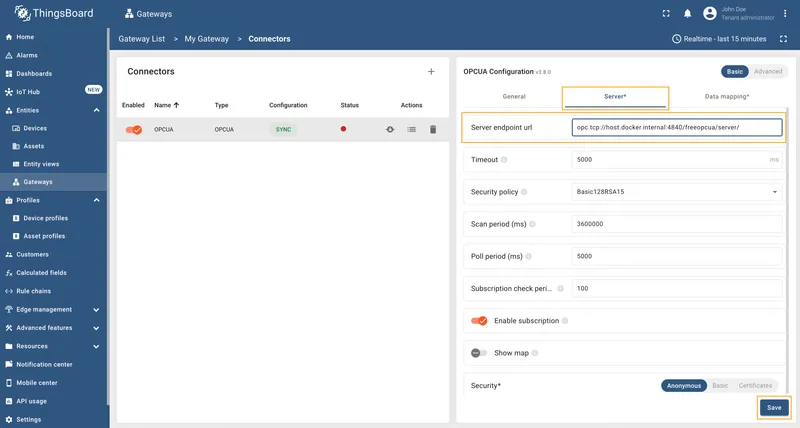
Also, you can see the connector logs to make sure that the connector works, for this purpose, follow these steps:
-
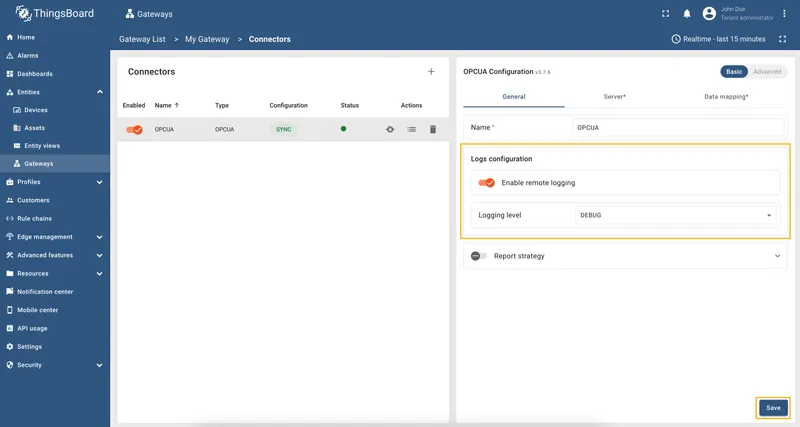
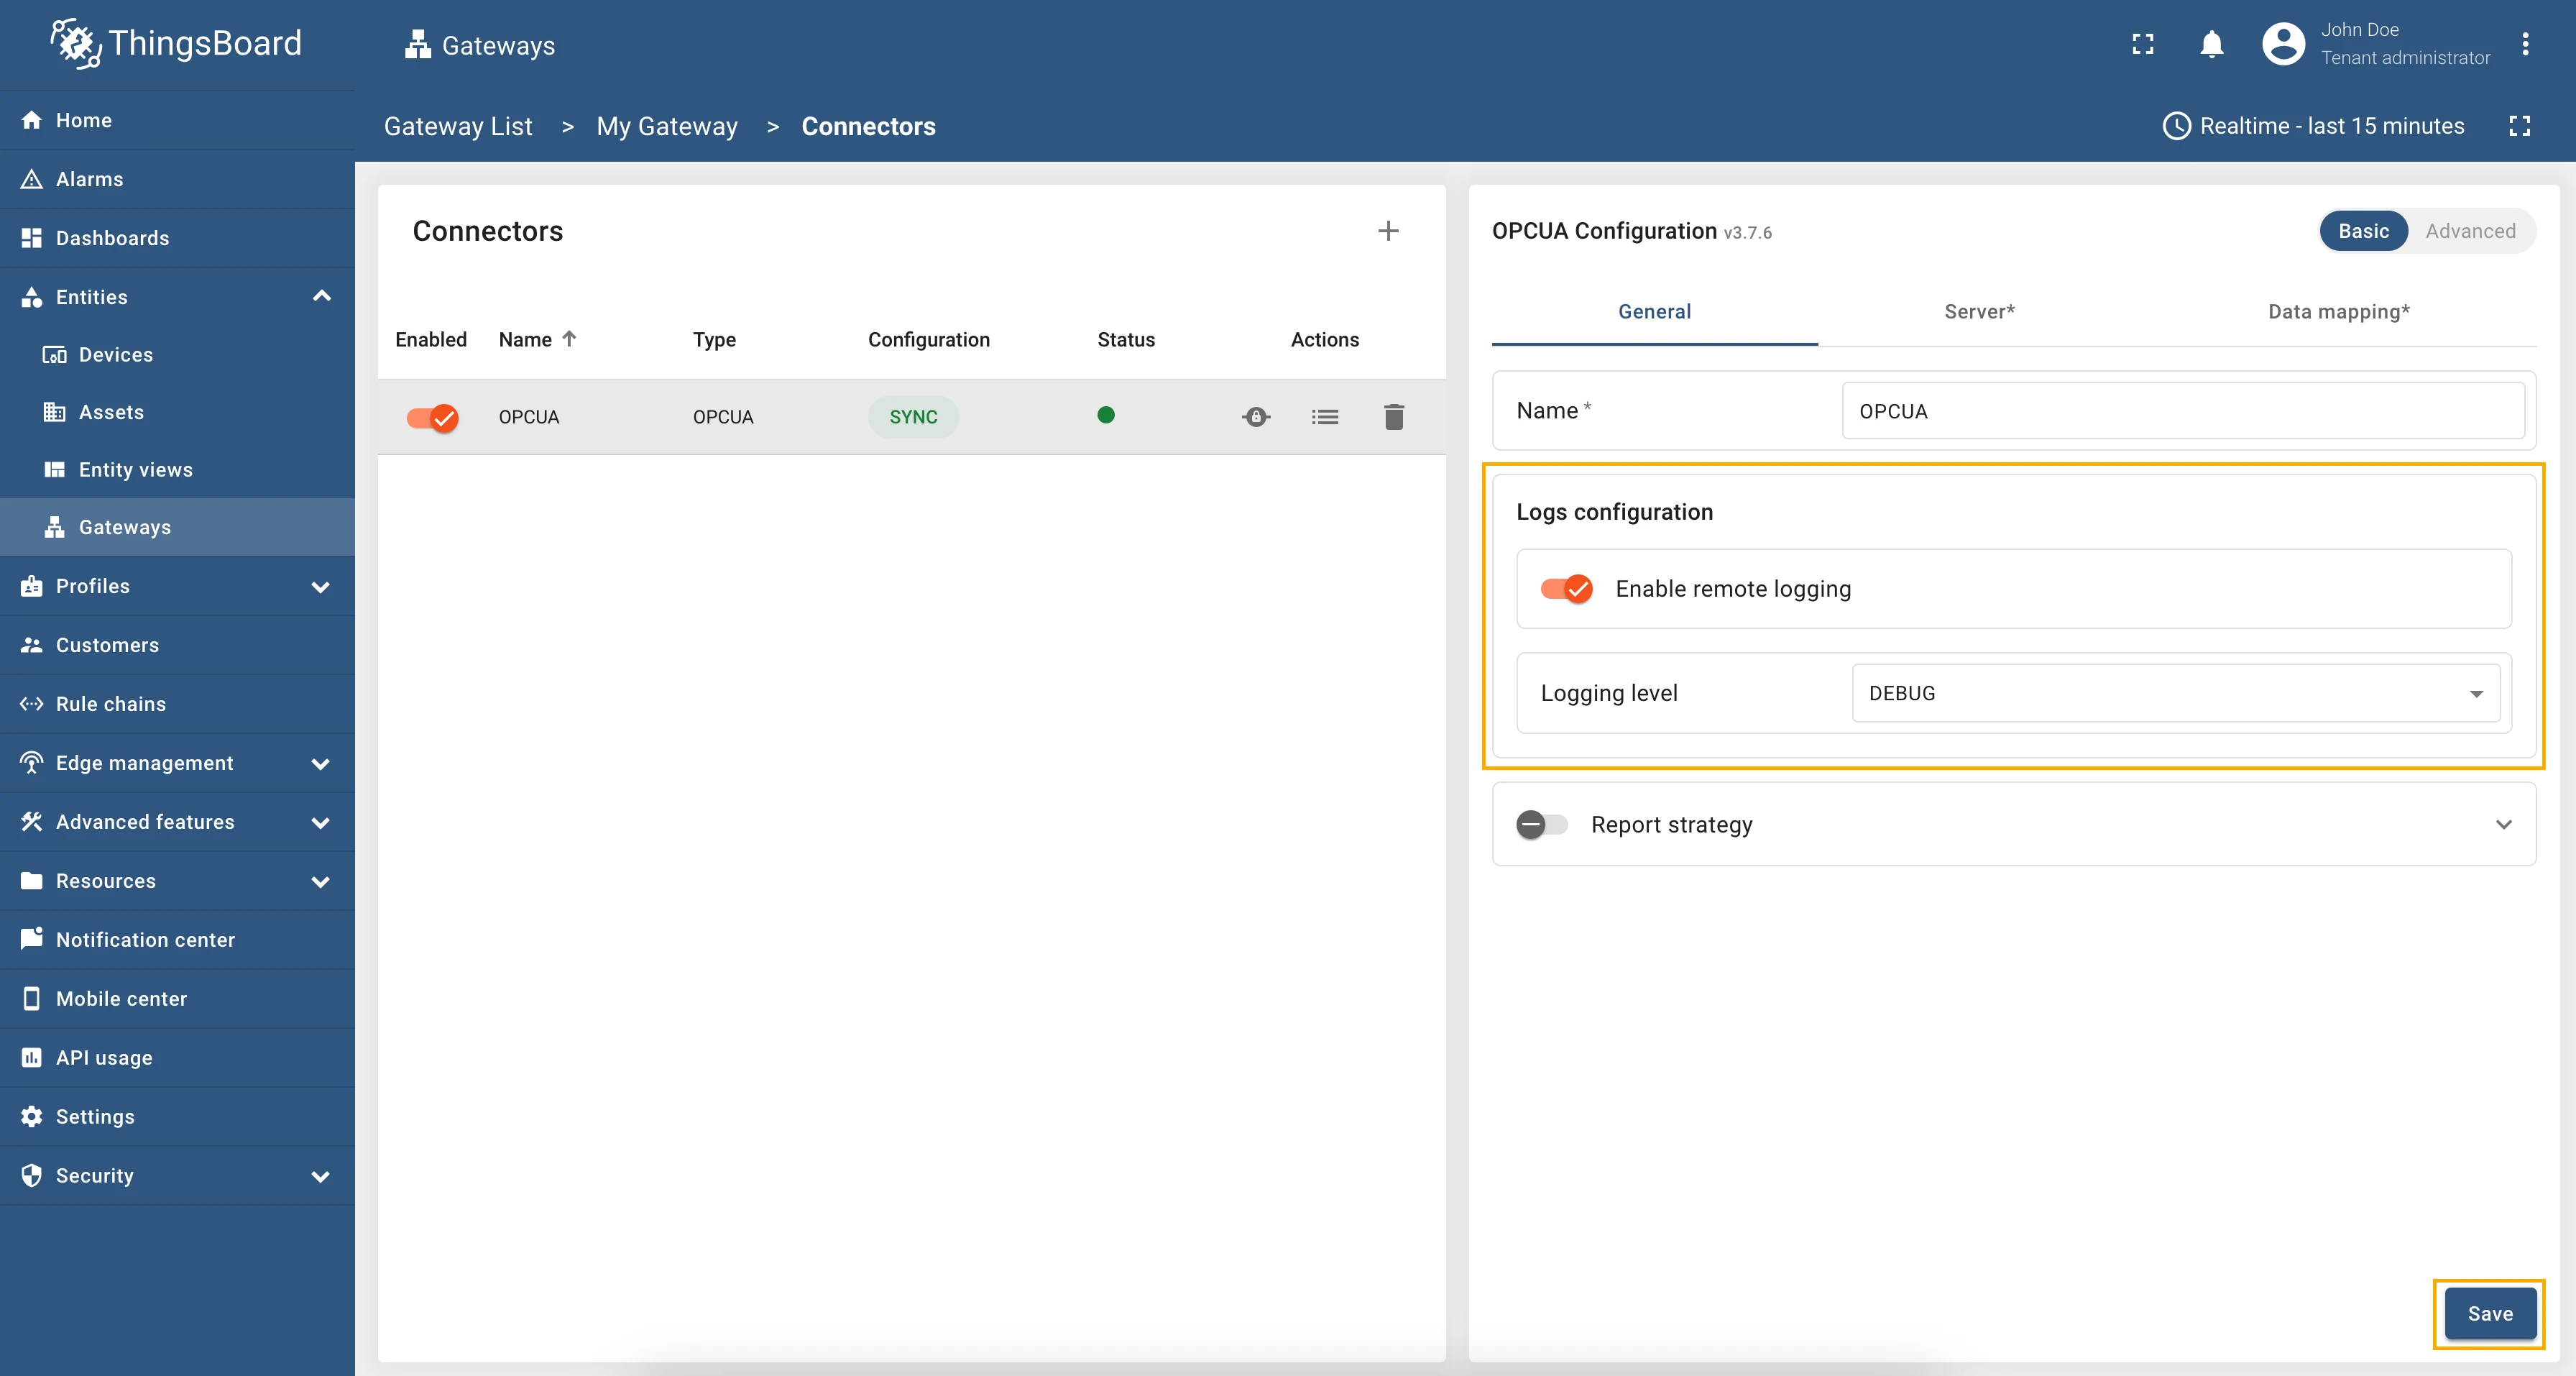
In the General connector tab enable remote logging by turning on the Enable remote logging toggle. Choose DEBUG in the Logging level drop-down menu. Click on the Save button to apply changes.
-
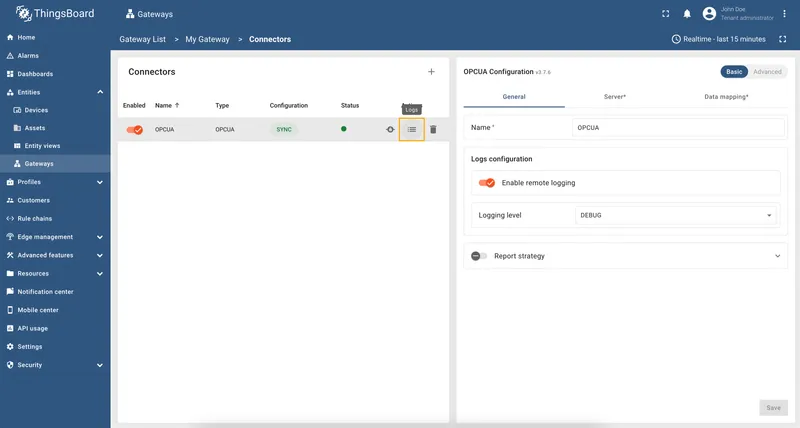
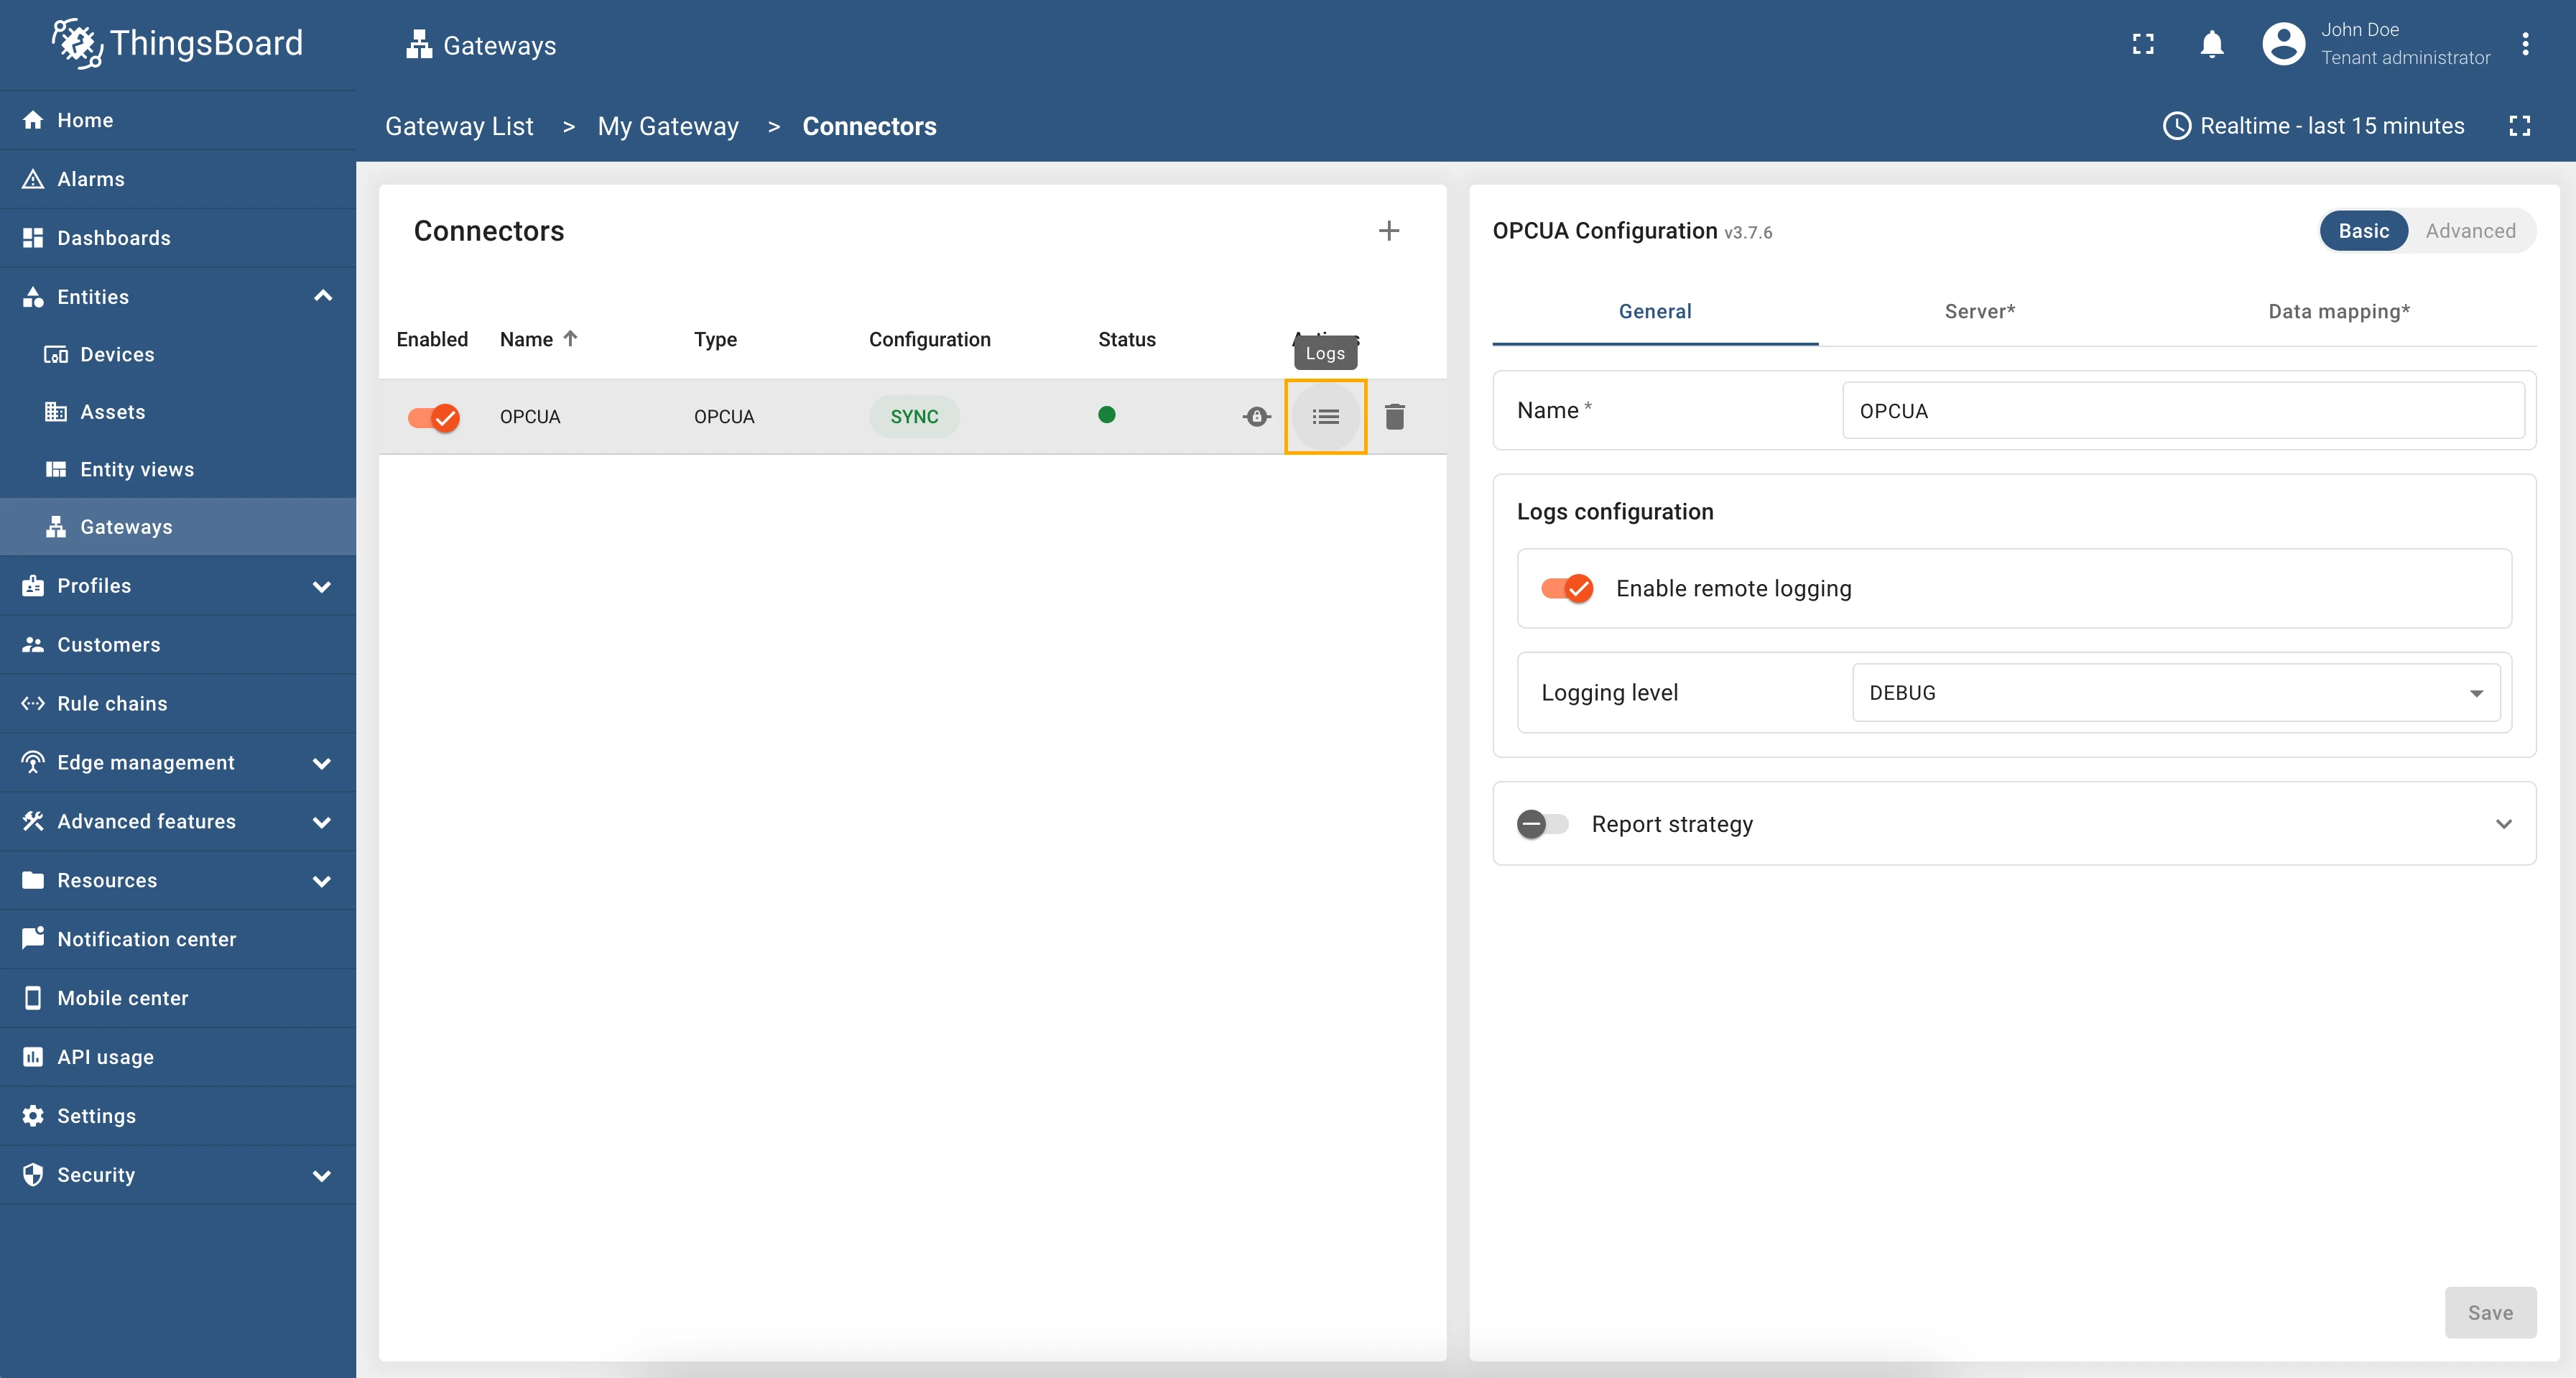
Click on logs icon to open connector logs page.
-
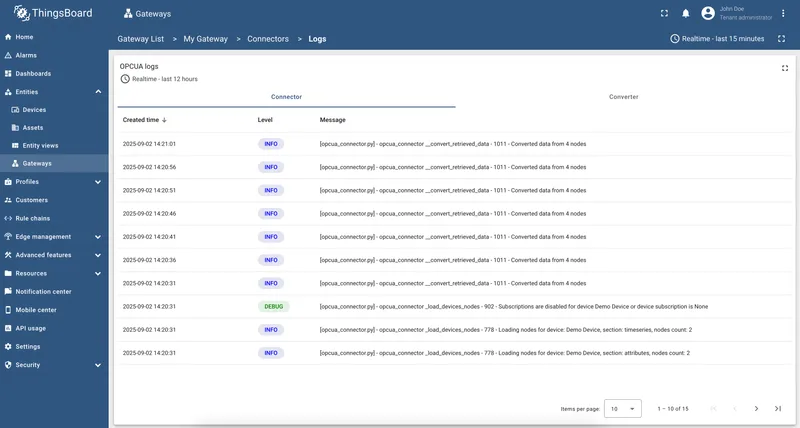
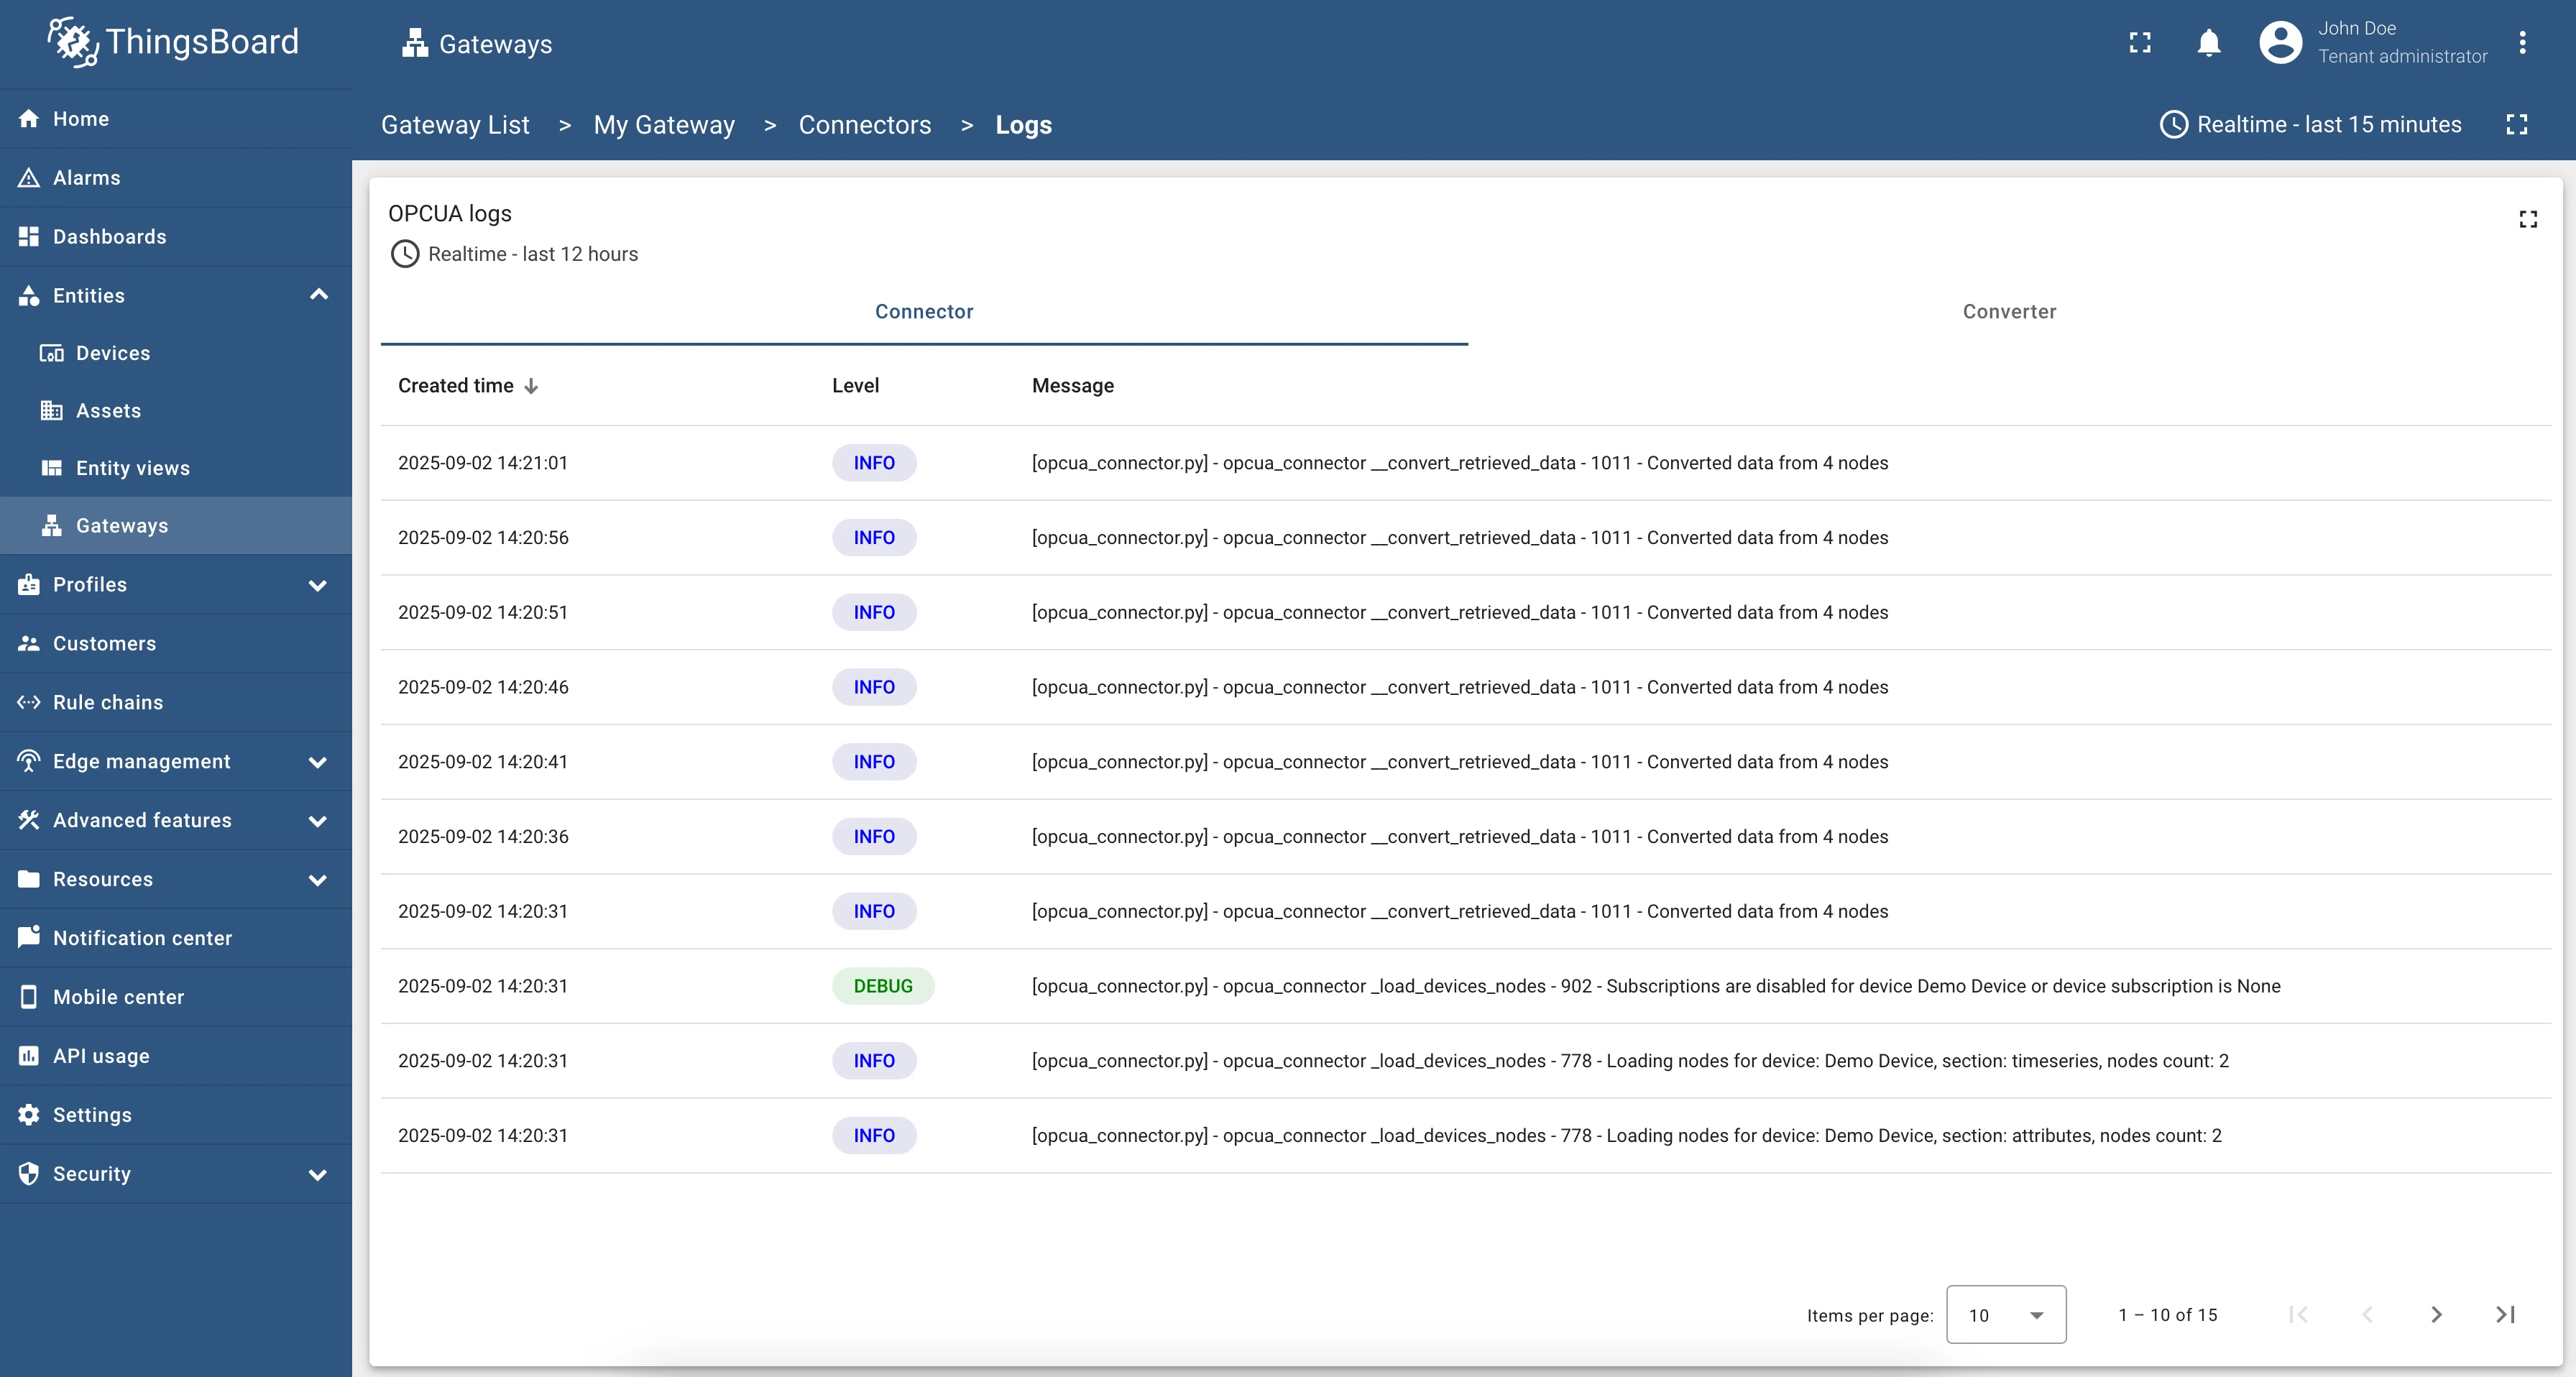
You can see the Logs table that consists of Created time, Level and Message columns.
For now, the gateway is ready to process data through the newly created and configured OPC-UA connector.
Checklist for Moving On
Section titled “Checklist for Moving On”Was this helpful?