
Getting started with ThingsBoard CLI
ThingsBoard CLI (thingsboard, alias tb) lets you build and manage your ThingsBoard solutions from the terminal, treating your setup as code you can version, review, and ship to any environment. There are two ways to work with it:
- With an AI agent. Describe what you want in plain English and your AI coding agent (Claude Code or Antigravity) builds a new solution, evolves an existing one, or makes a targeted change for you — see how to manage IoT solutions with ThingsBoard CLI.
- Yourself. Run the CLI commands directly for full, precise control — interactively, or in scripts, CI pipelines, and one-off tasks.
Prerequisites
Section titled “Prerequisites”You need a ThingsBoard account: ThingsBoard Cloud or a self-hosted ThingsBoard Professional instance.
Installation
Section titled “Installation”-
Install uv.
uv is a fast Python package manager that handles the CLI’s virtual environment for you.
Terminal window curl -LsSf https://astral.sh/uv/install.sh | shSee the uv installation guide for platform-specific options.
-
Install the CLI.
Terminal window uv tool install thingsboard-cliThis installs the
thingsboardcommand and itstbalias on your system. -
Verify the installation.
Terminal window tb --version
Connection
Section titled “Connection”Before the CLI can talk to ThingsBoard, it needs a connection: which instance to reach and how to authenticate. You define that as a profile — a URL plus credentials, saved under a name you choose. The active profile determines which instance your commands target.
Create a profile with the interactive wizard:
tb configThe wizard walks you through a few prompts:
ThingsBoard URL [https://thingsboard.cloud]:Auth method [api_key]:API Key: ********Profile name: cloud- ThingsBoard URL. Defaults to
https://thingsboard.cloud— press Enter to accept, or enter your own URL, likehttps://eu.thingsboard.cloudfor Cloud EU or your self-hosted host. - Auth method. Defaults to
api_key— press Enter to accept. This is the recommended method. The alternativejwtsaves your username and password to the profile file in plaintext; the CLI warns you and recommends API key auth instead. - Credentials. With
api_key, enter your API key — create one under Account ⇾ Security ⇾ API keys (see API Keys). Withjwt, the wizard prompts for your username and password instead. - Profile name. A short alias for this connection, so you can tell your instances apart and target them by name (
cloud,prod,staging).
For scripting, skip the wizard:
tb config set --url <url> --api-key <key>Profiles are additive — create as many as you need and switch between them:
tb config list # show all profilestb config use prod # switch the default profiletb config add staging --url https://... --api-key ...Pass --profile <name> to any command to override the active profile for that call.
Using the CLI
Section titled “Using the CLI”Your first project
Section titled “Your first project”A project is your local workspace for designing and managing ThingsBoard solutions — the folder where the CLI reads and writes entity files, and where your agent builds solutions. To start one, create a new directory (or open an existing folder) and run tb init inside it; that folder becomes the project root.
mkdir my-iot-project && cd my-iot-project && tb initThingsBoard CLI works with both Claude Code and Antigravity, so you can scaffold the project for whichever agent you have. tb init detects the agent CLIs you have installed and asks which format to scaffold:
Detected Claude Code.Unpack skills and agents for which format? (use ↑/↓ arrows, Enter to select)❯ claude (detected) antigravity both- claude — writes a
.claude/directory with the bundled skills and agents. - antigravity — writes
.agents/and anAGENTS.mdfile. - both — writes both layouts.
Pass --agent-format claude, --agent-format antigravity, or --agent-format both to skip the prompt in CI. Your choice is saved in thingsboard.json.
tb init scaffolds the project:
my-iot-project/ asset-profiles/ # entity folders — one JSON file per entity assets/ customers/ dashboards/ device-profiles/ devices/ entity-groups/ extension/ # scaffold for a custom backend extension roles/ rule-chains/ solutions/ # one subdirectory per solution tasks/ # telemetry emulators and calculated field reprocessing jobs users/ .claude/ # bundled skills and agents (or .agents/ + AGENTS.md for Antigravity) .git/ # git repository (initialized if the folder isn't already in one) thingsboard.json # project config — records the mode and the agent format you chose .gitignore- Entity folders. The root-level
devices/,dashboards/,assets/, and the rest hold entities that don’t belong to any solution. solutions/. A solution is a self-contained collection of devices, dashboards, alarm rules, and other entities that work together to solve one business need — a smart house, a fleet, a factory line. Each lives in its own subdirectory here. A single project can hold many solutions, and the same solution can be deployed to multiple ThingsBoard targets (dev, staging, prod) without any changes.extension/. A scaffold for a custom backend extension for behavior that ThingsBoard can’t express natively.
Launch your agent from the project directory:
claude --model sonnetagyThe bundled skills load automatically, so the agent is ready to design and deploy solutions right away. From here, learn how to manage IoT solutions with ThingsBoard CLI.
Local and remote modes
Section titled “Local and remote modes”Mode is a per-project setting:
tb config mode local # default: write commands save to project files; nothing reaches ThingsBoard until tb pushtb config mode remote # write commands call the ThingsBoard API immediatelyAdd --remote to force a single command to call the API without changing the project’s mode.
The CLI’s built-in help is always current and is the canonical reference for every command:
tb --help # top-level command groupstb device --help # subcommands in a grouptb device save --help # flags for one commandAppend -H (or --help-verbose) to any command that maps to a ThingsBoard API method to see the full request schema, including which fields are required and which are read-only:
tb device save -HCommands
Section titled “Commands”Drive the CLI yourself with the command groups below.
Entities
Section titled “Entities”Every entity type has its own group with the same list / save / delete shape (tb device, tb dashboard, tb asset, tb customer, tb rule-chain, tb calculated-field, etc.).
# List devicestb device list
# Create a device from a JSON bodytb device save --json '{"name": "Sensor-01", "type": "Temperature Sensor"}'
# Or use shorthand flags for common fieldstb device save --name Sensor-02 --type "Temperature Sensor"
# Save server-scope attributes on an entitytb attributes save DEVICE <entity-id> --scope SERVER_SCOPE --json '{"firmwareVersion": "1.0.3"}'
In local mode tb <entity> save writes one JSON file per entity into the matching entity folder, and nothing reaches ThingsBoard until you run tb push. In remote mode, the entity is persisted to your instance immediately.
Solutions
Section titled “Solutions”Each solution lives under solutions/<slug>/, and solutions can only be built in local mode.
tb solution new smart-building # create a solutiontb solution list # list solutions in the projecttb device save --solution smart-building --name Sensor-01 --type "Temperature Sensor"To save an entity under a solution, add --solution <name> to the command — it works from anywhere in the project.
Validate and push
Section titled “Validate and push”tb validate # dry-run root entities against the targettb validate smart-building # dry-run one solutiontb push smart-building # deploy a solution (omit the name to deploy root entities)tb push smart-building --run-tasks # also run telemetry emulators and calculated field backfilltb push --run-tasks does the regular push and then runs two extra steps:
- Telemetry emulators. The CLI writes synthetic telemetry for the devices your agent set up emulators for, so dashboards have something to display.
- Calculated field backfill. The CLI replays historical inputs through each calculated field expression so derived values are populated for the time range covered by the emulators.
Both steps are safe to omit on later pushes once the data exists — they are most useful on the very first push to a fresh tenant.
Multi-target deployment
Section titled “Multi-target deployment”The same solution can be deployed to multiple ThingsBoard environments by pushing it under different config profiles:
tb push smart-building --profile devtb push smart-building --profile stagingtb push smart-building --profile prodThe CLI writes no state files to your project — push to the same target twice and existing entities are updated, not duplicated. Develop and test against dev, promote to staging once you’re happy, and ship to prod with the exact same files.
tb pull is the inverse of push: it fetches the current server state and rewrites the matching JSON files on disk. Reach for it when someone tweaked a dashboard in the UI, when you want a fresh local copy of what’s running on staging, or when you need to bring a server-created entity into the project.
tb pull # refresh every locally-tracked entity in the current solutiontb pull --solution smart-building # the same, with the solution named explicitlytb pull dashboard --all # refresh every dashboard in the current solutiontb pull device <uuid> # fetch a single entity by its server-internal UUIDtb pull device <uuid1> <uuid2> # …or several at onceThe UUID form is how you pick up entities that exist on the server but aren’t in the project yet — pass the internal ID and the CLI writes a fresh file under the right directory.
A few flags worth knowing:
--dry-runprints the planned writes (created / updated / renamed) without touching disk.--with-credentialsincludes device credentials in the pulled files. Off by default; opt in only when you want them committed alongside the device JSON.--forceskips the safety check that aborts when target files have uncommitted git changes.
By default, tb pull refuses to overwrite files with uncommitted local changes, so it never silently clobbers work in progress. Commit, stash, or pass --force to proceed.
To bring a solution that already runs in ThingsBoard under CLI management, use the interactive pull to select exactly which entities to import:
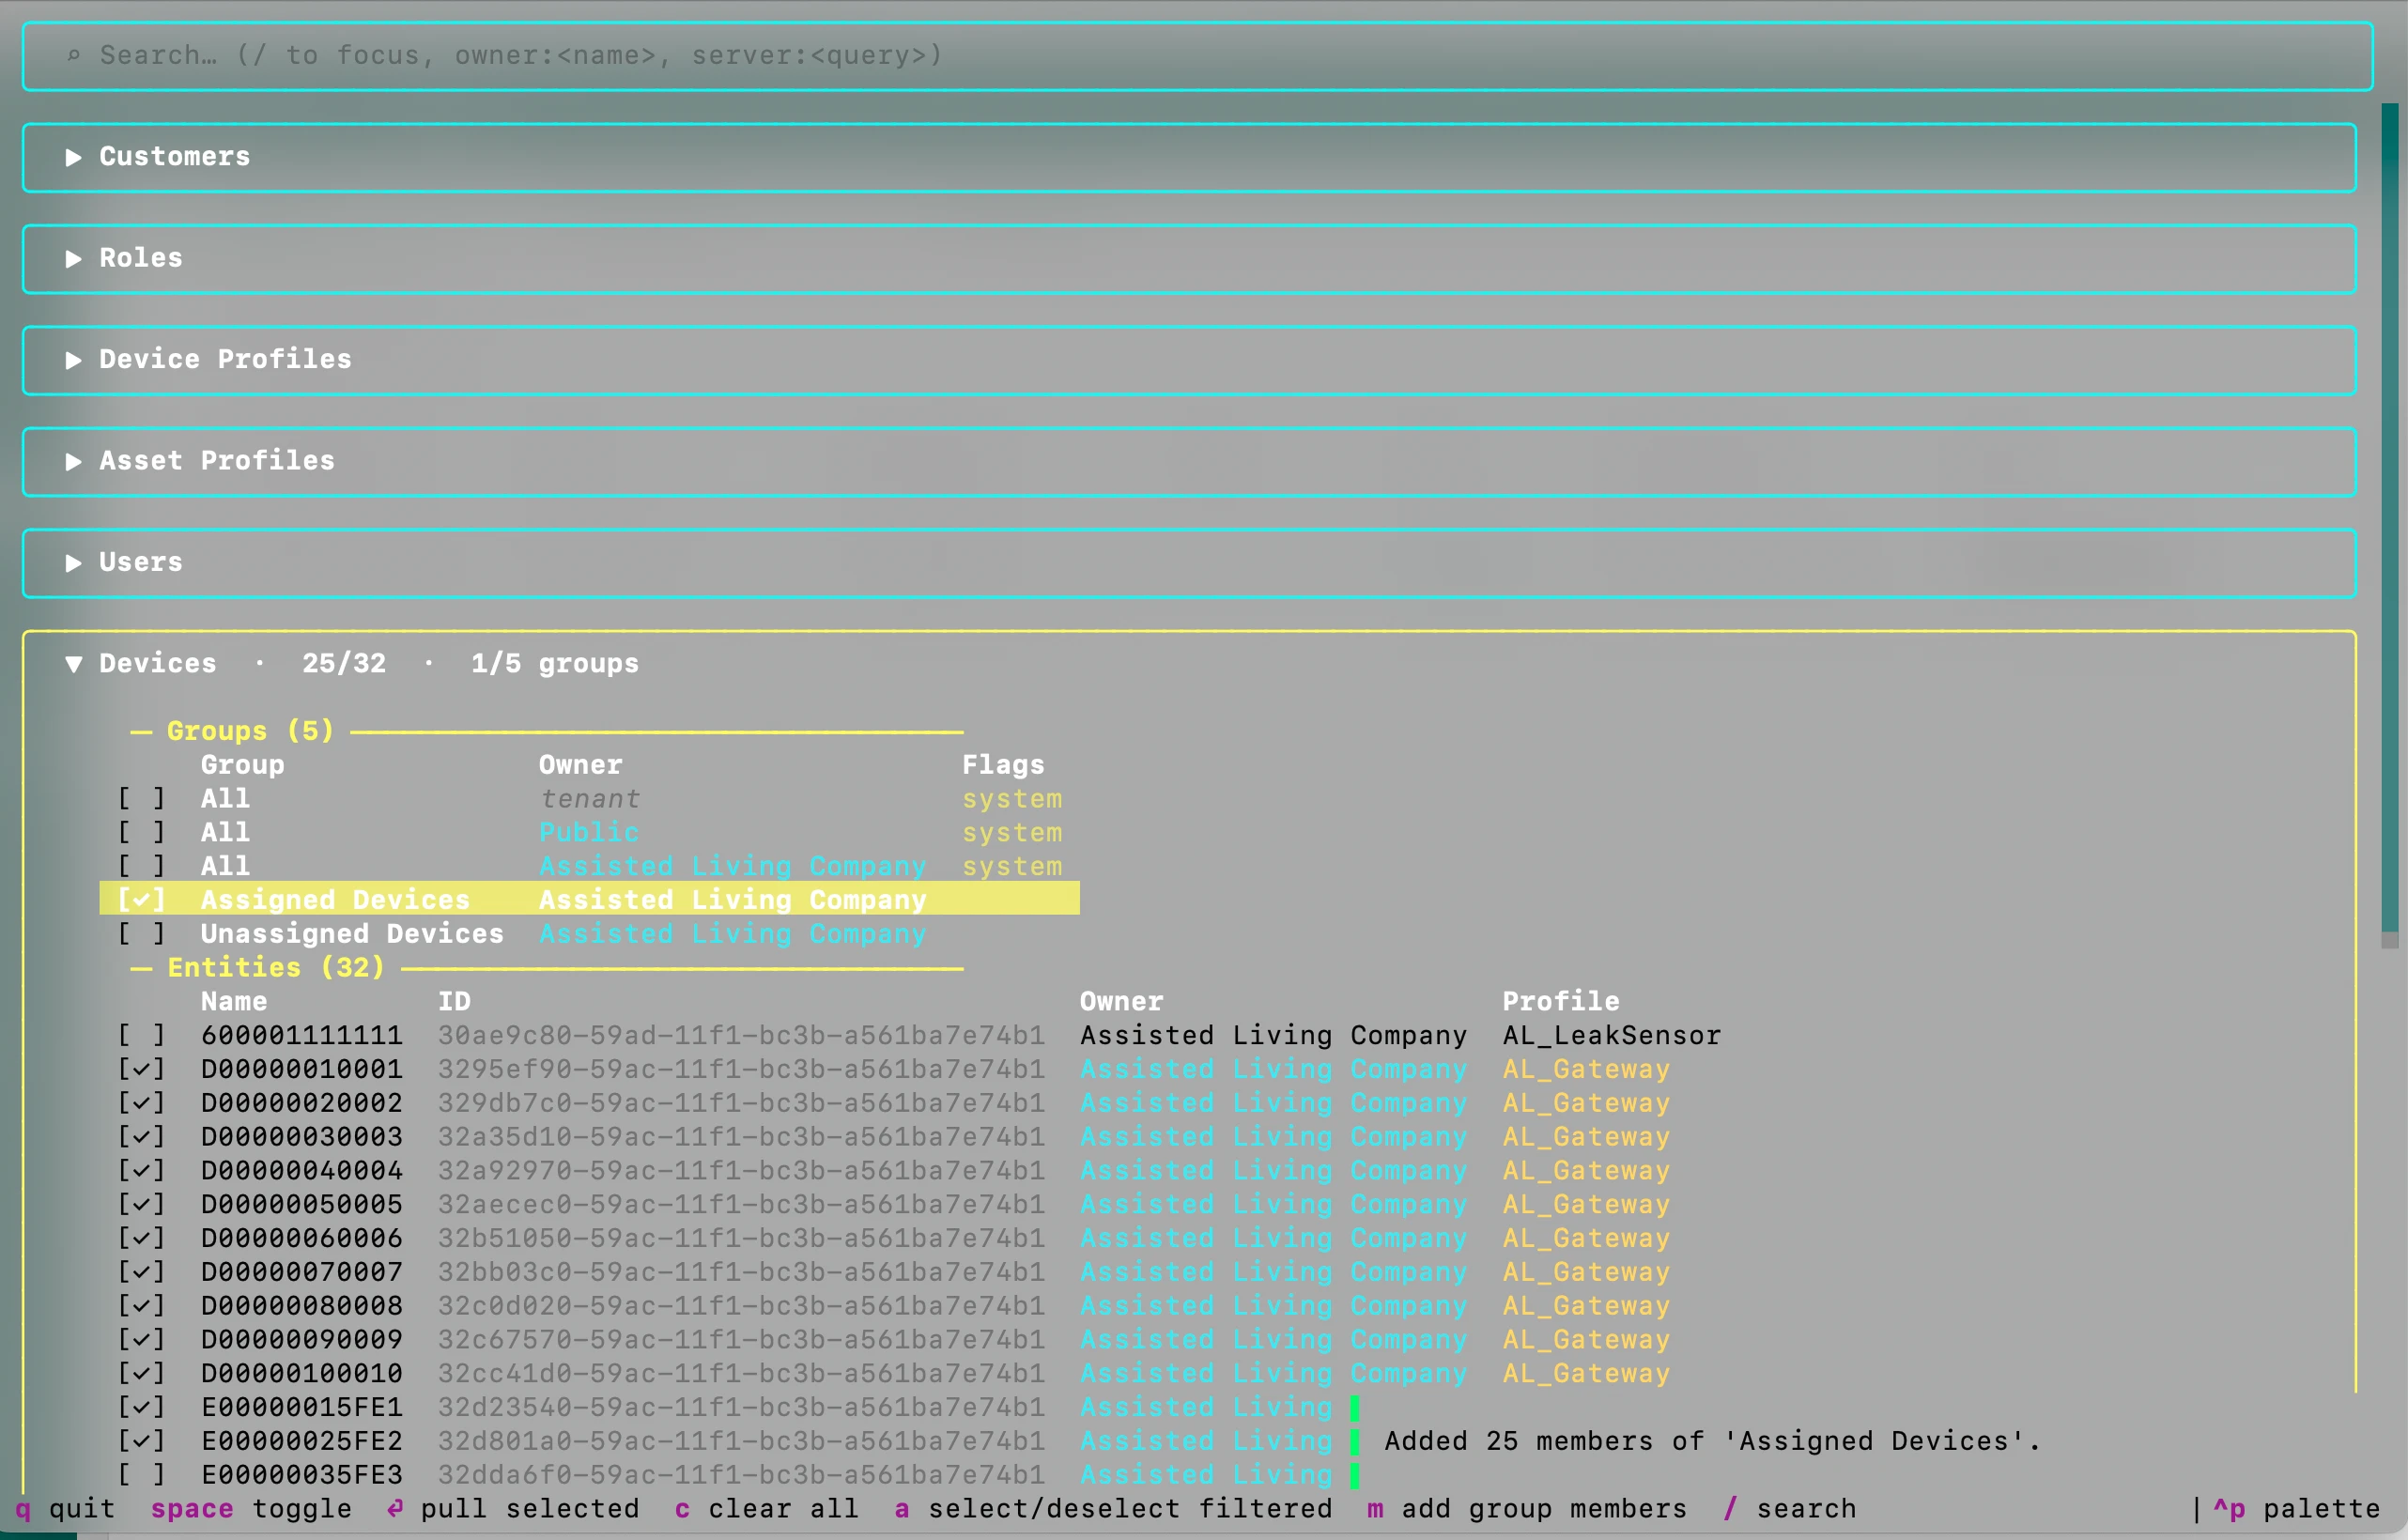
tb pull -iThe CLI opens a terminal UI where you browse your tenant across all entity types, including entity groups. Select the entities you want and press Enter to import them.
- Press
spaceto toggle selection on an individual entity. - Press
mon an entity group to select all entities in that group. - Press
ato select all entities in the current view.
Use owner:<name> or server:<query> in the search bar to filter by owner or run a server-side query. Once pulled, the entities land in your project files and stay in sync on the next tb push.
Feedback
Section titled “Feedback”Help improve the CLI with tb feedback — share your experience with the tool:
tb feedbackShell completion
Section titled “Shell completion”Install completion once and restart your terminal:
tb --install-completion bash # bashtb --install-completion zsh # zshtb --install-completion fish # fishLimitations
Section titled “Limitations”tb pushhas no automatic rollback. If you push a broken solution, fix it locally and push again.- Entity identity is tracked server-side by external ID. UI edits to project-managed entities are overwritten on the next
tb pushunless youtb pullthem back first. Brand-new entities created outside the CLI can also be brought into the project withtb pull.
Troubleshooting
Section titled “Troubleshooting”“No entities to push”
The solution or project root has no entity files yet. Create some — ask your agent, or run tb device save (or another entity command) — then push again.
“Commands target the wrong solution”
Scope commands with --solution <name>; the flag works from anywhere in the project and is more reliable than relying on the current directory.
Was this helpful?